> For the complete documentation index, see [llms.txt](https://support.skylum.com/llms.txt). Markdown versions of documentation pages are available by appending `.md` to page URLs; this page is available as [Markdown](https://support.skylum.com/organizing-images/filtering-the-view-of-your-images.md).
# Filtering the View of Your Images
**Filtering Catalog** is a feature that allows users to sort and narrow down their photo collection by applying filters based on various metadata (data about the image) and image attributes. This includes:
* **Filter by camera model** (the specific camera used to take the photo).
* **Filter by focal length** (the distance between the camera lens and the image sensor, affecting zoom and field of view).
* **Filter by ISO** (a camera setting that controls the sensor's sensitivity to light).
* **Filter by shutter speed** (when the camera’s shutter is open to let light in, affecting exposure).
* **Filter by aperture** (the size of the camera's lens opening, impacting the depth of field and brightness).
* **Filter by rating** (user-assigned ratings, such as star ratings for favorite or important images).
These extensive filtering options enable users to quickly locate specific images based on detailed criteria, making it easier to manage large photo collections.
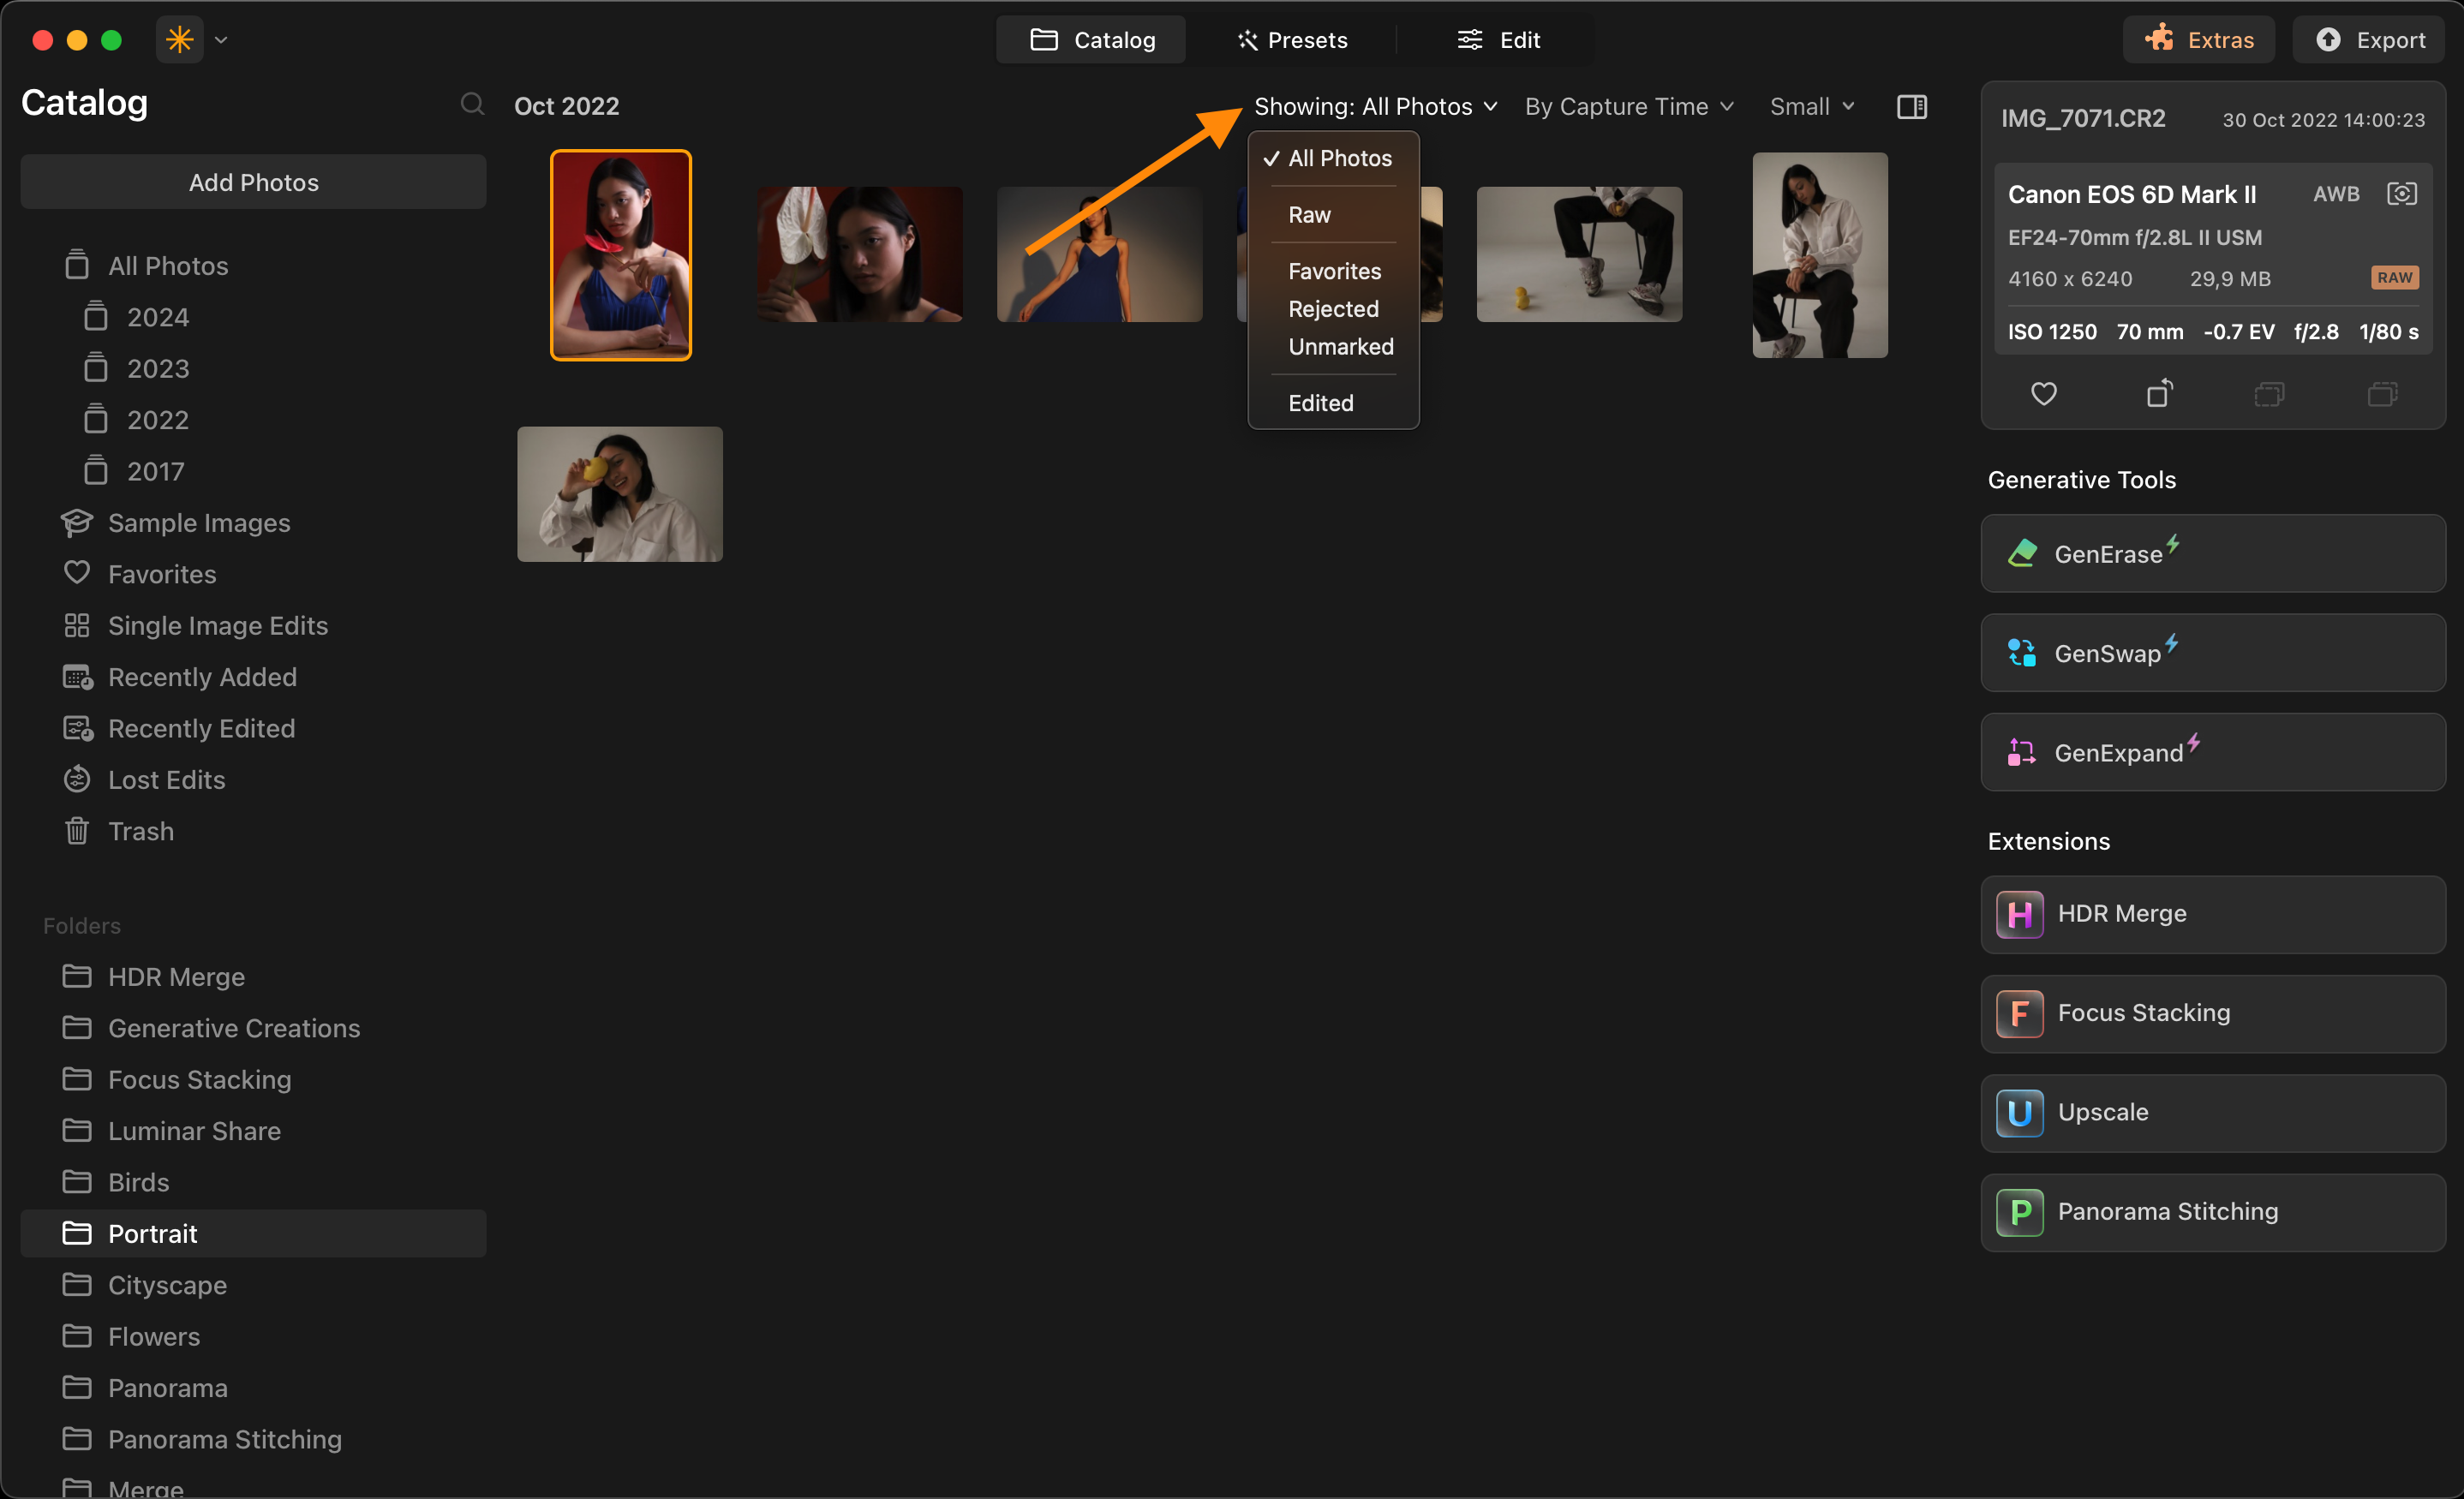
The **Showing All Photos** drop-down menu (located to the left of the **By** menu in the upper right corner of the Catalog) allows you to filter your images by **Favorites**, **Rejected**, **Unmarked, RAW,** and **Edited**. Finding the best ones can be tricky with hundreds, thousands, or even hundreds of thousands of pictures. The Showing menu allows you to filter your photos quickly.
Combining the filters in the **Showing** drop-down menu with the sorting functions in the **By** menu allows you to find exactly what you need in a few clicks. For example, you might show only Favorites organized by Capture Time.
#### Showing Filters
* **Favorites**. This filter shows only images you have flagged as favorites.
* **Rejected**. This filter shows only images you have rejected.
* **Unmarked**. This filter shows all images not tagged as either Favorite or Rejected.
* **RAW.** All photos in RAW format
* **Edited**. This filter shows all images you have edited. Showing only edited images makes it easy to find the photos you have already processed.
Moreover, you can filter your photos by capture time too:
#### Adjusting image thumbnail size
When viewing photos in the **Gallery** view, image thumbnails can be resized for better viewing. From the **Thumbnail Size** dropdown menu, choose between **Small**, **Medium**, **Large**, and **Largest**.
{% hint style="info" %}
When in Single Image View, the Thumbnail Size dropdown menu is hidden.
{% endhint %}
---
# Agent Instructions
This documentation is published with GitBook. GitBook is the documentation platform designed so that both humans and AI agents can read, navigate, and reason over technical content effectively. Learn more at gitbook.com.
## Querying This Documentation
If you need additional information that is not directly available in this page, you can query the documentation dynamically by asking a question.
Perform an HTTP GET request on the current page URL with the `ask` query parameter, and the optional `goal` query parameter:
```
GET https://support.skylum.com/organizing-images/filtering-the-view-of-your-images.md?ask=&goal=
```
`ask` is the immediate question: it should be specific, self-contained, and written in natural language.
`goal` is optional and describes the broader end goal you are ultimately trying to accomplish on behalf of the user. GitBook uses it to tailor the answer towards what is most useful for that goal.
The response will contain a direct answer to the question and relevant excerpts and sources from the documentation.
Use this mechanism when the answer is not explicitly present in the current page, you need clarification or additional context, or you want to retrieve related documentation sections.