# Welcome to Your Learning Journey
Need help with Luminar for Desktop? Browse our knowledge base, get answers to common questions, and contact support for personalized assistance.
{% hint style="warning" %}
**Note:** Some interface details and visuals in this article may differ from the latest version of Luminar for Desktop. To see the current interface, visit the [Luminar for Desktop walkthrough](/how-to-use-luminar-for-desktop/luminar-for-desktop-walkthrough).
{% endhint %}
We’re super excited to have you here in the Luminar for Desktop Knowledge Hub — your go-to space for everything you need to get the most out of Luminar for Desktop.
👇 **Here's what you'll find inside:**
***
### A Few Cool Things You Should Know About This Guide 💡
This isn’t just any guide — we’ve built in a few features to make your experience smoother and more enjoyable:
✨ **AI-Powered Search**\
Need help fast? Just type your question into the search bar at the top — our smart search tool will do the rest. It's quick, accurate, and always ready to assist.
***
🌙 **Light or Dark Mode – Your Choice!**\
Choose the look that’s easiest on your eyes. You can easily switch between light and dark modes in the bottom right corner.
***
🎥 **Step-by-Step Video Help**\
Many of our articles include short videos you can follow in real time. Just hit play and watch the magic unfold — and yep, most of them are available with translations too! Notice that many videos are built in interactive mode, where you need to click through each step in the video.
***
📄 **Download as PDF**\
Want to keep the guide offline or share it with someone? You can download either the full guide or just a single page as a PDF — super handy for quick reference.
***
📩 **Need More Help? Contact Support**\
Still stuck? No worries. Just click the support button in the top right corner and our team will jump in to help you out.
***
💬 **Tell Us What You Think**\
We’re always looking to improve! If you find something helpful (or not so helpful), leave us a quick reaction and comment using the smiley icon at the bottom of any article.
***
Thanks again for being here — we’re so glad to be part of your creative journey 💛\
Now, let’s get exploring!
# Activation Process
Follow this comprehensive guide to activate Luminar for Desktop and start editing your photos effortlessly.
{% @arcade/embed url="" flowId="FVMLIs7Pz9zSltXBKjLg" %}
Now that Luminar for Desktop is installed, it’s time to activate it.
To activate the app, you have to sign in to your Skylum account.
Enter your email address to find out if you already have an account:
Sign in with your email address (the one you used during the purchase) and the password for your Skylum account. If you created a Skylum using a linked third-party account, **Google, Facebook, Microsoft, or Apple**, click the relevant button.
In case you don't have an account yet, it will be created during the process:
{% hint style="warning" %}
If Luminar for Desktop doesn’t appear in the [**My Software**](https://skylum.com/user/login?utm_source=support\&utm_medium=organic\&utm_campaign=content) tab, it’s possible that there was a typo in the email address you entered during the purchase. To resolve this, visit the [**Skylum Support page**](https://skylum.com/support?utm_source=support\&utm_medium=organic\&utm_campaign=content) and scroll down to the "Missing Your License" section. There, you can check if any app is linked to your email address. If you receive the message "No data was found," please [**contact our Support Team**](https://skylum.com/support/contact?utm_source=support\&utm_medium=organic\&utm_campaign=content) for assistance in locating your purchase.
{% endhint %}

#### ***Important*** ***Notes***
License Key from the Resellers
In case you purchased the app at one of our resellers, you will have to enter the license key you received by clicking here:
Enter the **Activation code** you received from our reseller here to activate the app:
macOS users
If you see this activation window, it may happen that you downloaded Luminar for Desktop from the App Store:

**Kindly note that if you purchase Luminar for Desktop from the website, you will have to download the app from the website as well,** not the App Store. So, in this case, you need to **uninstall** the App Store version of Luminar for Desktop and install the correct one from the confirmation letter or Skylum account.
Reactivating Luminar for Desktop
If you need to reactivate Luminar for Desktop (for example, after updating or reinstalling the application, or when installing it on another device), make sure to sign in with your Skylum account credentials (email address and password).
Do not use your license key for reactivation. License keys are used only to register your purchase to a Skylum account. Once the license is linked to your account, all future activations should be completed by signing in to that account.
# Standalone Image Editor
Discover how to use Luminar for Desktop as a standalone image editor, allowing you to edit photos with advanced tools and features without relying on other software.
You can choose to open one or multiple images in a Luminar for Desktop session and make basic or creative edits to them. Any edits made to these images will automatically be stored in your Luminar for Desktop Catalog.
There are several ways to open images for editing in Luminar for Desktop:
* You can **add folders**, leaving your photos exactly where they are on your hard drive.
* You can **import images** from a memory card or external drive, moving or copying them to a new location.
* You can **open individual images** from any location, which allows you to easily edit and export photos that you don’t want to keep in your **Luminar Catalog**.
# System Requirements
Discover the minimum system requirements for running Luminar for Desktop on your computer or mobile device to ensure optimal performance during editing.
{% tabs %}
{% tab title="Windows" %}
| **Hardware** | Windows PC with a mouse or similar input device |
| -------------- | ------------------------------------------------------- |
| **Processor** | Intel® Core™ i5 8 gen or better, AMD Ryzen™ 5 or better |
| **OS version** | Windows 10 version 1909 or higher (only 64-bit OS) |
| **RAM** | 8 GB or more (16+ GB recommended) |
| **Disk space** | 10 GB free space; SSD for best performance |
| **Display** | 1280×768 or higher resolution |
| **Graphics** | Compatible with OpenGL 3.3 or later |
{% hint style="info" %}
You can check your system specifications on Windows 10 by opening **Settings** and clicking **About.**
{% endhint %}
{% hint style="warning" %}
*ARM processors installer for Luminar for Desktop can only be downloaded from the* [*Microsoft Store*](https://apps.microsoft.com/detail/9p7jqgl6gc8p)*.*
{% endhint %}
{% endtab %}
{% tab title="macOS" %}
| **Mac model** |
Early 2010 or newer MacBook, MacBook Air, MacBook Pro, iMac, iMac Pro, Mac Pro, or Mac Mini
macOS 12.0 or higher is required (starting from Luminar for Desktop 1.21.0)
|
| |
Important: For Luminar for Desktop 1.16.0, macOS 11.0 or higher is required. macOS <10.15 is not supported.
|
| **RAM** | 8 GB (16+ GB recommended) |
| **Disk space** | 10 GB free space; SSD for best performance |
| **Display** | 1280×768 or higher resolution |
{% hint style="info" %}
You can check your Mac system specifications and hardware by choosing the **Apple icon > About this Mac**.
{% endhint %}
{% endtab %}
{% endtabs %}
# Luminar for Desktop with other software
While Luminar for Desktop is a full-featured stand-alone application, some users choose to install and run it as a plug-in for other popular photo editing software. You will be prompted to install the plug-ins for detected software when you initially install Luminar for Desktop. You can also [install the plug-ins](/about-luminar-for-desktop/luminar-for-desktop-with-other-software/installing-plug-ins) at a later time.
#### You can use Luminar for Desktop as a plugin for the following applications:
{% hint style="warning" %}
**N.B.** Please note that we do not guarantee the performance for legacy Photoshop and Lightroom Classic apps such as Photoshop CS and Lightroom Classic 6.14, etc as the support of CS apps has been discontinued by Adobe.
Also, we only support desktop versions of Adobe Photoshop CC and LrC. None of Adobe's cloud editing solutions are supported. We recommend keeping your Adobe Photoshop and Lightroom Classic up to date to prevent any issues when using Luminar for Desktop as a plugin.
{% endhint %}
# Installing Plug-ins
Add extra functionality to Luminar Neo by installing compatible plugins. This guide explains the full process for Windows and Mac.
{% hint style="warning" %}
**Note:** Some interface details and visuals in this article may differ from the latest version of Luminar for Desktop. To see the current interface, visit the [Luminar for Desktop walkthrough](https://app.gitbook.com/o/ce1mezuaelhjGQ6S9kTM/s/ynrwC8fnGXULbglwsNaw/~/edit/~/changes/156/how-to-use-luminar-neo/luminar-for-desktop-walkthrough).
{% endhint %}
{% @arcade/embed url="" flowId="te3EXaEKUl16DHjGkohY" %}
The option to install Luminar for Desktop as a **Plug-in** is presented when you run the installer. You can also choose to install it as a plug-in at a later time. Please note that installing plugins is an optional step that can be omitted.
1. Quit any host applications you are installing for.
2. Make sure Luminar for Desktop is open.
3. Choose **Luminar for Desktop >Install Plugins** (macOS) or **Luminar for Desktop >File > Install Plugins** (Windows).
4. Mark the desired host applications in the new dialog box that appears to show you which supported host applications you have currently installed on your computer.
5. Click the **Install/Uninstall** button for the corresponding apps in which you’d like Luminar to run.
{% hint style="info" %}
**Quit first!**\
For best results, quit the host application (such as Photoshop) before you install a plugin. You may be prompted to input your Administrator password to complete the installation.
{% endhint %}
{% hint style="danger" %}
**Windows users** should run Luminar for Desktop as an administrator when installing plugins. To do so, right-click the Luminar for Desktop icon and choose Run as administrator.
{% endhint %}
# Luminar for Desktop with Adobe Photoshop
Use Luminar for Desktop as a plugin with Adobe Photoshop for powerful combined workflows. This guide shows you how to set it up.
{% hint style="warning" %}
**Note:** Some interface details and visuals in this article may differ from the latest version of Luminar for Desktop. To see the current interface, visit the [Luminar for Desktop walkthrough](/how-to-use-luminar-for-desktop/luminar-for-desktop-walkthrough).
{% endhint %}
{% @arcade/embed url="" flowId="9xa7lKfPWCm8a3j9oSK0" %}
Luminar for Desktop is a powerful addition to **Adobe Photoshop**. To apply Luminar for Desktop as a filter, follow these steps:
1. Open **Adobe Photoshop**.
2. Open an image you’d like to enhance.
3. Choose **Filter > Skylum Software > Luminar for Desktop** … (a dialog box will appear to indicate that Luminar is running).
4. Luminar for Desktop should automatically open the image you were editing. If needed, click the **Luminar for Desktop icon** in your **Dock** or **Taskbar** to switch to it.
5. Make any edits or adjustments in Luminar for Desktop
6. When done, click the **Apply** button to send the adjusted image back to **Photoshop**.
Please notice that we do not guarantee the performance for legacy Photoshop apps such as Photoshop CS.
{% hint style="info" %}
**Tip:** Luminar for Desktop can operate as a Smart Filter in Photoshop. If you designate a Photoshop layer as a Smart Object, you can then launch the Luminar for Desktop plugin as normal to make edits. When you return to Photoshop, you can always double-click on the layer and return to Luminar for Desktop with all edits intact.
{% endhint %}
{% hint style="warning" %}
**CropAI Missing?**
Due to a Photoshop limitation, the CropAI tool is hidden when Luminar for Desktop is run as a Photoshop plugin. Photoshop requires that any image sent to a plugin returns with the same shape and pixel count. You can, however, crop and straighten your photo in Photoshop before or after invoking the plugin.
{% endhint %}
{% hint style="danger" %}
***GenErase, GenExpand, and GenSwap are not available in Photoshop***
{% endhint %}
# Luminar for Desktop with Adobe Lightroom Classic
{% hint style="warning" %}
**Note:** Some interface details and visuals in this article may differ from the latest version of Luminar for Desktop. To see the current interface, visit the [Luminar for Desktop walkthrough](/how-to-use-luminar-for-desktop/luminar-for-desktop-walkthrough).
{% endhint %}
{% @arcade/embed url="" flowId="gPQuPfGWobInxB9dQRkj" %}
Images in Adobe Lightroom Classic can easily be handed off to Luminar for Desktop for editing.\
To send a file from Lightroom Classic to Luminar for Desktop, follow these steps:
1. Open **Adobe Lightroom Classic**.
2. In the **Library** or **Develop** module, select the image you want to edit in Luminar for Desktop.
3. Send your image to Luminar for Desktop using one of the following methods.
#### Method 1: Edit In
* Right-click the image and choose **Edit In** > **Luminar for Desktop**.
* If prompted, choose one of the following options:
* **Edit a Copy with Lightroom Adjustments** *(recommended)* – Creates a copy of the image and includes any adjustments you've already made in Lightroom.
* **Edit a Copy** – Creates a copy of the original image without applying your Lightroom adjustments.
* **Edit Original** – Opens the original file without applying your Lightroom adjustments.
#### Method 2: Export
* Right-click the image and choose **Export** > **Luminar for Desktop**.
* Select one of the following options:
* **Open Source Files** – Opens the original image in Luminar for Desktop.
* **Edit a Copy with Lightroom Adjustments** – Creates a copy of the image with your Lightroom edits applied before opening it in Luminar for Desktop.
The **Export** menu also provides quick access to several tools:
* **Focus Stacking in Luminar for Desktop** – Select all the images you want to merge in Lightroom before choosing this option.
* **HDR Merge in Luminar for Desktop** – Select all the bracketed images in Lightroom before launching this workflow.
* **Stitch Panorama in Luminar for Desktop** – Select all the images that belong to the panorama before choosing this option.
* **Upscale Photo in Luminar for Desktop.**
4. Edit your image in Luminar for Desktop.
5. When you save your changes, the edited photo will automatically appear in **Lightroom > Catalog > All Photographs**.
{% hint style="info" %}
To ensure the Lightroom plugin works correctly, make sure you're using the latest version of Luminar for Desktop. Before checking for updates, close Lightroom Classic. Then open Luminar for Desktop as a standalone app, go to Luminar for Desktop > Check for Updates (on macOS) or Luminar for Desktop > Help > Check for Updates (on Windows).
{% endhint %}
{% hint style="warning" %}
Please notice that we do not guarantee the performance for the apps no longer supported by Lightroom, such as the 6.14 version and others.
{% endhint %}
{% hint style="danger" %}
*Generative tools aren’t available in plugin mode, but rest assured, our team is actively working on making this happen.*
{% endhint %}
# Lightroom Classic Catalog Migration
{% hint style="warning" %}
**Note:** Some interface details and visuals in this article may differ from the latest version of Luminar for Desktop. To see the current interface, visit the [Luminar for Desktop walkthrough](/how-to-use-luminar-for-desktop/luminar-for-desktop-walkthrough).
{% endhint %}
You can migrate your Lightroom Classic catalog to Luminar for Desktop with folders, collections, metadata, and many basic edits.
{% @arcade/embed url="" flowId="2SawNwjj4JVK1nDLhw6Q" %}
{% hint style="warning" %}
Before starting the migration, please make sure that:
* You are using **Lightroom Classic 15.0 or newer version**
* Lightroom Classic is completely closed
{% endhint %}
To migrate a Lightroom Classic catalog to Luminar for Desktop, follow these steps:
1. Make sure **Lightroom is closed** before starting the migration.
2. Open Luminar for Desktop.
3. Сlick **File > Catalog > Import Lightroom Catalog**.
4. In a newly opened window, click **Continue.**
5. Luminar for Desktop will automatically search for Lightroom Classic catalogs (**.lrcat files**) in your Pictures folder.
6. Select the catalog you want to migrate from the detected list, or click **Browse** to manually locate a catalog stored in another location or on an external drive.
7. Click **Start Import** to start the migration process.
8. Wait for the migration to complete. Migration time depends on the size of your catalog and the number of photos it contains.
9. Once completed, your imported folders will appear in **Folders**, and your imported collections will appear in **Albums**.
10. Select an imported photo and open the **Edit tab > Edits** to view the adjustments migrated from Lightroom.
11. Feel free to fine-tune the imported adjustments or continue editing with Luminar for Desktop tools.
{% hint style="info" %}
As a result of migration, Luminar for Desktop automatically creates a new catalog named **Luminar for Desktop Catalog Imported.**
{% endhint %}
#### ***Important Notes***
Why Additional Photos May Appear After Migration
Lightroom Classic allows you to import only selected photos from a folder while keeping the entire folder's information in the catalog.
Luminar for Desktop currently uses a different catalog architecture and does not support this type of selective photo import. During the migration process, entire folders are imported rather than only the photos selected in Lightroom.
As a result, if your Lightroom Catalog contains photos imported with the selective photo import option, you may notice additional images appear in Luminar for Desktop that were not previously displayed in Lightroom (those are the images in the same folder).
Which Data Is Not Transferred
Please note that not all Lightroom Catalog data can currently be transferred to Luminar for Desktop.
The following attributes are not migrated:
* Keywords
* Smart Collections
* Masks
* Generative AI adjustments
* Black & White conversions
* Color profiles
* Adjustments made with Lightroom tools that do not have an equivalent in Luminar for Desktop
We hope to support additional Lightroom attributes in future updates.
Why Migrated Photos May Look Different
Migrated photos may appear slightly different in Luminar for Desktop compared to Lightroom.
This is because Luminar for Desktop uses a different image rendering engine, which can result in variations in color, temperature, and overall appearance. At the moment, this is expected behavior.
We are continuously working to improve color rendering and migration accuracy and hope to reduce these differences in future versions of Luminar for Desktop.
Why Unedited Photos May Be Marked as Edited in Luminar for Desktop
Lightroom may automatically apply adjustments based on camera and lens metadata stored in the photo file. For example, automatic crop settings and lens corrections.
These adjustments are transferred during migration. As a result, some photos may have an edit badge even if no manual adjustments were made in Lightroom.
This is expected behavior and reflects adjustments that were automatically applied by Lightroom.
Why Migrated Photos May Not Open Properly in Luminar for Desktop
If your Lightroom Catalog contains RAW files from a camera that is currently not supported by Luminar for Desktop, those photos will still appear in the migrated catalog.
However, it is an expected behavior that they may not open correctly or be unavailable for editing in Luminar for Desktop.
For more info on supported cameras and formats, see [Supported File Types and Cameras](https://support.skylum.com/about-luminar-neo/supported-file-types-and-cameras).
# Luminar for Desktop as a Photos for macOS Extension
{% hint style="warning" %}
**Note:** Some interface details and visuals in this article may differ from the latest version of Luminar for Desktop. To see the current interface, visit the [Luminar for Desktop walkthrough](/how-to-use-luminar-for-desktop/luminar-for-desktop-walkthrough).
{% endhint %}
If you’re running **macOS 12.0** or higher, you can use Luminar for Desktop as an **Extension** to **Photos**.
{% @arcade/embed url="" flowId="qCyai22Lc2rnIc53zggB" fullWidth="true" %}
Here’s how to activate the **Luminar for Desktop Extension**.
1. Choose **System Settings (System Preferences prior to macOS 13.0)**.
2. Choose **Extensions**.
3. Choose **Photos**.
4. Select the **Luminar for Desktop Extension**.
#### Here's how to send an image from Photos to Luminar for Desktop:
{% @arcade/embed url="" flowId="4GwmG1fCFAhqmH5tbRoj" %}
1. Launch **Photos** from your **Applications** folder.
2. Choose an image to edit in your **Photos library**.
3. Click the **Edit Photo** button.
4. Click the **Extensions** button and choose **Luminar for Desktop**.
5. Make any edits or adjustments in Luminar for Desktop.
6. When done, click the **Save Changes** button to send the adjusted image back to **Photos**.
{% hint style="danger" %}
***GenErase, GenExpand, and GenSwap are not available in the macOS Photos extension***
{% endhint %}
# Supported File Types and Cameras
Check which file formats and camera models are compatible with Luminar for Desktop, ensuring smooth integration and support for your photography workflow.
Luminar for Desktop opens a wide range of file formats. It is compatible with most cameras and all common graphics formats. Supported file types include:
{% tabs %}
{% tab title="Supported formats" %}
* PNG
* JPEG
* TIFF (8-bit and 16-bit)
* PSD
* HEIC
{% endtab %}
{% tab title="Supported Raw Formats" %}
* CR2
* CR3
* NEF
* ORF
* RAF
* ERF
* ARW
* RW2
* DNG
* PEF
* PPM
* and more
{% endtab %}
{% endtabs %}
{% hint style="info" %}
To see a full list of supported cameras, visit [Supported Cameras](https://l.skylum.com/luminar-neo-supported-cameras)
{% endhint %}
# Working with an unsupported raw format
Discover how to work with unsupported files in Luminar for Desktop, including tips for conversion and troubleshooting when dealing with incompatible formats.
{% hint style="warning" %}
**Note:** Some interface details and visuals in this article may differ from the latest version of Luminar for Desktop. To see the current interface, visit the [Luminar for Desktop walkthrough](/how-to-use-luminar-for-desktop/luminar-for-desktop-walkthrough).
{% endhint %}
Skylum team is always doing their best to add support of newly released cameras. As this process might take some time, but your photos are waiting to be edited, the best workaround is to convert the image to a DNG file. You may be able to create DNG files in-camera. Alternatively, you can install the free [**DNG Converter from Adobe**](https://helpx.adobe.com/camera-raw/digital-negative.html)**.**
Luminar for Desktop fully supports DNG files, including DNG files created by cameras and those created with the DNG Converter utility from images in another raw format.
To see a complete list of supported cameras, visit [**Supported Cameras**](https://l.skylum.com/luminar-neo-supported-cameras)
{% @arcade/embed url="" flowId="bqWXvK60Hb4NbdwIRjPK" %}
{% hint style="info" %}
**Tip: More camera profiles**\
Installing the Adobe DNG Converter will also load helpful DNG camera profiles that you can access in the Develop RAW tool in the Profile drop-down menu.
{% endhint %}
# Create Skylum account
Learn how to set up your Skylum account to access Luminar for Desktop features and manage your licenses easily.
{% @arcade/embed url="" flowId="zlA4yGILiM5SuEjbcRGL" %}
1\. Go to [skylum.com](https://skylum.com/luminar?utm_source=support\&utm_medium=organic\&utm_campaign=content) or [skylum.com/user/login](https://skylum.com/user/login?utm_source=support\&utm_medium=organic\&utm_campaign=content)
2\. In the top right corner, click **Sign In**.
3\. If you already have a Skylum Account, sign in with a linked Google, Facebook, Microsoft, or Apple account, or sign in with your email and password. If you don’t have a Skylum Account, click **Register** and create an account by linking an existing third-party account or by providing your email address and creating a password.
{% hint style="warning" %}
Use the same email address you used to buy Luminar for Desktop when creating your account.
{% endhint %}
4. In your Skylum Account, you will see a **My software** tab with all of your Skylum software, including Luminar for Desktop.
5. Find Luminar for Desktop in your list of software and download it by clicking the **Download** button.
* If you don’t see Luminar for Desktop in the **My software** tab, you probably bought it with another email address. Press **"App isn't showing?"** in the same My software section.
* If you’ve bought Luminar for Desktop on the **App Store**, submit proof of purchase to our support team by clicking the link under **"App isn't showing?" second section** and they’ll help you right away!
# Activate Luminar for Desktop on another device
Learn how to transfer your Luminar for Desktop license to a new device with this step-by-step activation guide.
{% hint style="warning" %}
**Note:** Some interface details and visuals in this article may differ from the latest version of Luminar for Desktop. To see the current interface, visit the [Luminar for Desktop walkthrough](/how-to-use-luminar-for-desktop/luminar-for-desktop-walkthrough).
{% endhint %}
If you want to change the device you are using for editing with Luminar for Desktop, you need to reset your activation counter. You can do this in your Skylum account or directly in Luminar for Desktop when you activate it on your new device. You can also purchase an extra seat as an option.
### In-app activation counter reset
{% @arcade/embed url="" flowId="eKITCBcXa8B600nE4eul" %}
When you open Luminar for Desktop on your new device, log in with your Google, Facebook, Microsoft, Apple account or with your email and password:
If you've already used all available seats and wish to replace your seat(s) with another device(s), just select the license:
and click **Sign out & Launch** next to the device you want to remove:
{% hint style="info" %}
It’s safe to sign out from all devices at once if you don’t know which device to remove.
New device(s) will be added to the list as soon as you activate Luminar for Desktop on them, and the old device(s) will be automatically added when you launch the app.
{% endhint %}
Alternatively, you can also get a new seat if you don't want to remove Luminar for Desktop from other devices:
### Reset activation in the Skylum account
{% @arcade/embed url="" flowId="mB7fTONn1Qi4TTtBGVCR" %}
\
Log in with your Google, Facebook, Microsoft, Apple account, or with your email and password [here](https://skylum.com/user/login?utm_source=support\&utm_medium=organic\&utm_campaign=content).
If you don't have a Skylum account yet, you can [register here](https://skylum.com/user/signup?utm_source=support\&utm_medium=organic\&utm_campaign=content).
Visit the **My Software** tab. In case you don't want to remove activation from your current device, check a number of available seats. You can always get additional seats by clicking **Get Seats** button:
If you wish to replace your seat with another device, the **Reset** buttons are available for each product you own.\
Click **Activations** > **Reset activation** to remove a specific device or **Reset all activations** to remove all activations at once:
{% hint style="info" %}
It’s safe to **Reset all activations** if you don’t know which device to remove. New device(s) will be added to the list as soon as you activate Luminar for Desktop on them and the old device(s) will be automatically added when you launch the app.
{% endhint %}
Once you are done, press **Download** to install Luminar for Desktop on your new device:
### Add an extra seat in Skylum account
If you want to keep Luminar for Desktop active on all your current devices, adding an extra seat is the perfect solution for you. You can easily purchase additional seats by clicking the "Get Seat" button and selecting the number of seats you need.
Please note that after the initial purchase, the cost of the extra seat will be added to your subscription invoice.
# Cancel my subscription
Find out how to cancel your Luminar Neo subscription with this straightforward guide.
{% hint style="warning" %}
**Note:** Some interface details and visuals in this article may differ from the latest version of Luminar for Desktop. To see the current interface, visit the [Luminar for Desktop walkthrough](/how-to-use-luminar-for-desktop/luminar-for-desktop-walkthrough).
{% endhint %}
{% @arcade/embed url="" flowId="jGqKUr2nq7qoITiDzaus" fullWidth="true" %}
To cancel the subscription, you need to proceed with the following steps:
{% stepper %}
{% step %}
Log in to your Skylum account by pressing the “Log in” button in the right-up corner
{% endstep %}
{% step %}
Choose “My software” from the list
{% endstep %}
{% step %}
Press “Manage Subscription”
{% endstep %}
{% step %}
Press “Cancel Subscription.” under your main Subscription or Extra Seat (if purchased) depends on your needs
{% endstep %}
{% step %}
Confirm your action and choose the reason
{% endstep %}
{% endstepper %}
# Can't See the App in Your Skylum Account?
{% hint style="warning" %}
**Note:** Some interface details and visuals in this article may differ from the latest version of Luminar for Desktop. To see the current interface, visit the [Luminar for Desktop walkthrough](/how-to-use-luminar-for-desktop/luminar-for-desktop-walkthrough).
{% endhint %}
If Luminar for Desktop isn’t showing up under the [**My Software**](https://skylum.com/account/my-software) tab in your Skylum account, it’s usually due to one of the following reasons:
* Your Skylum account hasn’t been verified yet
* You made the purchase using a different email address
* There might be a typo in the email used at checkout
***
### Unverified Skylum Account
To manage your Luminar for Desktop license in your account, you first need to verify your email address. Here's how:
* [**Log in** ](https://skylum.com/user/login)to your Skylum account, and go to the [**My software**](https://skylum.com/account/my-software) tab.
* Click on the ***Resend confirmation email*** option:
* Check your Inbox & Spam for an email titled ***'Verify your email to access new possibilities!'***
* Open the email and click on the ***Verify your email*** button:
* Once verified, you’ll be redirected to your account where you can manage your licenses:
***
### Purchased with a Different Email Address
If you used an alternative email when purchasing Luminar for Desktop, the app might not appear in your account. But no worries, you can link the second email to your existing Skylum account:
* [**Log in** ](https://skylum.com/user/login)to your Skylum account, and go to the [**My software**](https://skylum.com/account/my-software) tab.
* Click ***"App isn't showing?"*** in the same My software section:
* Enter your alternative email address in the field & click **"*****Link my licenses":***
* A verification email will be sent to your alternative address:
* Check your inbox & Spam for an email titled ***'Take a moment to verify your additional email!'***
* Once you find the letter, click on the ***Verify your additional email*** button:
* After the email is verified, you'll be forwarded to your account, where your purchases under that email will appear in your Skylum account.
***
### Missing Upgrade Tools?
If you’ve purchased the **Upgrade Pass 2024/25** for your lifetime license, but don’t see the new tools in the app, it’s possible that the pass was bought under a different email address.
We recommend linking any alternative emails to your Skylum account to ensure your upgrades are correctly displayed.\
👉 Follow the steps described [**here**](#purchased-with-a-different-email-address) to link additional emails.
***
### Still Don’t See Your App?
If none of the steps above help, it’s possible there was a typo in the email address you used during checkout.
No worries, our Support Team is here to help!
Reach out to us at [**skylum.com/support/contact**](https://skylum.com/support/contact), and we’ll locate your order and make sure it’s added to your account.
# Luminar for Desktop walkthrough
New to Luminar for Desktop? This support walkthrough introduces you to the layout, tools, and workflow basics to get you started.
Luminar for Desktop is designed to make photo editing intuitive and powerful, whether you're a beginner or a pro. We'll walk you through all tools and features, from importing images to applying AI-powered enhancements and making creative edits. Let’s get started!
{% @arcade/embed url="" flowId="xATqhUfeAJjtWPZbBNtG" %}
The Catalog, Presets, and editing tools are available from the same screen, allowing you to browse and edit your photos without switching between separate sections.
#### Browse your photos
Use the **Catalog** to browse your folders, albums, and photos.\
The navigation path at the top shows your current location, while the Back and Forward arrows allow you to return to a previous view or move forward.
#### Access editing tools, presets, and photo information
The panel on the right provides quick access to the main options for working with your photos. You can switch between these options while keeping your photo visible.
* **Presets** — apply ready-made looks and styles
* **Tools** — access main editing tools
* **Edits** — view and manage the applied adjustments
* **Extra** — access advanced tools, including:\
***- Generative (GenErase, GenSwap, GenExpand)***\
***- Enhancement (Upscale, Restoration)***\
***- Merge (HDR Merge, Focus Stacking, Panorama Stitching)***
* **Info** — photo details and metadata.
#### Explore tutorials, learning content, and creative assets
At the bottom of the left panel, you’ll find additional resources to help you learn and get more from Luminar for Desktop.
* **Tutorials** — explore guided tutorials and learn how to use Luminar for Desktop’s features
* **Learn Photography** — browse photography courses and e-books
* **Creative Library** — browse creative assets such as skies, overlays, backgrounds, etc.
#### Check your account
Select your profile in the lower-left corner to access your account, check your license, and manage profile settings.
# Cross-Device Editing
The cross-device editing functionality in the Luminar for Desktop ecosystem bridges the gap between desktop and mobile, offering a truly connected photo-editing experience across devices.
At the heart of this feature is effortless synchronization between Luminar Mobile and Luminar for Desktop. Every imported photo, edit, or adjustment is automatically synced through your Skylum account. Start editing your photos on Luminar Mobile and continue on Luminar for Desktop. This means your photo library, including all the edits, travels with you: no cables or manual transfers needed.
{% @arcade/embed url="" flowId="wCUIy7NSXkw09nIGsXc8" %}
{% hint style="info" %}
Cross-device editing is supported when transferring photos ***from Luminar Mobile to Luminar for Desktop.*** To transfer your Catalog between two desktop devices, refer to this article: [How to transfer the Catalog to another device](https://support.skylum.com/how-to-transfer-the-catalog-to-another-device)
{% endhint %}
{% hint style="info" %}
**Presets, Tools, and Edits tabs are greyed out?**
Make sure to ***import*** your photos from the Luminar Mobile folder. Click the button on the top panel to import the selected photos. The imported photos will be displayed in the ***"Space Imports" folder*** and can be edited there.
{% endhint %}
#### Readjusting the Edits
After you import the photo, you can access your previous edits made on Luminar for Mobile in the Edits tab. You can select the applied tools and readjust their settings.
{% hint style="warning" %}
***Synchronization doesn't work?***
Please refer to this article: [Fix Sync Issues Between Luminar Mobile and Luminar for Desktop](https://support.skylum.com/fix-sync-issues-between-luminar-mobile-and-luminar-neo)
{% endhint %}
# Catalog
The **Catalog** in Luminar for Desktop is your central hub for organizing and managing your photos efficiently. Whether you're working with a small collection or thousands of images, the Catalog helps you stay organized with intuitive tools for sorting, searching, and rating your photos. In this guide, we'll explore how to navigate the Catalog, import and organize images, use ratings, and maximize your workflow. Let’s dive in and unlock the full potential of the Catalog in Luminar for Desktop!
# Catalog Files
Learn about the different catalog files in Luminar for Desktop and how they store your editing data.
As you work in Luminar for Desktop, your edits are stored in a **Catalog file.** This Catalog tracks your images and the edits you make to them. Luminar for Desktop lets you create multiple Catalogs to better manage your photos. You can have Catalogs for different clients and events, a Catalog just for family photos — the sky’s the limit. Using numerous, relatively small, Catalogs can significantly speed up your workflow.
{% content-ref url="/pages/7AwQ3dizdF5PMIQeqaoO" %}
[Catalog Database](/how-to-use-luminar-for-desktop/catalog/catalog-files/catalog-database)
{% endcontent-ref %}
{% content-ref url="/pages/el6a92iJHmJCt7ZdHQlS" %}
[Multiple Catalogs](/how-to-use-luminar-for-desktop/catalog/catalog-files/multiple-catalogs)
{% endcontent-ref %}
{% content-ref url="/pages/8wPzLErto0IgeqRRTcoP" %}
[Backing Up a Catalog](/how-to-use-luminar-for-desktop/catalog/catalog-files/backing-up-a-catalog)
{% endcontent-ref %}
{% content-ref url="/pages/OBepPusEwrMtwTNj7LAT" %}
[Backing Up Your Photo Edits](/how-to-use-luminar-for-desktop/catalog/catalog-files/backing-up-your-photo-edits)
{% endcontent-ref %}
# Catalog Database
Understand the structure of Luminar for Desktop's catalog database to manage your photo library effectively.
{% hint style="warning" %}
**Note:** Some interface details and visuals in this article may differ from the latest version of Luminar for Desktop. To see the current interface, visit the [Luminar for Desktop walkthrough](/how-to-use-luminar-for-desktop/luminar-for-desktop-walkthrough).
{% endhint %}
{% tabs %}
{% tab title="Windows Catalog Structure" %}
Luminar for Desktop Catalog Folder Structure on Windows
Luminar for Desktop Catalog Folder Structure on MacOS
{% endtab %}
{% endtabs %}
Luminar for Desktop automatically creates a Catalog when you first install it. A Catalog contains all information about your files, including metadata on flags and edits you make.
Remember that edits you make in Luminar for Desktop are always non-destructive and are saved in your current Catalog. This means you aren’t changing the actual files but rather are capturing instructions in a database. When you’re ready to share or use your files elsewhere, you can export images with your edits applied.
You can back up your photos by exporting them in different formats:\
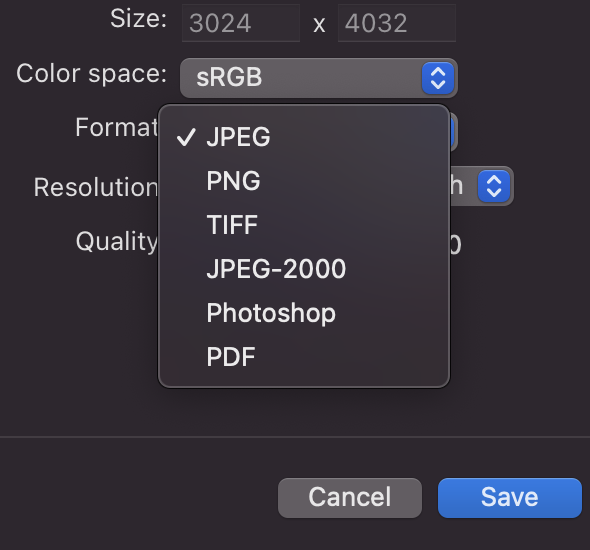
By default, the Luminar for Desktop Catalog is created in your Pictures folder. Ensure you **don’t include the Catalog folder when adding images to Luminar for Desktop.** Doing so will add all of Luminar for Desktop’s preview images to your Catalog, resulting in **duplicate photos in your Luminar Catalog.**
{% hint style="warning" %}
**Note: Total backup**\
The contents of a Catalog are stored inside a folder. If you’re backing up or moving a Catalog, be sure to back up or move the entire folder.
{% endhint %}
# Multiple Catalogs
Manage and switch between different catalogs in Luminar for Desktop to organize your photo libraries effectively.
{% hint style="warning" %}
**Note:** Some interface details and visuals in this article may differ from the latest version of Luminar for Desktop. To see the current interface, visit the [Luminar for Desktop walkthrough](/how-to-use-luminar-for-desktop/luminar-for-desktop-walkthrough).
{% endhint %}
{% @arcade/embed url="" flowId="d6v5MmRJv9lTLDGUH6hP" %}
Luminar for Desktop creates a default Catalog when you first launch the application. You can use this one Catalog for all your photos or easily create new Catalogs. Luminar for Desktop Catalogs can be located anywhere on your hard drive. By default, Luminar for Desktop creates a Catalog in your Pictures folder. A Catalog contains a database of your images and their locations, thumbnails of these images, and a history of all adjustments applied to your images.
### Creating a Catalog
To create a new **Catalog:**
1. Choose **File > Catalog > New**. A dialog box will open, asking you to name your new **Catalog** and choose where you want to store it.
2. Enter a Catalog name and choose a location. Many users choose their **Pictures** folder, but any drive and any location will work.
3. When you save the new Catalog, your current Catalog will close, and your new Catalog will open.
You can now add images as desired.
### Switching Catalogs
If you’re working with multiple Catalogs, you can quickly switch between them:
1. To open a previously created Catalog, choose **File > Catalog > Open**.
2. In the Finder (macOS) or File Explorer (Windows) window, navigate to the Catalog you want to work with. It will appear as a folder.
3. Select your Catalog and click **Open**.
4. Your current Catalog will be closed, and the selected Catalog will be opened.
# Backing Up a Catalog
Ensure your photo catalog is safe by learning how to back it up properly in Luminar for Desktop.
{% hint style="warning" %}
**Note:** Some interface details and visuals in this article may differ from the latest version of Luminar for Desktop. To see the current interface, visit the [Luminar for Desktop walkthrough](/how-to-use-luminar-for-desktop/luminar-for-desktop-walkthrough).
{% endhint %}
{% @arcade/embed url="" flowId="0tJSXGRZ0xTLXPGY3YvE" %}
Luminar for Desktop constantly backs up its database as you work with it. This ensures your latest edits are stored. However, you may want to manually back up a Catalog in case your hard drive malfunctions. We suggest backing up your Catalog to an external drive or cloud storage.
#### Backing Up a Luminar for Desktop Catalog on Windows and macOS
1. With Luminar for Desktop open, make edits with the Catalog you want to back up.
2. Choose **File > Catalog > Show in Explorer** (Windows) / **Show in Finder** (macOS). This reveals the Catalog file nested inside a folder.
3. Go up one level in the folder structure and back up that entire folder for the complete backup.
To restore a backup, just copy it to your machine and choose **File > Catalog > Open** to select the Catalog Folder you backed up.
**On macOS, you can also use the Backup command to store a backup Catalog:**
1. Choose **File > Catalog > Backup**
2. Luminar for Desktop will open a Finder window that lets you choose where you want to save your backup file.
3. To restore a backup file, choose **File > Catalog > Restore from Backup.**
# Backing Up Your Photo Edits
Protect your creative work by backing up photo edits in Luminar for Desktop with this easy guide.
{% hint style="warning" %}
**Note:** Some interface details and visuals in this article may differ from the latest version of Luminar for Desktop. To see the current interface, visit the [Luminar for Desktop walkthrough](/how-to-use-luminar-for-desktop/luminar-for-desktop-walkthrough).
{% endhint %}
You can back up your photos by **exporting them.** JPEGs are relatively small files that are easy to manage. However, when exporting JPEG files, your images will lose quality due to compression. Saving your photos in the TIFF format creates archival-quality files that will be much larger than JPEGs with no loss of quality.
# Spaces
{% hint style="warning" %}
**Note:** Some interface details and visuals in this article may differ from the latest version of Luminar for Desktop. To see the current interface, visit the [Luminar for Desktop walkthrough](/how-to-use-luminar-for-desktop/luminar-for-desktop-walkthrough).
{% endhint %}
Public Spaces — the feature that allows you to easily ***share your works*** with friends, family, acquaintances, clients, or a broader audience through a unique link to your page works.
{% @arcade/embed url="" flowId="QsQmT1uPmIGYqnDhwBzV" %}
You can ***select your photos in the Luminar for Desktop app*** ***and export them to a personal virtual album*** that automatically syncs with your Skylum account. From the web browser, you can easily view these photos and tweak your selection like:
* add an album title;
* reorder the photos;
* explore each photo in a single view;
* adjust metadata display settings;
* adjust the download permissions;
* delete individual images or the whole album;
Once you're satisfied, you can publish and share your portfolio with a ***unique public link.*** It's a wonderful way to showcase your progress, gather feedback, and share your creativity with others. It can also serve as a self-presentation tool, ideal for connecting with potential clients or establishing your personal brand.
Spaces are displayed in the left directory panel, under the list of folders and albums:
To delete a space via Luminar for Desktop, click on it with the right mouse and select delete:
{% hint style="warning" %}
You can add up to 200 photos per Space
{% endhint %}
# Editing a Single Image
Follow this guide to quickly load and edit a single image in Luminar for Desktop, perfect for focused, one-off edits.
{% hint style="warning" %}
**Note:** Some interface details and visuals in this article may differ from the latest version of Luminar for Desktop. To see the current interface, visit the [Luminar for Desktop walkthrough](/how-to-use-luminar-for-desktop/luminar-for-desktop-walkthrough).
{% endhint %}
{% @arcade/embed url="" flowId="6tV5s1lsLhD37o9KzLPf" %}
Adding a single image makes it easy to work with individual photos in Luminar for Desktop. It’s also helpful in editing images not in your Luminar for Desktop **Catalog**. Editing a single image is similar to using previous versions of Luminar as a standalone application.
#### When to add a single image
When you want to edit a single image or several images but do not **Add** or **Import** them to your **Catalog**, you can add a single image to Luminar for Desktop. This is great when you want to develop a few photos or when you have a photo you want to quickly process but not keep in your **Catalog** after you’re done editing it.\
When you add a single image, the file remains in its original location on your hard drive and you can access the image in a special collection in your **Catalog** panel called **Single Image Edits**.
1. You can open a single photo for editing in one of four ways:
* Click the **Add Photos** button at the top of the **Catalog** panel
* Choose **File > Edit Single Image…**
* Press **Cmd****+****O** (macOS) or **Ctrl****+****O** (Windows)
* Drag an image onto the **Luminar for Desktop application icon**
2. A **Finder** or **File Explorer** window will appear. Navigate to the image(s) you want to edit.
3. Select the image(s) you want to edit. (You can select multiple images using the modifier keys **Shift** and **Cmd****/****Ctrl**)
4. Click **Add**. The image(s) you’ve selected will appear in the **Filmstrip**. If you’ve selected multiple images, the first image you selected will be opened in the main window and will be ready to edit.
5. To select another image to edit, scroll through the **Filmstrip** or open the **Catalog** tab.
6. In the main menu, you can save your edited images for use in other applications via **File > Export**.
{% hint style="warning" %}
Note: The File menu and shortcuts may be grayed out until you open your first image. To add an image, use the Add Photos button in the Catalog panel.
{% endhint %}
#### Managing Images in the Single Image Edits Collection
Images will stay in your **Single Image Edits** collection until you remove them. This collection is built automatically. You can use the **Showing:** and **By:** drop-down menus in the top right corner of the **Single Image Edits** window to reduce the number of images shown or change the order in which they are displayed.
1. To remove an image from the **Single Image Edits collection**, right-click on the image.
2. Then select **Remove from Single Image Edits** in the menu that opens.
3. This will remove the image from your **Catalog** but keep the file safely in its original location. If you decide you want to keep a Single Image Edits photo in your **Catalog**, you can simply drag it to any of the folders in your **Catalog** panel. The original photo will then be moved on your hard drive to the folder you place it in within your Luminar for Desktop Catalog. Even though the image is now part of your regular **Catalog**, it will still show up under the **Single Image Edits collection** until you remove it from there.
{% hint style="danger" %}
**Note: Drag and Drop images from Single Edits to Folders**
Currently, dragging Single Image Edits to folders is only supported on macOS.
{% endhint %}
{% hint style="info" %}
**Note: Single Image cleanup**
You must have the Single Image Edits shortcut selected to manage your Single Image Edits collection.
{% endhint %}
# Adding a Folder for editing
Discover how to add folders to Luminar for Desktop's catalog for streamlined photo organization and editing.
{% hint style="warning" %}
**Note:** Some interface details and visuals in this article may differ from the latest version of Luminar for Desktop. To see the current interface, visit the [Luminar for Desktop walkthrough](/how-to-use-luminar-for-desktop/luminar-for-desktop-walkthrough).
{% endhint %}
{% @arcade/embed url="" flowId="bbM69NW5uRAXWQ54hPrh" %}
Adding a folder of images to your Catalog allows you to quickly access, organize, and work with photos located on your hard drive, on external drives, and even on synced cloud storage. When you add a folder, none of your photos are moved. Luminar for Desktop simply scans the folder and any subfolders and creates thumbnails and links to the images inside. Luminar for Desktop will keep your existing folder hierarchy, and folders in Luminar for Desktop are tied directly to folders on your hard drive.
There are two ways to add a folder to your Luminar for Desktop Catalog. Both methods accomplish the same goal:
1. [Adding Folders from the **Catalog** panel via the **+** button near the Folder section](#adding-folders-from-the-catalog-panel)
2. [Adding Folders from the **Main Menu**](#adding-folders-from-the-main-menu)
#### Adding Folders from the Catalog Panel
* Clicking the **+** button near the Foder section opens a browser window in **File Explorer** (Windows) or **Finder** (macOS).
* In this browser window, navigate to the folder on your hard drive that you would like to add and select it.
When you select a folder, it will be added to your **Folder** list as a top-level folder. All subfolders within the added folder will also be added to your **Catalog**.\
The folder you have added will now appear under the **Folders** list in the **Catalog** panel. Each folder you add to your **Catalog** is considered a master folder. Any folders contained within a master folder are added as subfolders.
* Any folder with a **small triangle** to the left of its name is a master folder that contains subfolders.
* Clicking on this triangle will reveal the subfolders within the master folder.
* You can create additional subfolders to any master folder by right-clicking on the master folder and choosing the **New Subfolder** command.
#### Adding Folders from the Main Menu
You can also add a folder from the main menu by choosing **File > Add Folder with Images** … Once selected, the folder will be added the same way as with the first two methods.
#### Folders added from an External Hard Drive
You can add folders located on an external hard drive to your **Catalog**. The process is the same as for adding folders from an internal hard drive. However, be aware that if an external hard drive is disconnected from your system, the media contained on it will go offline. If this happens, the names of folders located on your external hard drive will be greyed out in the Catalog and a warning triangle will appear next to the folder names.
* When an offline folder is opened, thumbnails of the original photos will be available.
* You can select or reject offline images, but you won’t be able to edit them until the external hard drive is reconnected.
* Offline images will have a warning triangle in the upper left corner of the thumbnail.
* You can organize offline images into **Albums**, but you cannot move offline images into **Folders**.
When an external hard drive containing a folder in your **Catalog** is reconnected and mounted, the folder and all the images inside it will come back online. The folder will no longer be greyed out, and the warning triangle next to the folder’s name and on each of the images will disappear. Any selection or rejection of images done while the folder was offline will be preserved. Also, if any images had been edited before the external drive was removed, the edits will be remembered when the drive is reconnected.
If your system cannot locate a drive, you can right-click on a folder located on that drive and choose **Locate Drive** to select it manually.
#### Folders added from Synced Cloud Storage
Luminar for Desktop lets you add folders from cloud storage locations that are synced to your computer. In this case, synced means that a physical copy of the photo resides on either your internal or external hard drive. If only a reference copy of the photo is located in cloud storage, Luminar for Desktop will not be able to create a thumbnail or edit the image.\
Adding folders from synced cloud storage is very useful in situations where a client or family member adds images remotely to a cloud service. Once these images are synced locally to your computer, Luminar for Desktop will automatically add them to your **Catalog**.
# Importing Images from a Memory Card
Import photos from a memory card into Luminar for Desktop easily and efficiently with this step-by-step support guide.
Importing images differs from adding a folder of images to your Luminar for Desktop Catalog. Importing physically moves your images or lets you create a copy of your images to a new location.
#### Import to
You can import images from an internal hard drive, an external hard drive, and even a memory card.
1. Create a new folder or select an existing folder in the **Catalog** panel.
2. Right-click on the folder and choose **Import Images to This Folder**.
3. Click the **Browse** button and navigate to the images or folder of images you want to import and select them.\
*To locate the images you want to use on a memory card, they are likely in a folder labeled **DCIM** (for Digital Camera Images).*
#### Action menu
Click the **Action** menu to choose whether you want to **Copy** the images to a new location or **Move** them to the new folder and erase them on the source disk.
{% hint style="info" %}
**Note: How do you move?**
If you choose the Move option, this will physically move the original photos to the selected folder in your Library and its corresponding folder on your hard drive. The original photo will be deleted from its original location once it is moved into the new location. If importing from a locked memory card, the images will not be erased.
{% endhint %}
#### Organizing Images During Import
To make it easier to find your best photos, Luminar for Desktop offers several ways to organize imported images. These commands automatically build subfolders based on different image or folder properties. Just click the **Organize** menu in the **Import** dialog to choose one of these options.
* **Into One Folder.** This will place all the images into a single level of the folder. No subfolders will be created.
* **Keep Existing Folder Structure.** If there are additional folders inside the folder you are importing, subfolders will be created to reflect the original folder structure.
* **Year/Month/Day.** Luminar will look at the creation date of the image and create subfolders based on the year, month, and day of the month the photo was taken.
* **Year/Month.** Luminar will look at the creation date of the image and create subfolders based on the year and month the photo was taken.
#### Subfolders
Mark the **Include Subfolders** checkbox if you want to take additional folders of images contained within a selected folder. If this is checked, Luminar will add images from all subfolders inside the selected folder. If left unchecked, only the images at the top level of the folder will be imported. The contents of the subfolders will be ignored.
{% hint style="warning" %}
Note: If the **Import** command is grayed out, make sure you have at least one folder in your **Catalog** to hold the new images.
{% endhint %}
# Filmstrip
Learn how to manage and view multiple images easily with the Filmstrip view while editing in Luminar for Desktop.
{% hint style="warning" %}
**Note:** Some interface details and visuals in this article may differ from the latest version of Luminar for Desktop. To see the current interface, visit the [Luminar for Desktop walkthrough](/how-to-use-luminar-for-desktop/luminar-for-desktop-walkthrough).
{% endhint %}
{% @arcade/embed url="" flowId="THIrp7BN1iowPAYgnbtj" %}
You can enable the Filmstrip mode by clicking on the ***Show Filmstrip*** button:
**Filmstrip in Edit** is a feature within the Edit tab that allows users to quickly switch between images without needing to exit Catalog mode. This feature keeps the editing process seamless by enabling users to browse through their photo collection while staying in the editing workspace. It also supports quick synchronization of edits across multiple images, improving workflow efficiency and productivity by minimizing interruptions and focusing on image editing.
# Smart Search
Learn how to quickly find your photos using Luminar for Desktop's Smart Search feature, which filters images by metadata, file name, or keywords for efficient workflows.
{% hint style="warning" %}
**Note:** Some interface details and visuals in this article may differ from the latest version of Luminar for Desktop. To see the current interface, visit the [Luminar for Desktop walkthrough](/how-to-use-luminar-for-desktop/luminar-for-desktop-walkthrough).
{% endhint %}
{% @arcade/embed url="" flowId="Kzi2342M0YI0mIyUk8d3" %}
**Smart Search** is an AI-driven search feature designed to make finding images more intuitive and efficient. It allows users to search for images through basic attributes like filenames, dates, or file extensions and by analyzing the images' content. For example, users can search using terms related to objects (e.g., "tree," "stop sign," "car"), scenes (e.g., "beach," "cityscape"), or specific details (e.g., "two smiling boys"). This feature leverages machine learning to recognize visual elements within images, providing a faster and more accurate way to locate specific visuals from a large image catalog.
**How to Use Smart Search:**
* **Keyboard Shortcut**:
* **Windows**: Press **Ctrl**** + ****F** to activate Smart Search.
* **macOS**: Press **Cmd**** + ****F** to activate Smart Search.
* **Search Box**: Type your query directly into the search box to find images based on your criteria. You can search for:
* **Objects** (e.g., "tree," "stop sign," "car")
* **Scenes** (e.g., "beach," "cityscape")
* **Specific Details** (e.g., "two smiling boys")
# Syncing Adjustments
Learn how to sync edits across multiple images in Luminar for Desktop, ensuring consistent adjustments throughout a batch of photos for efficient editing.
{% hint style="warning" %}
**Note:** Some interface details and visuals in this article may differ from the latest version of Luminar for Desktop. To see the current interface, visit the [Luminar for Desktop walkthrough](/how-to-use-luminar-for-desktop/luminar-for-desktop-walkthrough).
{% endhint %}
{% @arcade/embed url="" flowId="5F5ZhNZvTgFsjCYkGEyZ" %}
Once you’ve developed one image, it’s easy to reuse those adjustments on other photos. This process is called syncing and works by selecting the images you want to unify. Syncing is a global command that takes all the adjustments from one photo and applies them to one or more selected images.
#### To sync an image:
1. Open an image in Luminar for Desktop and edit it.
2. In the Catalog, select the adjusted image whose edits you wish to sync. It should have an orange border around its edges to indicate it is selected.
3. Identify multiple images that you want to apply the same adjustments to.
* This can be done in **Gallery Images Mode** (double-click on the photo to open gallery mode).
* You can also select multiple images in the side Filmstrip (**View > Hide/View Filmstrip**)
* Select the additional photos you want to use.
* Hold down the **Shift** key and click to select a range of images.
* Hold down the **Cmd** key (macOS) or **Ctrl** key (Windows) and click on individual photos to add them to the selection.
* Additional selected photos now have a white border around them.
4. Choose **Image > Adjustments > Sync Adjustments** to unify the images or press **Shift****+****Cmd****+****S** (macOS) or **Shift****+****Ctrl****+****S** (Windows). The images will synchronize, once complete you’ll notice an **adjustment badge** in the upper left corner when viewing in the **Gallery Images Mode**.
5. Inspect the newly synced images and modify them as needed.
{% hint style="success" %}
**Power Tip: The right tools**\
Using tools that rely on artificial intelligence, such as **AccentAI**, **StructureAI**, and **SkinAI**, can improve the results you get when syncing images. These AI tools can adjust to changes between photographs easily. Tools like Crop, Erase and Background Removal cannot be synced.
{% endhint %}
{% hint style="warning" %}
**Note: Thumbnails may not be accurate**\
The thumbnails after syncing may not look accurate, this is because the images in the gallery view are JPEG previews. If the source photos are raw, you may need to open up the photo in a **Single** view or **Edit** mode to judge the effects properly.
{% endhint %}
{% hint style="info" %}
**Note: Syncing and Batch Processing**\
If you have several images to develop, you can use the **Sync Adjustments** command to perform a **Batch Process**. Simply adjust the first photo in a series. Sticking with Ai-powered adjustments works particularly well here. With the first image selected, simply choose the rest of the images, right-click on the first image, click **Adjustments** and then select **Sync Adjustments** to sync the images with the first image. Finish by using the **Export** command to batch export multiple photos.
{% endhint %}
Discover more efficient workflow tips:
{% embed url="" %}
# Histogram
Understand and use the histogram in Luminar for Desktop to better balance highlights, shadows, and overall exposure for precise photo editing.
{% hint style="warning" %}
**Note:** Some interface details and visuals in this article may differ from the latest version of Luminar for Desktop. To see the current interface, visit the [Luminar for Desktop walkthrough](/how-to-use-luminar-for-desktop/luminar-for-desktop-walkthrough).
{% endhint %}
Once you have selected an image, you can view the Histogram by clicking **View > Show Histogram**.
The histogram can be a great help while correcting colors or adjusting exposure. A histogram is a graphical representation of the tonal values of your image. This graph illustrates how the pixels in the image are distributed across brightness levels. In other words, it shows the number of tones of a particular brightness found in your photograph, ranging from black (0% brightness) to white (100% brightness). Well-balanced images will have tonal values across the entire range of the histogram.
1. To read a histogram, start at the left edge, which shows the **shadow** regions. The middle shows the **midtones** (where most adjustments to an image are made). **Highlights** are to the right.
2. The histogram is able to display **Red**, **Green**, **Blue** channels separately or, by default, show them all at once. Click on the **Histogram** to switch between seeing a composite Histogram and viewing details for the Red, Green, and Blue channels (which can be useful for spotting tint issues and color casts). You can also see a grayscale average for luminance.
3. Additionally, clicking the two small triangles in the upper left and upper right corners will show hot and cold pixels, respectively. These are pixels that have shifted or been exposed to become absolutely black or white.
#### Cold & Hot Pixels
* **Cold Pixels.** To enable or disable warnings about absolutely black pixels, click the triangle on the left side of the Histogram. Purely black pixels will now be displayed in bright blue in the image. Cold pixels (in bright blue) indicate areas where black has achieved maximum concentration (a zero value).
* **Hot Pixels.** Clicking the triangle on the upper right of the Histogram will show where your image is completely white (where the histogram is clipped on the right side). Absolutely white pixels are displayed in red.
{% hint style="warning" %}
**Note: Probematic prints**
Cold and hot pixels can both be problematic (especially for printing) as there is too much ink coverage for cold pixels and there are no details at all in hot pixels. The presence of cold or hot pixels is a sign that you should adjust the exposure of the image. You may want to leave the Histogram open as you work because it’s an easy way to learn to read the details of a digital image.
{% endhint %}
{% hint style="info" %}
**Note: Check for clipping**
The Light tool is excellent for taking control of an image’s Black and White points as well as the Shadows and Highlights. Pressing the J key will toggle the clipping indicators on and off so you can see the pixels underneath.
{% endhint %}
# Reconnecting Lost Edits
Learn how to recover and reconnect edits in Luminar for Desktop if files have been moved or are missing.
{% hint style="warning" %}
**Note:** Some interface details and visuals in this article may differ from the latest version of Luminar for Desktop. To see the current interface, visit the [Luminar for Desktop walkthrough](/how-to-use-luminar-for-desktop/luminar-for-desktop-walkthrough).
{% endhint %}
Lost Edits look like a triangle with an exclamation sign
Luminar for Desktop attempts to accurately track both the edits applied to an image and its location on your hard drive or network. However, it is possible for an image to go missing. This typically happens for one of the following reasons:
* Luminar for Desktop was closed when you moved an image to another folder
* Luminar for Desktop was closed when you renamed an image or folder
* You moved an image at the Finder/Explorer level to a different location that isn’t in your Luminar for Desktop library.
* You unplugged or removed a hard drive or memory card that was in use.
The application may not know where the source file is stored if this happens. In this case, the photos will be added to a particular album called **Lost Edits**.
This shortcut only appears when images are lost. You will not see it unless there are missing pictures. Luminar still has a thumbnail image and a set of instructions that can be reconnected.
### How to reconnect images in the Lost Edits folder
{% @arcade/embed url="" flowId="Gb7kWNsJhYPXGh3UnNvT" %}
If the Lost Edits album appears, you should repair the connection promptly.
1. Locate the **Lost Edits** shortcut in the Catalog panel.
2. Click on the **Lost Edits** shortcut to see the missing images.
3. **Right-click** on the desired image and choose **Locate Image**.
4. A new navigation window opens.
5. Navigate to the new location where the file is stored.
6. Click the **Select Folder** button to relink the file(s).
The images will reconnect and once again be accessible in your Catalog:
* **If the chosen folder is already in your Catalog**, all edits are transferred to the selected image(s). The images are automatically removed from the Lost Edits shortcut. If multiple images are in the same folder, their Lost Edits will also be resolved.
* **If the selected folder is not in your Catalog** – the new folder is added to your Luminar Catalog, and all edits are transferred to the image(s). The images are automatically removed from the Lost Edits shortcut. If multiple images are in the same folder, their Lost Edits will also be resolved.
### Matching Criteria
In order for the selected photos to reconnect, Luminar checks 3 parameters for the selected images.
* Source file name
* Image dimensions in pixels
* Original creation date
If all three properties match, the image will reconnect automatically. However, it is still possible to reconnect if the file name is changed as long as the image dimensions and creation date still match. If these properties do not match, you will receive an alert that **Image (image\_name) is not found in the selected folder** and the folder cannot be added.
Once a photo is matched, the following occurs:
* If all photos from the Lost Edits shortcut are located, the shortcut disappears from the shortcuts list.
* All attributes are transferred and are available for the selected photos.
* If there were multiple images from the same folder in Lost Edits > all these images will be located and added to the Library.
* For Raw+JPEG files, these will also be reconnected
### Reconnecting Lost Folder
As you work with folders and hard drives, it’s possible that images may move from time to time. For example, if an external hard drive is unmounted or disconnected, the folders linked to that hard drive will be grayed out. When you open those folders, you’ll still see image thumbnails and be able to set flags for the images. However, you won’t be able to edit or move those images while the drive is offline.
To bring these folders back online, simply reconnect or remount the external hard drive, and Luminar for Desktop will re-establish its link with the folders. Once reconnected, folders will no longer be grayed out, and you can edit and organize the images within them as usual.
In case you moved/renamed the folders while Luminar for Desktop was inactive, please follow the steps below in order to reconnect the Luminar for Desktop catalog with the folder(s):
1\. Go to the **Catalog** tab (in the top-bar menu);
2\. Right-click the folder with an exclamation mark next to it;
3\. Choose **Locate** **Folder** from the drop-down menu:

4\. In the window that opens, find and select the necessary folder.
{% hint style="success" %}
**Tips for working with folders and images:**
* To avoid breaking links to folders, move, rename, and organize any folders linked to your Catalog while Luminar for Desktop is running.
* Rename master folders in Luminar for Desktop and not in File Explorer (Windows) or Finder (macOS).
* Remember that relocating and renaming folders in Luminar for Desktop directly affects those folders on your hard drive.
{% endhint %}
# Revealing Original Images
Discover how to reveal the original version of your edited photos in Luminar for Desktop, allowing you to compare the before and after of your edits easily.
{% hint style="warning" %}
**Note:** Some interface details and visuals in this article may differ from the latest version of Luminar for Desktop. To see the current interface, visit the [Luminar for Desktop walkthrough](/how-to-use-luminar-for-desktop/luminar-for-desktop-walkthrough).
{% endhint %}
There are times when you want to locate an original photo on your hard drive. Perhaps you want to save or archive the original on another drive or email it to someone. Often, you just want to find another image you shot simultaneously but that isn’t in your Luminar for Desktop Catalog. No matter your goal, Luminar for Desktop allows you to locate your original image files on your hard drive quickly.
#### Show in Finder / File Explorer
Here’s how to locate content in your Luminar for Desktop Catalog on your hard drive. This can be useful for operations like copying or backing up data.
#### Single Image
To locate a single image on your hard drive:
1. Select an image in your Catalog.
2. **Right-click** on the image and choose **Show in Explorer** (Windows) or **Show in Finder** (macOS).
3. Luminar for Desktop will open **File Explorer** (Windows) or **Finder** (macOS) and reveal the file on your hard drive.
If you select multiple images before choosing **Show in Explorer/Show in Finder**, Luminar for Desktop will locate the first one you selected.
#### Folder
To locate a folder of images on your hard drive:
1. Switch to the **Catalog** view.
2. Under the **Folders** collection in the **Catalog** panel, select the folder or subfolder you wish to locate.
3. **Right-click** on it.
4. In the pop-up menu, choose **Show in Explorer** (Windows) or **Show in Finder** (macOS). Luminar for Desktop will reveal the folder on your hard drive.
{% hint style="warning" %}
**Note: External disks**
If an image or folder resides on an external hard drive and that hard drive is offline or disconnected, the **Show in Explorer/Show in Finder** option will not be available. Also, as they are virtual collections, albums do not have this as an option. However, individual images located inside albums can be revealed in **File Explorer** or **Finder**.
{% endhint %}
{% hint style="info" %}
**Tip: Multiple edits**
If you need to develop an image multiple times (similar to a virtual copy), simply locate the desired image and reveal it in the Finder or Explorer. You can then duplicate the photo and return it to Luminar for Desktop. You can now develop the second copy with different settings.
{% endhint %}
# Organizing Images
A broader overview of organizing tools and strategies in Luminar for Desktop to keep your projects orderly.
{% hint style="warning" %}
**Note:** Some interface details and visuals in this article may differ from the latest version of Luminar for Desktop. To see the current interface, visit the [Luminar for Desktop walkthrough](/how-to-use-luminar-for-desktop/luminar-for-desktop-walkthrough).
{% endhint %}
A well-organized photo library helps streamline your editing workflow and makes it easy to find the images you need. Luminar for Desktop offers the tools to help you sort, rate, and categorize your photos efficiently. In this guide, we’ll explore how to import, tag, and structure your images using features like albums, favorites, and ratings. Let’s dive in and take control of your photo organization!
# Organize Images
Learn how to sort, filter, and manage your photo library within Luminar for Desktop for efficient workflow.
{% hint style="warning" %}
**Note:** Some interface details and visuals in this article may differ from the latest version of Luminar for Desktop. To see the current interface, visit the [Luminar for Desktop walkthrough](/how-to-use-luminar-for-desktop/luminar-for-desktop-walkthrough).
{% endhint %}
A key benefit of working with Luminar for Desktop’s Catalog is organization. Finding your best and favorite photos makes your Catalog more useful. Taking the time to organize in Luminar for Desktop is essential.
Folders are the primary organizational tool in Luminar for Desktop. Folders in Luminar for Desktop are directly connected to folders on your hard drive. In addition to organizing folders on your hard drive within Luminar, you can also organize your images virtually using Albums. Albums let you organize your images into groups without affecting their location on your hard drive. Let’s explore both approaches.\
\
[#h\_01h0qdfh0damh6dzpcd8av4hc3](#h_01h0qdfh0damh6dzpcd8av4hc3 "mention")\
[#h\_01h0qdg3kjw9f7fq9sg60h30d9](#h_01h0qdg3kjw9f7fq9sg60h30d9 "mention")\
[#h\_01h0qdg9qx61dm4gfafex04vpm](#h_01h0qdg9qx61dm4gfafex04vpm "mention")
Organizing your images within folders in Luminar is a great way to keep your photo collection in order. All changes you make to folders in Luminar for Desktop directly affect how the folders on your hard drive are organized and vice versa. If you create subfolders or add new images to folders on your hard drive, your Luminar for Desktop Catalog will automatically be updated to reflect those changes.
#### What Are Folders?
When you add a folder of images to Luminar for Desktop, you create a direct link to that folder on your hard drive, along with all the subfolders and images it contains. You should consider managing folders and their contents in Luminar for Desktop as an alternative to managing these items directly within File Explorer in Windows or Finder in macOS.
#### Master Folders
There are three ways to add a folder to your Catalog:
* Click the **Add Photos** button at the top of the Catalog panel.
* Click the **Add Folder** icon (the + sign to the right of the word Folder) in the Catalog panel.
* Go to **File > Add Folder with Images…**
The folder you select will be added to your Folder collection as a top-level folder. All folders contained within that top-level folder will also be added as subfolders.
#### Using Subfolders
Any folders that already exist within a master folder you add to Luminar for Desktop are added to your Catalog as subfolders. If a new folder is added to a master folder from within the operating system, Luminar for Desktop will recognize that change and automatically add that subfolder to your Luminar for Desktop Catalog. You can also add subfolders to Luminar for Desktop. Subfolders make organizing images by client, location, or event easy.
#### Creating Subfolders
As you work in your Luminar for Desktop Catalog, you may want to create additional folders to get organized. You can quickly create subfolders inside any folder in your Catalog in two ways:
* Right-click on a folder and choose **New Subfolder**.
* Select a folder in the **Catalog** panel and choose **File > New Subfolder** from the main application menu.
A new subfolder called "New folder" will be created (you can rename it). This subfolder will also be created on your hard drive within the master folder.
Additionally, you can drag folders from one level to another to create nested folders. Simply drag a folder on top of another to nest it and convert it into a subfolder. The nested folder (now a subfolder) will be relocated both in your Luminar for Desktop Catalog and on your hard drive.
{% hint style="danger" %}
Please note that the nested folders feature doesn't work with the main folders in the Luminar for Desktop catalog. This means that you cannot move one main folder from one level to another when, e.g., there is also a main folder above and create a nested folder.
{% endhint %}
#### Renaming Folders
As you organize images, you may want to rename folders or subfolders. You might name folders to identify the status of images (such as “Selects”) or to split up collections by date or location.
If you rename a folder or subfolder within Luminar for Desktop, the name of the linked folder or subfolder will also be changed on your hard drive. If you change the name of a folder on your hard drive while Luminar for Desktop is running, your Catalog will automatically update to reflect the new name.
{% hint style="info" %}
**Note: Broken Links**
Renaming or moving a master folder on your hard drive when Luminar for Desktop is not running can break the link to your images and cause the renamed or moved folder to no longer be available in Luminar for Desktop (it will be grayed out). If this happens, you can reconnect the folder by changing its name to the original name in File Explorer (Windows) or Finder (macOS) or by moving the folder back to its original location and relaunching Luminar for Desktop.
{% endhint %}
### Moving Images Between Folders
You can move images and subfolders from one folder in your Catalog to another. When reorganizing your photos in Luminar for Desktop, you can select single or multiple images and drag them to master folders or subfolders. These images will be relocated on your hard drive to match their new locations inside your Catalog. You can also move an entire subfolder of images from one folder to another, which will also affect the folder structure on your hard drive.
{% hint style="info" %}
**Note: Moving folders**
If you move folders from one disk to another within Luminar for Desktop, the images in those folders will be moved (not copied). This means they will be transferred to the new location and erased from the original location.
{% endhint %}
#### Moving Images from the Single Image Edits Shortcut to a Folder (macOS)
The Edit Single Image command is a great way to work with individual images without having to add them to your collection of folders. Any image you open is tracked as a recent file in the **Single Image Edits** shortcut.
Images that have been temporarily added to Luminar for Desktop using the **Edit Single Image** command can be permanently added to your Luminar for Desktop Catalog.
1. Click on **Single Image Edits** in the top section of the Catalog panel.
2. Select an image (or multiple images)
3. Drag the image thumbnails onto any folder or subfolder in the **Folders** section of the Catalog panel. The images will be physically moved from their original location into the folder you specified on your hard drive.
{% hint style="info" %}
**Note:**\
When you drag an image from the **Single Image Edits** shortcut to a folder in Luminar for Desktop, it moves the photo on the hard drive to the new location.
{% endhint %}
These images will still appear in the **Single Image Edits** shortcut even though they are now part of your Library. To remove them from the Single Image Edit shortcut, select them and just press the **Delete** key. The image is removed from the Single Image Edits collection. Though no longer in the Single Image Edits collection, the images are in the new location you added to your Library.
### Using Albums to Organize Images
**Albums** let you organize your images into groups without affecting their location on your hard drive. Albums are a helpful way to sort your images into groups or categories, such as people, places, and pets.
#### What Are Albums?
Albums are virtual storage locations. Think of them as playlists for your photos. A song on your hard drive can live in a playlist based on the artist, the year it was released, or the musical genre it belongs to. So can a photo. One photo can be assigned to multiple albums. These might be named for the subject, where the photo was taken, or the event where the photo was shot.
#### How Are Albums Different from Folders?
Folders in Luminar for Desktop are directly linked to (and affect) folders on your hard drive. On the other hand, when you move an image between albums — or even one image into multiple albums — the folder structure on your hard drive doesn’t change as it does when working with folders. Also, if you delete a photo from an album, it remains in its original folder in Luminar for Desktop and on your hard drive.
Thus, albums allow you to organize your images inside Luminar for Desktop without affecting the structure of images on your hard drive.
#### Creating an Album
Creating albums is an easy way to organize your photos.
1. To create an album, select a single image or a group of images in your Catalog.
2. Click the **Add Album** button (the small **+** button to the right of the word Albums) in the **Catalog** panel. A new album will be created named “New Album,” and the image or group of images you selected will be placed in that album. You can also create a new album by selecting an image or images and choosing **File > New Album**, by **right-clicking** on an image or series of images and choosing **Create Album**, or by pressing **Cmd****+****N** (macOS) / **Ctrl****+****N** (Windows).
3. When you create an album, its name will be highlighted so you can easily rename it. Give your new album a descriptive name.
#### Renaming Albums
You can rename an album at any time by **right-clicking** on it and selecting **Rename** from the pop-up menu. It’s possible to have two albums with identical names, so be careful when naming albums so you can easily find your images in the future.
#### Copying Images Between Albums
Dragging images from one album to another puts those images in a new album without removing them from the first album. For example, you may have photos of people in your Paris Travel album and want those photos in your People album.
#### Removing Files from Albums
Removing an image from an album is easy; after doing so, the image file will remain in its original folder on your hard drive and in your Catalog.
1. Choose the album you want to remove an image from.
2. Select the image you want to discard (hold down the **Shift** key to select a range of images).
3. Right-click on one of the selected images, choose **Remove from Album**, or press the **Delete** key.
Your images will be removed from the selected album but live in other albums and their original folder(s). **Removing an image from an album does not affect the original file on your hard drive.**
{% hint style="danger" %}
**Warning**: If you select **Move to Trash** on an image in an album, all instances of that photo will be removed from any albums it has been assigned to, and the original file will be moved from its folder and placed in the Luminar for Desktop Trash shortcut.
{% endhint %}
### Moving Images from the Single Image Edits Shortcut to an Album
Over time images in your **Single Image Edits** shortcut will accumulate. These images are considered temporary and do not reside in any of the Folders in Luminar. You can organize images you brought into your Single Image Edits shortcut into an existing Album or create a new album.
This is a great way to organize images you want to edit but not affect where they are located on your hard drive. When you remove an image from the Single Image Edits shortcut, it will also be removed from any Albums you have added it to.
{% hint style="info" %}
**Note: Moving single image edits**\
\[Mac only] If you drag a Single Image Edits image from an Album into a Folder, that photo will be moved from its original location into the corresponding folder on your hard drive.
{% endhint %}
# Star Ratings in Luminar for Desktop
Learn how to assign star ratings to your images in Luminar for Desktop to help sort and categorize your photos efficiently and streamline your editing workflow.
{% hint style="warning" %}
**Note:** Some interface details and visuals in this article may differ from the latest version of Luminar for Desktop. To see the current interface, visit the [Luminar for Desktop walkthrough](/how-to-use-luminar-for-desktop/luminar-for-desktop-walkthrough).
{% endhint %}
{% @arcade/embed url="" flowId="aEy9wQE9VukuSWwfbFhB" %}
The **Star Ratings** feature in Luminar for Desktop allows you to easily rate and organize your photos, helping you quickly identify your best shots and sort through large collections. You can rate each photo with a score ranging from **1 star** to **5 stars**.
**Viewing and Filtering by Star Ratings**
Once you've rated your photos, you can filter and sort your library based on star ratings, making it easy to find your best images when you need them.
To filter your images by star rating:
1. Go to the **All Photos**.
2. Select the **Rating** option.
3. Choose the desired star rating to display only photos with that specific rating.
# Marking Favorite and Rejected Images
Organize your photo library in Luminar for Desktop by marking favorites and rejected images. This guide shows you how it works.
{% hint style="warning" %}
**Note:** Some interface details and visuals in this article may differ from the latest version of Luminar for Desktop. To see the current interface, visit the [Luminar for Desktop walkthrough](/how-to-use-luminar-for-desktop/luminar-for-desktop-walkthrough).
{% endhint %}
{% @arcade/embed url="" flowId="4BX4N9SWNYnkeYGAut6A" %}
Over time, your photo catalog will grow. One of the key benefits of a Luminar for Desktop catalog is finding just the images you want to work with, view, or share. Flags make it easy to find your favorites.
\
[#h\_01h0qdn7hdagw06g5t1kbydt3m](#h_01h0qdn7hdagw06g5t1kbydt3m "mention")\
[#h\_01h0qdnhgpvhmcgkqn5zkjdvj6](#h_01h0qdnhgpvhmcgkqn5zkjdvj6 "mention")\
[#h\_01h0qdnc27y7zejzhsc6ktcx1n](#h_01h0qdnc27y7zejzhsc6ktcx1n "mention")
### Understanding Flags
**Flags** are an easy way to rate and sort images. There are three types of Flags that you can apply to an image.
* **Favorite.** Favorite images are the images you may want to work on later or easily find again.
* **Rejected.** These are images you know you will not want to use. This could be based on focus issues, closed eyes, or other problems that can’t be fixed in editing.
* **Unmarked.** Images that are neither Favorite nor Rejected remain unmarked. You can filter out everything but unmarked images to determine if you want to flag or reject them. Images that have been Favorited or Rejected can have their rating removed using the **Unmarked** command.
### Choosing Favorite Images in the Catalog View
The most accessible place to choose your favorite images is the **Catalog**. This is because you can compare images to each other.
In the **Gallery View**, you can directly mark a photo as a favorite on the image thumbnail. When you hover your mouse over a thumbnail that is unmarked, a small outline of a heart appears in the lower right corner of the thumbnail.
To start:
1. Click a Shortcut in the Catalog panel or choose a Folder, Subfolder, or Album for the images you want to work with.
2. Press the **L** key, ensuring you are in **Gallery View** mode.
3. Adjust the thumbnail size (**Small**, **Medium**, **Large**, or **Largest**) with the **Zoom Controls** in the upper left corner so you can easily see image details.
4. Click the hollow **heart icon** on the lower right edge of each thumbnail; the heart can be toggled on or off with each click to mark **Favorite** or **Unmarked**.
{% hint style="info" %}
**Tip: More flags**
Use your mouse to flag images. Right-click on an image, mouse over **Set Flag**, and choose from **Favorite**, **Rejected**, or **Unmarked**.
{% endhint %}
### Marking Favorite Images in the Single View
You can also add a Flag to an image in the Edit panel or Single Image Catalog view. This can be useful as you enhance the image as you might change your mind about how good it is (especially after taking advantage of Luminar for Desktop’s tools).
To start:
1. Click a Shortcut in the Catalog panel or choose a Folder, Subfolder, or Album for the images you want to work with.
2. Press the **G** key, ensuring you are in **Gallery View** mode. This mode makes it easy to get an overview of a folder or album’s contents so you can choose the image you want.
3. Choose the image you’d like to edit and double-click to enter the **Single Image** view.
4. The individual image opens, and you should see flags and other helpful information below the image on Canvas.
5. If hidden, click the **View** menu and make sure the **Show Photo Actions Panel** is marked. You can now flag directly below the image.
From left to right, here’s what’s displayed
* **Filename.** Matches the name of the file on your hard drive.
* **Favorite.** Click the heart to flag the image as a favorite.
* **Rejected.** Click the X to reject the image.
* **Visibility Icon.** Click to view the before and after if the image is edited.
* **Zoom**. Click the dropdown menu to change the Zoom percentage.
You can also use keyboard shortcuts to label images.
* **P** Favorite
* **X** Rejected
* **U** Unmarked
# Find Your Photos
{% hint style="warning" %}
**Note:** Some interface details and visuals in this article may differ from the latest version of Luminar for Desktop. To see the current interface, visit the [Luminar for Desktop walkthrough](/how-to-use-luminar-for-desktop/luminar-for-desktop-walkthrough).
{% endhint %}
### Using Shortcuts to Find Your Photos
One of the easiest ways to find your images is with shortcuts at the top of the Catalog panel. Luminar for Desktop makes it easy to locate your photos based on standard and powerful criteria.
#### **All Photos**
Selecting the **All Photos** shortcut loads all photos in your current catalog. If you click on the small disclosure Triangle, you can browse your Library by **Year**, **Month**, or **Day**. Photos are automatically sorted based on their file creation or capture date.
#### **Single Image Edits**
If you have chosen to use the **Edit Single Image** command, the **Single Image Edits** shortcut will appear in the list. Selecting this will show all of the images you have temporarily added to your library to process.
#### **Favorites**
If you have Flagged any images as Favorites, the **Favorites** shortcut will appear. This is the quickest way to find all of your favorite images. Combining this option with a selection from the Viewing Filter allows you to filter your favorite images by additional criteria. Click the dropdown list next to the words **Showing: All Photos** in Gallery View to get started.
#### **Recently Added**
Recently added photos appear under the **Recently Added** shortcut. If you click on the small disclosure triangle you can browse these images by the specific day they were added to your library.
#### **Recently Edited**
If you want to review images that you have edited quickly, select the Recently Edited shortcut. All of your edited images will appear. If you click on the small disclosure triangle, you can refine what Luminar for Desktop shows you by Today, Yesterday, This Week, or This Month.
#### **Lost Edits**
If you have images Luminar for Desktop has lost track of, they’ll appear in the [**Lost Edits**](/how-to-use-luminar-for-desktop/catalog/reconnecting-lost-edits) section. If there are no issues, this section is hidden.
#### **Trash**
You can review images you’ve queued for deletion in the **Trash** shortcut. The images can either be deleted from Luminar for Desktop and moved to the system trash for cleanup or returned to the Luminar for Desktop catalog.
#### **Custom Shortcuts**
Right-click on a folder or album to choose **Add to Shortcuts** for quick access. If you ever change your mind, just right-click on the shortcut and choose **Remove from Shortcuts.** You can also drag shortcuts in the list into a new order.
### Using Search to Find Your Photos
You can find photos in Luminar for Desktop with the **Search** tool located in the top left of the Catalog panel. The Search tool lets you quickly find images by image name, folder name, date, or extension.
# Filtering the View of Your Images
{% hint style="warning" %}
**Note:** Some interface details and visuals in this article may differ from the latest version of Luminar for Desktop. To see the current interface, visit the [Luminar for Desktop walkthrough](/how-to-use-luminar-for-desktop/luminar-for-desktop-walkthrough).
{% endhint %}
**Filtering Catalog** is a feature that allows users to sort and narrow down their photo collection by applying filters based on various metadata (data about the image) and image attributes. This includes:
* **Filter by camera model** (the specific camera used to take the photo).
* **Filter by focal length** (the distance between the camera lens and the image sensor, affecting zoom and field of view).
* **Filter by ISO** (a camera setting that controls the sensor's sensitivity to light).
* **Filter by shutter speed** (when the camera’s shutter is open to let light in, affecting exposure).
* **Filter by aperture** (the size of the camera's lens opening, impacting the depth of field and brightness).
* **Filter by rating** (user-assigned ratings, such as star ratings for favorite or important images).
These extensive filtering options enable users to quickly locate specific images based on detailed criteria, making it easier to manage large photo collections.
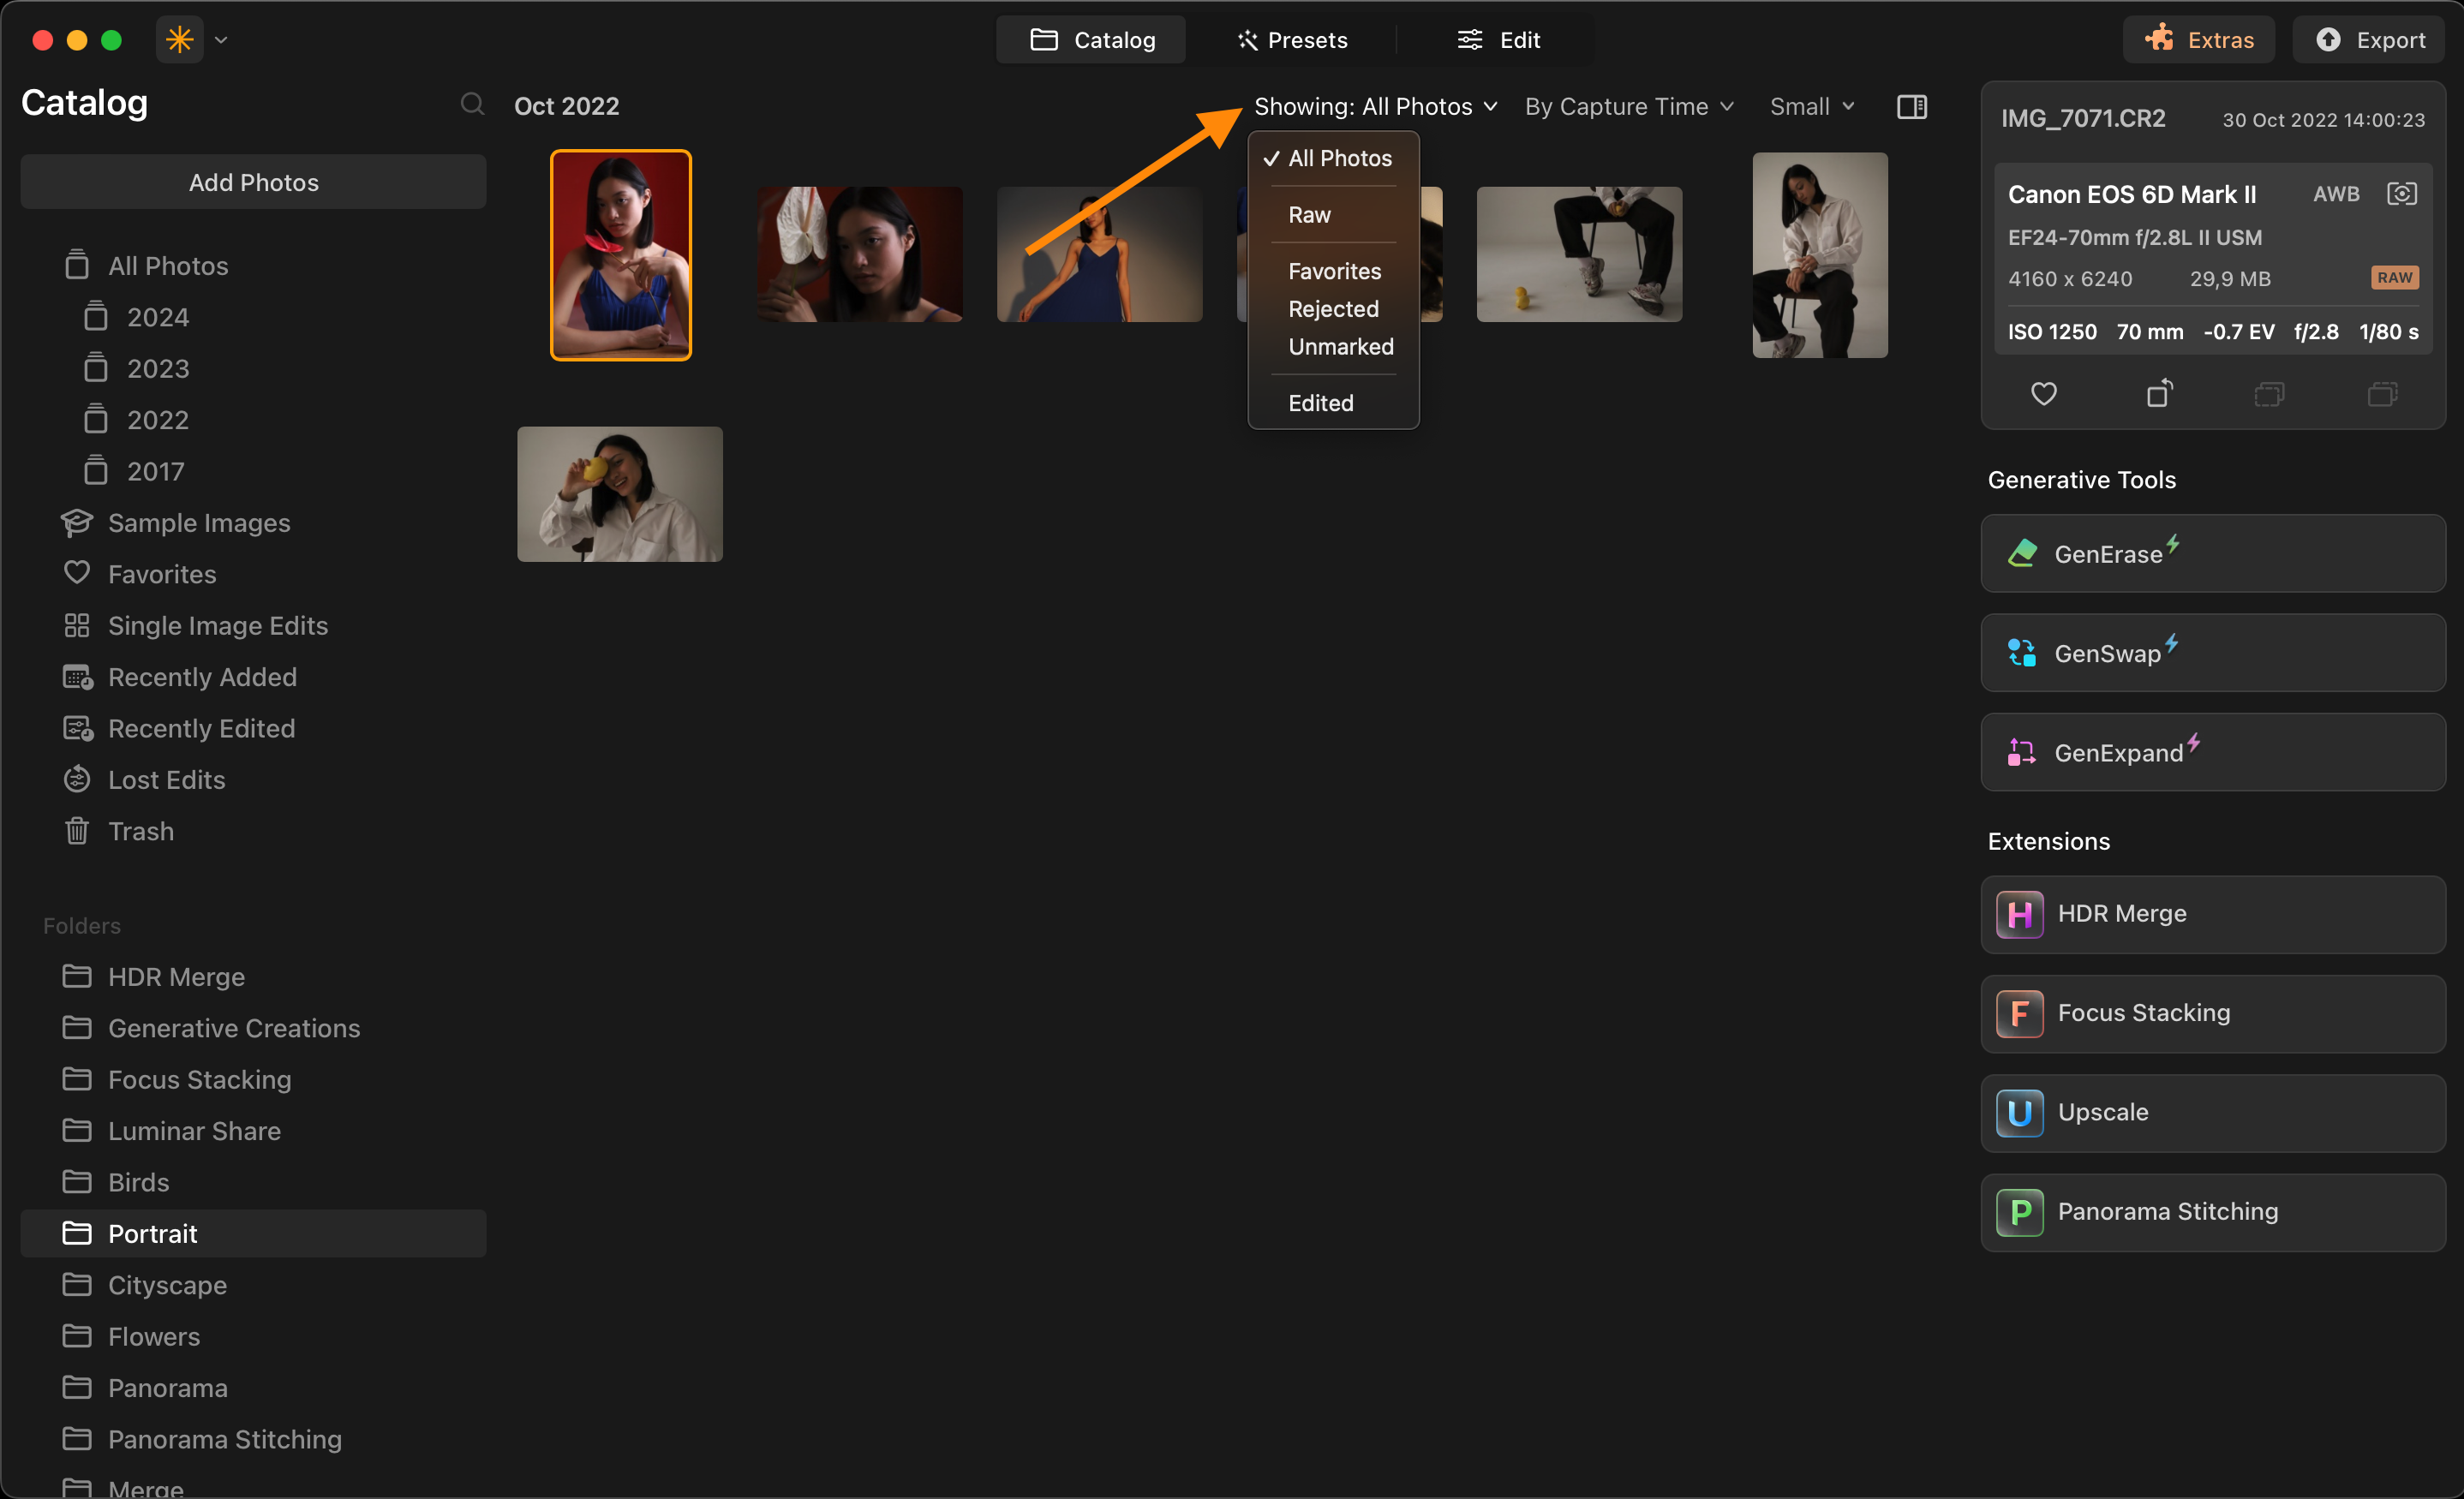
The **Showing All Photos** drop-down menu (located to the left of the **By** menu in the upper right corner of the Catalog) allows you to filter your images by **Favorites**, **Rejected**, **Unmarked, RAW,** and **Edited**. Finding the best ones can be tricky with hundreds, thousands, or even hundreds of thousands of pictures. The Showing menu allows you to filter your photos quickly.
Combining the filters in the **Showing** drop-down menu with the sorting functions in the **By** menu allows you to find exactly what you need in a few clicks. For example, you might show only Favorites organized by Capture Time.
#### Showing Filters
* **Favorites**. This filter shows only images you have flagged as favorites.
* **Rejected**. This filter shows only images you have rejected.
* **Unmarked**. This filter shows all images not tagged as either Favorite or Rejected.
* **RAW.** All photos in RAW format
* **Edited**. This filter shows all images you have edited. Showing only edited images makes it easy to find the photos you have already processed.
Moreover, you can filter your photos by capture time too:
#### Adjusting image thumbnail size
When viewing photos in the **Gallery** view, image thumbnails can be resized for better viewing. From the **Thumbnail Size** dropdown menu, choose between **Small**, **Medium**, **Large**, and **Largest**.
{% hint style="info" %}
When in Single Image View, the Thumbnail Size dropdown menu is hidden.
{% endhint %}
# Sorting Images
Learn how to sort your images by various criteria, such as date, rating, or file type, to quickly find specific photos within Luminar for Desktop's interface.
{% hint style="warning" %}
**Note:** Some interface details and visuals in this article may differ from the latest version of Luminar for Desktop. To see the current interface, visit the [Luminar for Desktop walkthrough](/how-to-use-luminar-for-desktop/luminar-for-desktop-walkthrough).
{% endhint %}
The **By** drop-down menu lets you choose the order in which you view images in the Catalog.
The **By** menu lets you easily switch between different sorting options depending on your needs in the upper right corner of the Catalog. For example, you can find your photos using By **Capture Time**, **Edit Time**, **Pick** (Flag status), **File Name**, **File Type**, **File Size**, and **Ascending** or **Descending**.
* **Capture Time**. This option sorts your images using date and time metadata. This allows you to quickly find your most recent (or the oldest) photos in a folder or album.
* **Edit Time**. This option allows you to sort your photos by the last date you edited them in Luminar for Desktop. This is great when you reopen your Catalog after a break and want to locate the images you were last working on quickly.
* **Pick**. This option groups and sorts your images by how you have flagged them. If you sort by ascending, you will see Unmarked, Rejected, and Favorite images in that order. Switching to Descending reverses the order, showing Rejected images first, then Favorites, and finally Unmarked.
* **File Name**. This option sorts your images by file name. Files starting with a number will appear first, followed by letters from A to Z. When set to Descending order, images will be sorted from Z to A and then numerically from highest to lowest.
* **File Type**. This option categorizes and sorts images by file type, such as JPEG, TIFF, and raw. These groups are sorted alphabetically by the file identifier. For example, Sony raw images would appear first, as they are ARW files. Canon raw files would appear second, as they are CR2 files, followed by JPG, Nikon NEF files, Fujifilm RAF files, and TIFFs.
* **File Size**. You can sort your photos by the size of the files. This is useful if you have multiple versions of the same photos, perhaps low-quality thumbnails and the original JPEGs. Sorting by size lets you easily group photos and quickly delete them from your Catalog in the case of low-resolution thumbnails.
* **Ascending**. This option works with the other filter criteria, sorting filter results from smallest to largest, A to Z, lowest number to highest number, oldest to newest, and so on.
* **Descending**. This option works with the other filter criteria and reverses the sorting order, displaying results from largest to smallest, Z to A, newest to oldest, etc.
# Sorting Folders and Albums
Learn how to organize your images into folders and albums with Luminar for Desktop’s sorting features to keep your photo library clean and easy to navigate.
{% hint style="warning" %}
**Note:** Some interface details and visuals in this article may differ from the latest version of Luminar for Desktop. To see the current interface, visit the [Luminar for Desktop walkthrough](/how-to-use-luminar-for-desktop/luminar-for-desktop-walkthrough).
{% endhint %}
**Sort Folders and Albums** is an organizational feature that helps users manage their photo catalog more efficiently by allowing them to sort folders and albums using various attributes. Users can arrange their collections based on criteria such as date, name, size, or custom attributes. This feature simplifies the management of large photo collections, making it easier to find and access specific albums or folders, thus streamlining workflows for photographers and editors.
#### **How to Sort:**
* Select your desired sorting option from the folder or album dropdown menu to quickly organize your collection.
#### **Sorting Options**
Users can sort their folders and albums based on several criteria:
* **Folder Name**: Sort your folders and albums alphabetically for easy retrieval by title.
* **Creation Date**: Organize your collections chronologically. This is especially useful when working on time-sensitive projects or reviewing recent shoots.
* **Recently Updated**: Sort folders and albums based on when they were last updated. This is helpful for quickly accessing collections you’ve recently edited or added new photos to, ensuring you can pick up right where you left off.
* **Photo Count**: Arrange folders and albums by the total number of photos they contain. This helps you identify larger or smaller collections at a glance, which can be useful for organizing and prioritizing your workflow based on the size of your projects.
# Handling Raw + JPEG Pairs
Learn how Luminar for Desktop handles RAW + JPEG image pairs and how to customize your workflow to best suit your editing and file management needs.
{% hint style="warning" %}
**Note:** Some interface details and visuals in this article may differ from the latest version of Luminar for Desktop. To see the current interface, visit the [Luminar for Desktop walkthrough](/how-to-use-luminar-for-desktop/luminar-for-desktop-walkthrough).
{% endhint %}
Some photographers choose to shoot raw and JPG files simultaneously in order to have the JPG files as a reference for in-camera processing or as a backup. Luminar for Desktop makes it easy to organize files that are captured in raw and JPG pairs.
When you import raw and JPEG pairs, you can decide which files you see to keep your Catalog uncluttered.
1. Click the View menu, choose **View > Raw + JPEG Pairs** and select the desired option.
2. Choose one of these based on need.
* **Show Raw Only**. If a raw and a JPEG exist in the same folder with the same file name, Luminar for Desktop will only show the raw image.
* **Show JPEG Only**. If a raw and a JPEG exist in the same folder with the same file name, Luminar for Desktop will only show the JPEG image.
* **Show Separately**. This option will show all raw and JPEG images in your Catalog so you can use JPG files as a reference while you edit.
3. You can change your view at any time.
Or you can choose RAW format in the Catalog filter:
Here are some rules when it comes to adjusting and flagging image pairs:
* Edits to JPG and raw files are independent but can easily be synced. Use the View menu described above to control which images are shown for a clutter-free Catalog.
* Flagged, Rejected, and Unmarked flags are applied to the JPG and raw files in a pair when you modify either.
* If you move a JPG or raw file part of a pair, the other file in the pair will be moved along.
* If you choose to view Raw Only or JPG Only, deleting a raw or JPG image will move both files in the RAW/JPG pair to the Trash collection in Luminar for Desktop.
* If you are viewing raw and JPG files separately, you can delete raw and JPG images independently of each other.
# Virtual Copies
Learn how to create virtual copies of your images in Luminar for Desktop to experiment with different edits without altering your original photos, preserving your originals.
{% hint style="warning" %}
**Note:** Some interface details and visuals in this article may differ from the latest version of Luminar for Desktop. To see the current interface, visit the [Luminar for Desktop walkthrough](/how-to-use-luminar-for-desktop/luminar-for-desktop-walkthrough).
{% endhint %}
{% @arcade/embed url="" flowId="4885KA3G0gerKOEqjhJ3" %}
**Virtual Copies** allow users to create multiple versions of a single photo without duplicating the original file. This feature is particularly useful for photographers and editors who want to experiment with different editing styles, crops, and adjustments while keeping the original photo intact. Each virtual copy can have its own unique edits, giving users the flexibility to explore creative possibilities without consuming additional storage space or risking changes to the original image. This fosters creative experimentation and ensures the preservation of the unaltered photo.
#### How to Create a Virtual Copy:
* **Keyboard Shortcut**: Create a virtual copy using **Windows**: **Ctrl**** + ****'** or **macOS**: **Cmd**** + ****'**
* **Right-Click**: Right-click the image and select "Virtual Copy" from the menu.
* **Actions Menu**: You can also create a virtual copy by selecting it from the **Actions** drop-down menu.
To remove a virtual copy, simply move it to the trash can. This will delete the virtual copy, but the original image will remain unaffected.
# Working with the Trash folder
Learn how to manage your deleted images in Luminar for Desktop’s Trash folder, allowing you to recover or permanently delete photos from your workspace for better organization.
{% hint style="warning" %}
**Note:** Some interface details and visuals in this article may differ from the latest version of Luminar for Desktop. To see the current interface, visit the [Luminar for Desktop walkthrough](/how-to-use-luminar-for-desktop/luminar-for-desktop-walkthrough).
{% endhint %}
{% @arcade/embed url="" flowId="us62OZmWrwHMI7GZ8iP6" %}
While editing, you can move images to the trash directly from within Luminar for Desktop. This makes it easy to organize your hard drive and reduces clutter. Remember that **deleting files from folders in Luminar for Desktop will also delete them from your hard drive**. To help you avoid permanently deleting your original photos unintentionally, Luminar for Desktop includes multiple warnings.
#### Deleting a File in Luminar for Desktop
To delete one image or multiple images in Luminar for Desktop, select one or several images in the **Catalog**, **right-click** on the image(s), and choose **Move to Luminar Trash** from the pop-up menu. Alternatively, you can press **Cmd****+****Delete** (macOS) or **Ctrl****+****Delete** (Windows). The selected images will be hidden in the current folder Luminar for Desktop and placed into the **Trash** shortcut.
The **Trash** shortcut in Luminar for Desktop is a staging area. When files are in the Trash shortcut, they are still on your hard drive in the same place they had been. Click on the Trash shortcut to see additional controls.
#### Restoring Files from the Trash
Images in the Trash shortcut are still on your hard drive and can easily be restored to their original location in your Catalog.
**To restore images from the Trash:**
1. Select the image(s) you want to restore.
2. Choose **Image > Put Back** to restore the image(s) in your Catalog, or **right-click** on the image (or one of the selected images) and choose **Put Back**.
#### Emptying the Trash in Luminar for Desktop
To permanently remove an image from the Luminar for Desktop Catalog:
* All references to the image in its folder are removed from Luminar.
* All edits are removed (be sure to export a new file to your hard drive if you want to save these first).
* Any references to the image are removed from Albums.
There are two ways to empty the Trash in Luminar for Desktop:
* **Right-click** on a single image or on one of the multiple selected images and select **Delete** from the pop-up menu.
* Click the **Empty Trash** button at the top of the Catalog window.
This will send all images in the Trash shortcut in Luminar for Desktop to your operating system’s **Trash** (macOS) or **Recycle Bin** (Windows).
At this point, your files are not yet deleted from your hard drive. Luminar for Desktop has only moved your files to the operating system’s **Trash** (macOS) or **Recycle Bin** (Windows). You can still open your computer’s Trash/Recycle Bin and retrieve the files. To permanently delete the files, empty the Trash or Recycle Bin.
#### Emptying the Trash/Recycle Bin
{% tabs %}
{% tab title="MacOS" %}
To permanently delete images from your hard drive, you need to empty the **Trash** on your computer. This must be done at the operating system level.
* **Choose Finder > Empty Trash…**
{% endtab %}
{% tab title="Windows" %}
To permanently delete images from your hard drive, you need to empty the **Recycle Bin** on your computer. This must be done at the operating system level.
* Find the **Recycle Bin** icon on the desktop, then **right-click** it and choose **Empty Recycle Bin**.
{% endtab %}
{% endtabs %}
# Extra Tools
Explore the suite of catalog tools in Luminar for Desktop designed to organize and manage your images.
{% hint style="warning" %}
**Note:** Some interface details and visuals in this article may differ from the latest version of Luminar for Desktop. To see the current interface, visit the [Luminar for Desktop walkthrough](/how-to-use-luminar-for-desktop/luminar-for-desktop-walkthrough).
{% endhint %}
Luminar for Desktop’s Extra Tools go beyond simple photo organization—they empower you to transform and enhance your images with advanced features. From creating stunning panoramas with **Panorama Stitching** to enhancing details through **HDR Merge** and **Focus Stacking**, these tools are designed to elevate your editing process. You can also enlarge images without losing quality using **Upscale AI** and explore creative possibilities with **Generative Features**. In this section, we’ll dive into each of these powerful tools and show you how to make the most of them in your workflow.
# Extra tools in the Plugin mode
Discover how to use catalog tools effectively when operating Luminar for Desktop as a plugin.
{% hint style="warning" %}
**Note:** Some interface details and visuals in this article may differ from the latest version of Luminar for Desktop. To see the current interface, visit the [Luminar for Desktop walkthrough](/how-to-use-luminar-for-desktop/luminar-for-desktop-walkthrough).
{% endhint %}
When you use Luminar for Desktop as a plugin for Photoshop or Lightroom Classic, all tools located in the Edit and Presets tabs will be accessible.
Also, you can use the HDR Merge, Focus Stacking, and Upscale AI tools in the Lightroom plugin. Achieve even more impressive results with any editing workflow.
Moreover, please keep in mind that if you invoke Luminar for Desktop from Photoshop or select the “Edit a Copy with Lightroom Adjustments” option in Lightroom Classic, you’ll get a TIFF file in the Luminar plugin.
Therefore, if you need to work with the RAW file in Luminar, you need to upload it in standalone mode.
Alternatively, using Lightroom Classic, you can choose ‘Export Original’ after right-clicking the photo > Export > Luminar for Desktop > Open Source Files.
When you use Luminar for Desktop as an Extension to Photos on macOS, Catalog tools are not available.
# Generative tools
Explore Luminar for Desktop’s AI-powered generative tools that unlock new levels of creativity and automation.
{% hint style="warning" %}
**Note:** Some interface details and visuals in this article may differ from the latest version of Luminar for Desktop. To see the current interface, visit the [Luminar for Desktop walkthrough](/how-to-use-luminar-for-desktop/luminar-for-desktop-walkthrough).
{% endhint %}
Discover more efficient workflow tips:
{% embed url="" %}
# GenErase
Learn how to use GenErase to intelligently remove objects and fill gaps in your photos with AI-generated background content.
{% hint style="warning" %}
**Note:** Some interface details and visuals in this article may differ from the latest version of Luminar for Desktop. To see the current interface, visit the [Luminar for Desktop walkthrough](/how-to-use-luminar-for-desktop/luminar-for-desktop-walkthrough).
{% endhint %}
{% @arcade/embed url="" flowId="LX1QRrvuzh1wJFqXe2Zn" %}
#### What is GenErase
GenErase is an advanced Erase tool representing the next generation of image editing. It not only removes undesirable visual distractions from your images but also applies content-aware AI techniques to replace these elements intelligently. This process results in a composition that is both focused and devoid of distractions. GenErase's unique capability is to uphold the integrity of your photos by automatically filling in the erased areas with textures and elements that seamlessly match the surrounding context, all thanks to the power of AI. GenErase excels at effortlessly eliminating objects like litter, street signs, utility poles, vehicles, graffiti, crowds, and more, preserving the inherent beauty of your composition.
**Preview Icon**: To observe the outcomes before and after, click the preview icon, represented by an eye symbol.:
**Zoom Feature:** Adjust your view using the zoom slider or the left and right bracket keys to magnify or shrink the view of the image.
**Select:** When you need to replace an object, activate the "select" option, fine-tune the brush size, and paint over the region you wish to substitute. It's advisable to be generous with your selection, providing the tool with more intricate details to enhance accuracy.
**Deselect:** Once an object is selected, enable the "deselect" option, refine the brush size, and paint over the area you want to exclude from the selection.
**Reset Selection:** Following the application of GenErase, the object remains selected. If the desired outcome isn't achieved, you can reapply the erase tool by selecting it again. If you wish to erase a different object, reset the current selection and create a new one.
**Erase button:** To utilize GenErase and eliminate the selected object while also intelligently replacing unwanted visual distractions in your images, simply click the erase button. This innovative tool goes beyond essential removal, harnessing content-aware AI techniques for a refined result. You can continue to select the erase button to cycle through different outcomes, fine-tuning your edits until you achieve the desired result.
**Cancel Button:** If you opt not to implement the alterations, simply click the cancel button.
**Save Button:** When content with the GenErase outcomes, click the save button to confirm the changes. This will generate a new image saved in TIF format, renamed with the GENERASE extension, and added to the Genitive Creations folder.
#### Applying GenErase
Below is a detailed, step-by-step guide for replacing undesired objects in an image with GenErase.
1\. Begin in the Catalog view and choose an image with objects you want to replace.
2\. Adjust the brush size and select the unwanted object generously. Precision is not required. You can deselect a selection by clicking the Deselect button.
3\. Click the Erase Button to initiate the object replacement. You can repeatedly select the erase button to explore different outcomes, fine-tuning your edits until you achieve the desired result.
4\. To switch to a different object, select the Reset Button and pick the desired object. For optimal results, handle individual objects separately.
5\. Confirm your changes by clicking the save button.
6\. The new image will be saved in the Genitive Creations folder.
{% hint style="info" %}
**Tips:**
* We recommend removing objects **one by one**, ensuring they are fully marked. For example, if you need to erase an unwanted person and a car in the background, start by removing the car, fully masking the object. After successfully removing the car, proceed to erase the person in the same manner.
* If you are dissatisfied with the result, it's advisable to **continue erasing** or consider restarting the process from the beginning.
* Achieving the best result often requires **a few attempts.**
* In case you encounter an error message, please wait for 20-30 minutes, reload the app, and then try again. There may be instances when too many users are accessing the tool simultaneously, causing server delays. However, rest assured, we are diligently working on mitigating such occurrences.
{% endhint %}
*Check the video for more information:*
{% embed url="" %}
# GenSwap
Learn how to swap elements within a photo using AI to creatively replace skies, objects, or backgrounds with GenSwap.
{% hint style="warning" %}
**Note:** Some interface details and visuals in this article may differ from the latest version of Luminar for Desktop. To see the current interface, visit the [Luminar for Desktop walkthrough](/how-to-use-luminar-for-desktop/luminar-for-desktop-walkthrough).
{% endhint %}
{% @arcade/embed url="" flowId="iekh61PaZDrYahxVl6Ck" %}
#### What is GenSwap
GenSwap is advanced Generative AI technology that empowers photographers to alter image compositions by substituting or exchanging objects and effortlessly incorporating new AI-generated details based on user input.
GenSwap enables users to enhance their images by introducing elements like trees, animals, and more, turning ordinary photos into captivating visuals. For instance, you can replace an unappealing tree with a more attractive one, introduce a bird into the sky, or place a stone in the desert to enrich and improve your photograph.
{% hint style="danger" %}
**Important**: starting from Update 1.16.0, we no longer support Luminar for Desktop on Apple computers with macOS Catalina (10.15) and macOS Mojave (10.14). While Luminar for Desktop will continue to function on these older operating systems, we cannot guarantee uninterrupted access to the latest features, such as GenSwap.
To upgrade macOS, please follow the instructions provided by Apple in this [link](https://links.skylum.com/u/click?_t=2088cd84ffd8445d8d73ad17da8e58aa&_m=84eX6EJR0cBuew7qns5uruWbE6Q9hGgHm&_e=r5ABN7Bcafo86DcfnYXYTfY4VLv8CJglhb-MwSUchvIskfVZm7zenMCFlcq4rxLYHEJTUcDhR9hapOf7ZOsSbeul5DVfZK1J0i5GycTy4ysMsEomVjFpTtBY9USof5npzsxxnc4QAXLKEUaQH2gg7C0Ahys9scE5h5ZePzztV_Ly969DNfbndPf9EOMbgLtkzthQ5EVOBMsjICdjVS5H3eC52rVtYfte-SiRuqCEW38%3D).
{% endhint %}
**Prompt Input:** Once a selection is made, the prompt text box labeled "What do you envision here?" will appear. Enter your detailed prompt in the designated text field, using nouns or adjectives plus nouns. Specify precisely what you want to see, such as "blue sea" or "big tiger," and refrain from using verbs like "change," "erase," "remove," "add," or "create."
{% hint style="info" %}
**Inappropriate content error**
If you encounter an "inappropriate content" error message and are confident there's no violation of our terms and conditions, try altering the mask or the prompt. While GenSwap may function with prompts in other languages, we recommend using English for more accurate results.
{% endhint %}
**Undo/Redo Functionality**: allows you to reverse or repeat the previous action.
**Preview Icon**: To observe the outcomes before and after, click the preview icon, represented by an eye symbol.
**Zoom Feature:** Adjust your view using the zoom slider or the left and right bracket keys to magnify or shrink the view of the image.
**Select:** When swapping an object, activate the "select" option, fine-tune the brush size, and paint over the region you wish to substitute. It's advisable to be generous with your selection, providing the tool with more intricate details to enhance accuracy.
**Deselect:** Once an object is selected, enable the "deselect" option, refine the brush size, and paint over the area you want to exclude from the selection.
**Reset Selection:** Following the application of GenSwap, the object remains selected. If the desired outcome isn't achieved, you can reapply the swap tool by selecting it again. If you wish to replace a different object, reset the current selection and create a new one.
**Swap button:** Simply click the swap button to utilize GenSwap and replace the selected object in your image. This innovative tool goes beyond essential swapping, harnessing content-aware AI techniques for a refined result. You can continue to choose the swap button to cycle through different outcomes, fine-tuning your edits until you achieve the desired result.
**Cancel Button:** If you opt not to implement the alterations, simply click the cancel button.
**Save Button:** When content with the GenSwap outcomes, click the save button to confirm the changes. This will generate a new image saved in TIF format, renamed with the GENSWAP extension, and added to the Genitive Creations folder.
### Applying GenSwap
Below is a step-by-step guide for swapping objects in an image with GenSwap.
1\. Begin in the Catalog view and choose an image with objects you want to swap.
2\. Adjust the brush size and select the object generously. Precision is not required. You can deselect a selection by clicking the Deselect button.
3\. Write a descriptive prompt in the prompt text box using nouns or adjectives plus nouns. Specify precisely what you want to see, such as "blue sea" or "big tiger," and refrain from using verbs like "change," "erase," "remove," "add," or "create."
4\. Click the Swap Button to initiate the object replacement. You can repeatedly select the swap button to explore different outcomes, fine-tuning your edits until you achieve the desired result.
5\. Click the preview icon to view the before and after results.
6\. Confirm your changes by clicking the save button.
7\. The modified image will be renamed, with "GenSwap" included in the filename, and then saved in the Genitive Creations folder.
{% hint style="info" %}
**Tips**
1. **Make Object Swaps for Optimal Results:** Remember, the tool is crafted for swapping objects. When you're creating something new, the best results come from swapping existing elements.
2. **Craft Your Prompts Thoughtfully:** Avoid unsatisfactory results by using well-phrased prompts. Imagine that the object is already in your photo, and you are describing it.
3. **Mask It Right for Magic:** Masks are your secret weapon! Ensure you get the best outcomes by using masks in different ways.
4. **Iterate and Experiment:** Not happy with the first try? No worries! Play around with the same mask, try different prompts, or adjust your approach. It's like magic—you might discover the perfect combination.
5. **Size Matters—Mark It Clearly:** If you're getting "nothing" in the result, check your marked area. Ensure it's large enough for the tool to work its magic and match the size accurately.
{% endhint %}
*Check the video for more information:*
{% embed url="" %}
# GenExpand
Learn how to extend image boundaries realistically using GenExpand, the AI tool that intelligently fills added space.
{% hint style="warning" %}
**Note:** Some interface details and visuals in this article may differ from the latest version of Luminar for Desktop. To see the current interface, visit the [Luminar for Desktop walkthrough](/how-to-use-luminar-for-desktop/luminar-for-desktop-walkthrough).
{% endhint %}
{% @arcade/embed url="" flowId="lc1WMhdzsdk0oSOnUV9J" %}
#### What is GenExpand
GenExpand is a groundbreaking tool that empowers users to break free from traditional aspect ratios and add a new dimension to their original compositions. You can effortlessly extend the boundaries of your photos, whether you're creating panoramic landscapes or giving your favorite images more space.
As you expand the image border, GenExpand intelligently analyzes the image and anticipates how the additional space will be populated. For enhanced precision and creative authority, craft a specific prompt outlining your desired content for the new area, and GenExpand will incorporate this guidance into the expansion process. GenExpand does require internet access.
### Guidelines for optimal results
**To maintain quality:** The canvas can be expanded by an additional 25% beyond the original image dimensions.
**The prompt:** Can assist you in realizing your vision or addressing undesired outcomes.
**Effectiveness:** It's much more effective to focus on one side rather than expanding two or more at a time.
**Smaller expansion is better:** It's better to generate about 10% of the pictures instead of going with 25%. this helps keep AI from having to imagine too much.
**Reapply:** You can expand one photo multiple times
**Quality:** For optimal results in the generated portion using a higher resolution photo, focus on generating more side-by-side content rather than expanding all four sides of the image.
### GenExpand options
**Prompt Input:** Once an expansion is made, the prompt text box labeled "What do you envision here?" will appear. Enter your detailed prompt in the designated text field, using nouns or adjectives plus nouns. Specify precisely what you want to see, such as "blue sky" or "sandy beach," and refrain from using verbs like "change," "erase," "remove," "add," or "create." If no prompt is added, GenExpand will intelligently analyze the image and anticipates how the additional space will be populated.
{% hint style="info" %}
**Inappropriate content error**
If you encounter an "inappropriate content" error message and are confident there's no violation of our terms and conditions, try altering the mask or the prompt. While GenExpand may function with prompts in other languages, we recommend using English for more accurate results.
{% endhint %}
**Undo/Redo Functionality**: allows you to reverse or repeat the previous action.
**Zoom Feature:** Adjust your view using the zoom slider or the left and right bracket keys to magnify or shrink the view of the image.
**Expand button:** Simply click the expand button to utilize GenExpand and add to the selected area in your image. This innovative tool goes beyond essential expanding the image, it harnessing content-aware AI techniques for a refined result. You can continue to choose the expand button to cycle through different outcomes, fine-tuning your edits until you achieve the desired result.
**Cancel Button:** If you opt not to implement the alterations, simply click the cancel button.
**Save Button:** When content with the GenExpand outcomes, click the save button to confirm the changes. This will generate a new image saved in TIF format, renamed with the GenExpand extension, and added to the Genitive Creations folder.
*Check the video for more information:*
{% embed url="" %}
# Restoration
{% hint style="warning" %}
**Note:** Some interface details and visuals in this article may differ from the latest version of Luminar for Desktop. To see the current interface, visit the [Luminar for Desktop walkthrough](/how-to-use-luminar-for-desktop/luminar-for-desktop-walkthrough).
{% endhint %}
{% @arcade/embed url="" flowId="R0qBOQz5vn50qwG48gCy" %}
The **Restoration** tool revives old or damaged photos with advanced AI precision — repairing scratches, restoring color, and bringing cherished memories back to life in just one click.
This AI-driven tool analyzes your photo to distinguish between what should be rebuilt and what should remain untouched. It fills in cracks, smooths textures, restores skin tones, and revives color — all while preserving the original essence of the image.
### How It Works
#### Step 1: Open the Tool
1. Import the black and white/vintage images you want to restore to the Catalog.
2. Go to the **Restoration** panel.
3. Select the image you want to restore.
#### Step 2: Choose a Mode
| **Full** | Removes scratches and restores color. *(Default mode)* |
| ------------- | -------------------------------------------------------- |
| **Color** | Adds lifelike color to black-and-white photos. |
| **Scratches** | Removes visible damage while keeping the original tones. |
#### Step 3: Click Restore
After choosing a mode, click **Restore**.\
The processing happens online, and once it’s complete, Luminar automatically saves your new image in the **Restoration** folder in your Catalog.
{% hint style="warning" %}
**Internet connection** is required for processing.
{% endhint %}
{% hint style="info" %}
Additional Notes:
* Not available in **plugin mode**.
* **Batch processing** is currently not supported.
{% endhint %}
# HDR Merge
Combine multiple exposures into one detailed HDR image using Luminar for Desktop’s HDR Merge tool. This guide walks you through every step.
{% hint style="warning" %}
**Note:** Some interface details and visuals in this article may differ from the latest version of Luminar for Desktop. To see the current interface, visit the [Luminar for Desktop walkthrough](/how-to-use-luminar-for-desktop/luminar-for-desktop-walkthrough).
{% endhint %}
{% @arcade/embed url="" flowId="GPadK19whdALP1GSN5Tk" %}
Batch Processing is a powerful way to open, edit, and save many images at once, saving time and effort. The **HDR Merge Batch Processing** tool is ideal for working on single images as well as many sets of bracketed exposures. Luminar will automatically group brackets based on EXIF data stored in each image, including exposure settings, aperture settings, ISO levels, lens data, and time shot.
1. **Capture bracketed photos:** You’ll need to capture a series of bracketed photos with your camera, typically varying by exposure value (EV) increments (e.g., -2, 0, +2). Make sure to use a tripod to avoid misalignment between shots.
2. **Import your images:** Open Luminar for Desktop and import your bracketed photos into the software. You can do this by clicking the “Add” or “+” button and selecting the images from your computer.
3. **Selecting Images:** You can choose up to 1000 images that you want to merge into HDR images. Just drag and drop them onto the HDR Merge tool.
4. **Batch Processing:** Now, look for the option called Batch processing. This allows you to work on multiple images all at once, saving you time.
5. **Tweaking Settings:** Click on the three dots icon for more settings. Here, you can adjust things like Auto Alignment (to make sure all your images line up perfectly), Chromatic Aberration Reduction (to remove those weird color edges), and Ghost Reduction (to fix any blurry spots caused by movement). If you choose Ghost Reduction, you'll also pick a base image as your reference and decide how strong you want the effect to be. You have the flexibility to organize images by dragging them into your desired sequence. Additionally, if an image doesn't match the defined set, you can remove it by clicking on the X icon. To delete the whole group of images, just click on the trashcan icon.
6. **Merging the Images:** Select “Continue” to start the HDR merging process. Luminar for Desktop will take all your chosen exposures and blend them into one image with beautifully balanced lights and darks.
7. The newly merged HDR image will be saved as a Tiff file in the HDR Folder. You can leave it there or move it back to its original folder.
Using the HDR Merge feature in Luminar for Desktop, you can create stunning images with a broad dynamic range, capturing details in both highlights and shadows that would be difficult to achieve in a single exposure.
***
{% hint style="info" %}
Location in Neo: Catalog view > Merge Tools section
{% endhint %}
# Focus Stacking
Learn how to combine multiple images at different focus points to create one sharp, detailed photo with Focus Stacking.
{% hint style="warning" %}
**Note:** Some interface details and visuals in this article may differ from the latest version of Luminar for Desktop. To see the current interface, visit the [Luminar for Desktop walkthrough](/how-to-use-luminar-for-desktop/luminar-for-desktop-walkthrough).
{% endhint %}
{% @arcade/embed url="" flowId="KxJJtFCExZ7fCYj7bJXI" %}
Make every part of your photo crisp by stacking up to 100 photos with different depths of field. Focus Stacking will align, crop, and balance them automatically. The AI algorithm chooses the parts with the best focus across all photos and corrects lens and chromatic aberration in raw files. The result is an image in which every detail pops — in macro shots, still life compositions, or multi-layered landscapes. Here’s a step-by-step guide on using Focus Stacking in Luminar for Desktop:
1. **Capture multiple images:** First, take a series of photos with varying focus points, covering the entire depth of your scene. Use a tripod to ensure consistency and alignment between shots.
2. **Import your images:** Open Luminar for Desktop and import the images you want to stack. You can do this by clicking the “Add” or “+” button and selecting the images from your computer.
3. **Access the Focus Stacking in Luminar for Desktop’s Catalog mode:** Select your photos and drag them to the Focus Stacking window.
4. **Click the gear icon for additional settings:** You can select Auto Alignment and Chromatic Aberration Reduction. Selecting Auto Alignment will enable you to choose a reference image. Luminar for Desktop does a great job of selecting this image for you.
5. **Merge the images:** Click “Stack” to initiate the Stack merging process: Luminar for Desktop will combine your images into a single focused image.
6. The merged image is saved as a Tiff image in the Focus Stacking Folder. You can leave the image in this folder or drag and drop it into the original folder.
7. **Fine-tune your image:** You can now use Luminar for Desktop’s editing tools to adjust exposure, contrast, colors, and other aspects of your image to achieve the desired look.
***
{% hint style="info" %}
Location in Neo: Catalog view > Merge Tools section
{% endhint %}
# Panorama Stitching
Learn how to combine multiple photos into a seamless panorama, expanding your creative possibilities.
{% hint style="warning" %}
**Note:** Some interface details and visuals in this article may differ from the latest version of Luminar for Desktop. To see the current interface, visit the [Luminar for Desktop walkthrough](/how-to-use-luminar-for-desktop/luminar-for-desktop-walkthrough).
{% endhint %}
{% @arcade/embed url="" flowId="dgE7ox04TEW8uKqkKw5l" %}
In the captivating world of photography, few techniques are as cherished and revered as the art of creating panorama and High Dynamic Range (HDR) images. These awe-inspiring panoramas have an innate ability to transport viewers into the very heart of a scene, offering a breathtaking perspective that extends beyond the confines of a single frame. To fuel the creative passion of photographers even further, the groundbreaking release of Luminar for Desktop's newest Panorama Stitching, has emerged as a game-changer — giving photographers the remarkable ability to seamlessly merge the realms of panorama and HDR photography from not only still images but even video footage! Imagine the possibilities when two remarkable techniques intertwine to produce unparalleled visual masterpieces! Let me show you how it’s done.
{% stepper %}
{% step %}
#### Select Your Images
To begin crafting your stunning panorama, choose the series of images you wish to merge. Make sure they capture the complete scene you want to showcase in all its grandeur. Whether it's a majestic landscape or a bustling cityscape, a well-curated selection of images is the key to a mesmerizing panorama.
{% endstep %}
{% step %}
#### Drag and Drop to Panorama Stitching tool
With your chosen images at the ready, open Luminar for Desktop and drag them into the Panorama Stitching tool. Watch in awe as Luminar's intelligent algorithms identify bracketed images effortlessly, streamlining the entire process. This smart recognition system saves you time and ensures a smooth blending of HDR images.
{% endstep %}
{% step %}
#### Customize Your Panorama
Once your images are loaded into the Panorama Stitching tool, explore the various options available to unleash your creativity by fine-tuning your masterpiece. Correct distortion, eliminate vignettes, address chromatic aberration, and reduce ghosting.
{% endstep %}
{% step %}
#### Begin Panorama Stitching
With your customizations in place, it's time to bring your panorama to life. Click the "Start" button and watch in amazement as Luminar for Desktop seamlessly weaves together your selected images. As the software works its magic, you'll witness the gradual merging of individual frames into a breathtaking, unified panorama.
{% endstep %}
{% step %}
#### Fine-Tune and Crop if needed
Explore a range of projection modes, including spherical, cylindrical, mercator, plane, or fisheye, to discover the perfect match for your scene. Tailor the projection to complement your panorama best and crop the image as required, allowing you to create a visually captivating and harmonious composition. Once the image is created, it will be stored in the Panorama Stitching folder.
{% endstep %}
{% step %}
#### Export
Once the panorama stitching process is complete, take a moment to inspect your masterpiece. If needed, make any final adjustments to ensure your panorama is flawless. Once satisfied, save your creation in your preferred file format and resolution. Your masterpiece is now ready to be shared and admired by audiences far and wide.
{% endstep %}
{% endstepper %}
### Crafting panoramas from videos
Combining HDR with panoramas was already impressive, but now, behold the exceptional prowess of the Panorama Stitching tool that sets it apart from the rest. Crafting panoramas from videos is awe-inspiring, but the true marvel lies in the seamless merging of selected video segments, unlocking a whole new realm of creativity. This extraordinary feature deserves its own dedicated tutorial, but fear not — I won't keep you waiting. Prepare to be amazed by watching this video and witnessing the boundless possibilities that await!

How amazing was that! **Creating perfect panoramas from videos** can be a rewarding and visually stunning endeavor. To accomplish this, consider the following expanded suggestions:
1\. **Capture a Wider Perspective:** When shooting the video intended for a panorama, ensure you use a wider field of view to encompass the entire scene. This means using a camera or smartphone with abroader lens or adjusting the camera settings to capture a wider angle. A wider perspective will provide more image data for stitching the panorama together later, resulting in a seamless and comprehensive view of the landscape.
2\. **Steady and Stationary Focus:** To maintain the consistency and sharpness of the panorama, choose a stationary object within the scene and focus on it. It could be a tree, a building, or any fixed element that won't move during the video recording. By keeping your focus locked on this stable reference point, the subsequent frames of the video will align more effectively, reducing potential distortions during the stitching process.
3\. **Smooth and Controlled Panning:** When recording the video, employ a smooth and controlled panning motion. Avoid sudden movements or jerks, as they can lead to misalignment when stitching the frames together. Use a tripod or stabilizing equipment to ensure steady footage, greatly improving the final panorama's quality.
4\. **Pay Attention to Overlapping Elements:** While recording, be mindful of the composition and avoid overlapping important elements within the scene. Overlapping objects can make it challenging for panorama software to distinguish between them, resulting in a distorted or messy final image. Take your time to compose the shots carefully, ensuring each element has a distinct space in the frame.
5\. **Consistent Lighting and Exposure:** To achieve a harmonious panorama, maintain consistent lighting and exposure settings throughout the video. Drastic changes in lighting conditions or exposure settings between frames can create visible seams and inconsistencies in the final result. If shooting in manual mode, lock the exposure and white balance settings to maintain uniformity.
*By following these suggestions, you'll be well on your way to creating captivating panoramas from your videos, offering immersive and breathtaking views of the landscapes you capture.*
### Range of projection modes
#### **Spherical**
Spherical panoramas are best suited for capturing and presenting scenes with significant detail in all directions, offering viewers an immersive and all-encompassing experience. Particularly valuable in Landscape and Architecture Photography, these panoramas provide a comprehensive perspective of vast landscapes, capturing the entire scene from horizon to sky to foreground. The seamless stitching of overlapping images creates a distortion-free, lifelike representation with added depth and interest from foreground elements, allowing interactive exploration and connecting viewers with breathtaking landscapes' grandeur, beauty, and atmosphere.
#### **Cylinder**
Cylinder panoramas are best suited for capturing scenes with a horizontal emphasis or expansive width. They excel in showcasing cityscapes, urban landscapes, and wide scenic environments, providing a broad view of these settings. Cylinder panoramas are also ideal for presenting architectural structures with wide facades and interiors featuring significant horizontal features, offering an immersive and continuous view of these spaces.
#### **Mercator**
The Mercator projection applies adjustments as if the image is projected onto the exterior surface of a sphere. This approach is particularly suitable for panoramas captured while moving around a subject rather than rotating the camera. It can be likened to imagining a panorama of the Earth and then flattening it to create a Mercator map.
#### **Plane**
Plane in panoramas refers to a method of displaying the curved panoramic image on a flat surface, like a computer screen. It determines how the wide-angle view is mapped onto a 2D plane for viewing without distortion.
#### **Fisheye**
Fisheye panoramas encompass an extremely wide field of view, often exceeding 180 degrees. They produce a distinct visual effect known as barrel distortion, curving straight lines near the edges inward toward the center, resulting in an immersive and artistic representation of the scene. Fisheye panoramas are particularly popular in creative and experimental photography, adding a surreal and captivating quality to the panoramic images.
{% hint style="warning" %}
Please note that the maximum export size is **15,000 px**
{% endhint %}
# Upscale AI
{% hint style="warning" %}
**Note:** Some interface details and visuals in this article may differ from the latest version of Luminar for Desktop. To see the current interface, visit the [Luminar for Desktop walkthrough](/how-to-use-luminar-for-desktop/luminar-for-desktop-walkthrough).
{% endhint %}
{% @arcade/embed url="" flowId="2j1OGzwj6uIkOXw8YSKS" %}
Upscale a photo up to 6X and enhance image resolution naturally with AI. Crop an interesting frame from a panoramic landscape, get high-quality zoom-ins of wildlife, improve macro shots, enhance old photos, prepare your images for printing, and more. Here’s a step-by-step guide on using UpscaleAI in Luminar for Desktop:
1. Open Luminar for Desktop as a stand-alone program.
2. Click on Add Photos and then click on Add Image.
3. Select your file and click Open.
4. Click Catalog at the top of the menu.
5. Drag the image down to the Upscale AI box at the bottom where it says Drag a photo here to start.
6. Choose the amount you want to upscale your image by.
It will take a few moments to upscale. Once the task is complete, a copy of your upscaled image will be placed in the Upscale folder. To avoid confusion, the upscaled image file name will also be changed, with image\_upscale added to the end of the original file name.
***
{% hint style="info" %}
*Location in Luminar for Desktop: Catalog view > Resolution Enhancement section*
{% endhint %}
{% hint style="warning" %}
**Upscale Info:**
* Minimum input size is 257x257 px
* Maximum input size is 16,000 px on the longest side
* Maximum output size is 32,000 px on the longest side
{% endhint %}
# Presets
Explore a variety of presets to quickly apply different styles and looks to your photos in Luminar for Desktop.
{% hint style="warning" %}
**Note:** Some interface details and visuals in this article may differ from the latest version of Luminar for Desktop. To see the current interface, visit the [Luminar for Desktop walkthrough](/how-to-use-luminar-for-desktop/luminar-for-desktop-walkthrough).
{% endhint %}
Presets in Luminar for Desktop are a powerful way to enhance your photos with just one click. They offer a quick and easy starting point for editing, applying a range of styles and adjustments that can transform your images instantly. Whether you're looking for a subtle enhancement or a bold, creative look, Presets help streamline your workflow and spark inspiration. In this section, we’ll explore how to apply, customize, and create your own Presets to make the most of your photo editing experience.
# Working with Presets
Learn how to apply and adjust Luminar’s preset filters to your photos to achieve fast and professional results, enhancing your images with a single click.
{% hint style="warning" %}
**Note:** Some interface details and visuals in this article may differ from the latest version of Luminar for Desktop. To see the current interface, visit the [Luminar for Desktop walkthrough](/how-to-use-luminar-for-desktop/luminar-for-desktop-walkthrough).
{% endhint %}
Luminar for Desktop was built on the belief that photo editing should be fast, easy, and fun. Our Preset-based editing approach helps Luminar for Desktop achieve this goal. Presets combine efficiency with creativity. By using AI to understand the strengths and weaknesses of every image, Presets automatically correct common capture problems and apply enhancements that inspire new ideas.
The Presets included in Luminar for Desktop were created in collaboration with professional photographers and retouchers to produce high-quality results. Based on in-depth research, Presets are composed to reflect the classic design and modern, popular trends, producing fresh and engaging images with maximum impact. Once refined, customized Presets can be saved and easily synced across large batches of photos, including across sets of images from different sessions and taken in different environments.
Use Presets as a starting point or when you need inspiration.
{% hint style="info" %}
Discover more efficient workflow tips [here](https://skylum.com/blog/how-to-work-with-presets-in-luminar-neo?utm_source=support\&utm_medium=organic\&utm_campaign=content).
{% endhint %}
{% embed url="" %}
# Adding Preset Collection
Learn how to import and manage preset collections to speed up your editing workflow in Luminar for Desktop.
{% hint style="warning" %}
**Note:** Some interface details and visuals in this article may differ from the latest version of Luminar for Desktop. To see the current interface, visit the [Luminar for Desktop walkthrough](/how-to-use-luminar-for-desktop/luminar-for-desktop-walkthrough).
{% endhint %}
#### Custom Preset
{% @arcade/embed url="" flowId="Ho2fYfmTJDbYYEDzkWxA" %}
{% embed url="" %}
The Skylum team or other professional photographers will occasionally release a Presets collection. When you import a Custom Luminar Preset Collection, it will create a new Collection in the **Purchased** section in the Preset browser.
To add a Custom Luminar for Desktop Preset Collection, select **File > Add Luminar for Desktop Preset Collection…** An open dialog will be displayed, allowing you to browse your computer and choose the Collection you wish to add.
Alternatively, you can add a Custom Luminar for Desktop Preset Collection from the Presets tab by clicking on **+ Add** on the Purchased button on the Presets panel or at the top of the Purchased Presets section.
After adding a Preset Collection to the custom folder, you’ll find it in the Purchased area of the Presets tab in Luminar for Desktop.
{% hint style="warning" %}
**Note: Get updates**\
Many old collections of Luminar Looks and Templates have been updated to the newer Preset format. Check the [**My Account**](https://skylum.com/account/my-softwarehttps://skylum.com/account/my-software) area on the Skylum website to download the latest Presets for previously purchased Looks and Templates.
{% endhint %}
#### Purchased presets from Skylum Marketplace
Every month, our Skylum team collaborates with hundreds of professional photographers and retouchers to expand our collection with new items, including Presets. Let's take a look at how you can easily install Presets from our [Marketplace](https://skylum.com/marketplace?utm_source=support\&utm_medium=organic\&utm_campaign=content).
{% @arcade/embed url="" flowId="310MqIYadTxC0IU2xArl" %}
{% embed url="" %}
{% hint style="info" %}
**Tip: Get fresh Presets**\
A great way to get fresh Presets is a [**Luminar X membership**](https://skylum.com/luminar-x-membership?utm_source=support\&utm_medium=organic\&utm_campaign=content). Every month, you get new Skies and Templates. Plus, you’ll receive new video inspiration multiple times per year.
{% endhint %}
# Browsing and applying Presets
Streamline your editing process by learning how to browse and apply presets in Luminar for Desktop.
{% hint style="warning" %}
**Note:** Some interface details and visuals in this article may differ from the latest version of Luminar for Desktop. To see the current interface, visit the [Luminar for Desktop walkthrough](/how-to-use-luminar-for-desktop/luminar-for-desktop-walkthrough).
{% endhint %}
{% @arcade/embed url="" flowId="Ruu4G0AeohFBybs2PiI1" %}
In order to save time when developing your image, you’ll find an extensive collection of **Presets**. Professional photographers and image retouchers help create these Presets to save you time and offer inspiration.
### To apply a Preset
1. Make sure an image is open in Luminar for Desktop.
2. Click **Presets** at the top of the window to switch to the **Presets Browser**. This opens the **Presets** panel.
3. Choose a Preset collection
* Use suggested templates in the **For This Photo** section
* Browse other collections organized by categories.
4. Examine the Presets available by exploring their icons.
5. When ready, **click** on a Preset name to apply it. To apply a different Preset to your photo, **click on its name**.
#### Additional Controls
1. Click the **Heart** icon next to a Preset to add it to your **Favorites** list for easy access.
2. In order to quickly return to the original state of a photograph, just use the **Reset Adjustments** command or Ctlr/Command + Z. You can find this in the ellipsis menu (…) to the right of the selected template name at the bottom right corner of the screen. The Reset Adjustments command resets all tool adjustments including Presets, but won’t affect tools such as **CropAI**
{% hint style="danger" %}
**Applying a Preset will overwrite any changes you made to the image.**
{% endhint %}
### Preset Panel
Clicking the **Presets** tab on the top toolbar opens the **Preset Panel**.
* **For This Photo**. Uses content-aware technology to suggest what Presets may work best for your photo.
* **Membership.** Find there all the installed Presets from Membership. \[only for owners]
* **Favorites Collection**. This collection contains Presets you have favorited by selecting the heart icon next to the preset’s name.
* **Purchase Presets Collection**.This collection contains Presets you have purchased.
* **User Presets Collection**. This collection contains Presets you have edited or created from scratch and then saved for later use.
#### Sorting for Presets and Collections
In Luminar for Desktop, you can sort your presets collections to quickly find the look you need. You can organize them by the following attributes:
* **Recently Added:** Display the most recently added collections at the top.
* **Collection Name:** Arrange collections alphabetically.
* **Ascending:** Sort collections from A to Z.
* **Descending:** Sort collections from Z to A.
#### Rearranging Presets within a Collection
You can easily rearrange the order of presets within a collection for **My Presets** and **Favorites** categories. Simply drag and move a preset to the desired position, whether it’s at the top, bottom, or anywhere in between. This helps you prioritize your favorite presets for quicker access.
#### Removing Preset Collections
If you no longer need a preset collection, you can easily remove it. Right-click on the collection you want to delete and select **Delete Collection**. This helps keep your workspace organized and clutter-free.
### Get editing suggestions with For This Photo
The Presets panel uses content-aware technology to suggest what Presets may work best for your photo. Luminar for Desktop scans each image and compares its contents and their needs to a built-in collection of editing Presets. This allows Luminar for Desktop to suggest new styles as well as useful fixes.
#### To get editing suggestions
Taking advantage of the *For This Photo* tool is easy. Luminar for Desktop uses content-aware technology to determine what Presets may work best for each photo.
1. Open an image or select an existing photo in your catalog.
2. Click the **Presets** button at the top of the window.
3. Locate the **For This Photo** section near the panel’s top (scroll if needed).
4. Let Luminar for Desktop analyze your image. When complete, suggestions will appear. You can see suggested Presets at the top of the **Presets** panel in the **For This Photo** area.
5. Scroll through the suggested collections by clicking the arrows to the right and left of the collection image to review your suggestions.
6. When you’ve chosen a collection, click to open it. You can now:
* Click on an individual Preset to apply it.
* Click on a new Preset to try out another option.
# Customizing a Luminar for Desktop Preset
Learn how to personalize your editing workflow by customizing Luminar Neo presets to match your unique style.
{% hint style="warning" %}
**Note:** Some interface details and visuals in this article may differ from the latest version of Luminar for Desktop. To see the current interface, visit the [Luminar for Desktop walkthrough](/how-to-use-luminar-for-desktop/luminar-for-desktop-walkthrough).
{% endhint %}
{% @arcade/embed url="" flowId="td2B7klrQJLJABBpB3j7" %}
### Saving a Custom Preset
As you adjust a Preset or build your recipes from scratch, you may find a particular combination. A Preset can store a lot of control in an easy, one-click effect.
After editing your image, saving your new style as a Luminar Preset is easy.
1. Adjust an existing Preset or add your own tools to an image.
2. In the bottom Actions dropdown, click the **Save as Preset**.
3. The item is saved to your **My Presets** tab.
4. You can rename the Preset or keep the default name in the **My Preset** tab.
### Modifying Custom Presets
1. Your new Preset can be found under **Preset panel > My Presets.**
2. Click the item menu next to the Preset name if you want to manage or rename the Preset.
* **Edit**. Loads the Edit panel allowing you to make changes.
* **Rename.** Renames the current My Preset.
* **Delete.** Deletes the current My Preset.
* **Show in Finder/Show in Explorer.** Opens an operating system window for the currently selected Preset file. This allows you to copy the Preset and pass it on to someone else.
#### Sharing a Custom Preset
Any Luminar Preset you make can be shared with other users, manually backed up to a new location, or copied to a new computer. You can freely export your own Presets and import another person’s Presets into your application.
1. To view any Presets, navigate to the **User Presets** section in the **My Collection** area of the Presets panel.
2. Click the item menu (**three dots**) next to a custom Preset and choose **Show in Finder** (macOS) or **Show in Explorer** (Windows).
3. Select the Presets you want to share, then send them to fellow Luminar users. Be sure to copy the entire parent folder which contains the preset file, resource file, and custom icon.
4. To copy Presets on another machine, just reveal the folder as described above. Then go up one level to the **Users** folder.
5. Simply drag the new Presets into your Luminar Presets User Folder.
6. For best results, restart Luminar to load all the new Presets.
# Editing Tools
Explore Luminar for Desktop’s full suite of editing tools designed to elevate your photos with professional-level precision.
{% hint style="warning" %}
**Note:** Some interface details and visuals in this article may differ from the latest version of Luminar for Desktop. To see the current interface, visit the [Luminar for Desktop walkthrough](/how-to-use-luminar-for-desktop/luminar-for-desktop-walkthrough).
{% endhint %}
Editing is at the heart of Luminar for Desktop, offering advanced tools and AI-driven features to help you bring your creative vision to life. Whether you're making quick adjustments or diving into detailed, professional edits, Luminar for Desktop provides intuitive controls for enhancing color, lighting, composition, and more. In this guide, we’ll walk you through the essential editing tools, techniques, and tips to help you achieve stunning results with ease.
# Start editing with Edit View
Get started with Luminar for Desktop’s Edit View, offering full control over your image edits from basic enhancements to advanced retouching tools.
{% hint style="warning" %}
**Note:** Some interface details and visuals in this article may differ from the latest version of Luminar for Desktop. To see the current interface, visit the [Luminar for Desktop walkthrough](/how-to-use-luminar-for-desktop/luminar-for-desktop-walkthrough).
{% endhint %}
Follow these steps to edit an image using Luminar for Desktop.
1. Select an image from the Catalog or choose to edit a single image from Single Image Edits.
2. Click **Edit** on the top toolbar to reveal Luminar for Desktop’s tools.
3. A good starting point is the Develop RAW or Enhance AI tool. Select one of these tools and edit your image. Select other tools to complete your edit.
4. Click the **Edits** tab to make changes to a tool that was applied. Notice that you can add the same tool more than once.
5. Click the **Share Button** on the top toolbar for export options.
### Setting up Favorites
{% @arcade/embed url="" flowId="Q6a364JWav7kvlrka055" %}
In Luminar for Desktop, you can organize your workspace by **pinning your favorite tools to the top of the list.** Right-click the tool you'd like to pin, then select "Add to Favorites". Once the tool is pinned, you can reorder the remaining Favorite tools by clicking and dragging them.
# AI Assistant
{% hint style="warning" %}
**Note:** Some interface details and visuals in this article may differ from the latest version of Luminar for Desktop. To see the current interface, visit the [Luminar for Desktop walkthrough](/how-to-use-luminar-for-desktop/luminar-for-desktop-walkthrough).
{% endhint %}
The AI Assistant in Luminar for Desktop helps you edit photos using text queries. It analyzes your specific image along with your query and recommends solutions based on its knowledge base. Just type in your prompt, and the AI Assistant will:
* Analyze your photo and provide editing recommendations.
* Guide you to the appropriate tools in Luminar for Desktop.
* Offer ready-to-use adjustments that are well-suited for your situation.
{% hint style="info" %}
**An internet connection is required** for the AI Assistant to work.
{% endhint %}
#### Evoking the AI Assistant
To start the chat with the AI Assistant, click on the icon in the bottom right corner:
For even quicker access, use the shortcut on your keyboard:
* **Cmd**** + ****K** *(on MacOS)*
* **Ctrl**** + ****K** *(on Windows)*
You can move the AI Assistant window by clicking & dragging the top bar:
{% hint style="info" %}
AI Assistant is available in **the Presets and Edit tabs.** It is not accessible from the Catalog view.
{% endhint %}
#### Typing in the prompt
In the window that opens, you will see several suggestions to help you get started. You can choose one of them or type your own question or prompt. You can ask the AI Assistant to do something with your photo, for example, to fix the white balance or to turn it into black & white. Also, you can seek advice on how to achieve a certain look, for example: "How to make the colors muted?" or "How to make it appear as a sunset?"
Click the **Enter** button on your keyboard or the arrow at the right side of the bar to send your query. AI Assistant might take some time to think, and then it will reply to you with thumbnails of your photo and a description of the changes that they contain.
#### Navigation buttons
1. **Resetting a chat**\
This button will completely clear the chat history for the current photo. Before resetting, a notification will pop up asking whether you want to proceed with deleting the chat history. This action cannot be undone.
2. **Expanding the window**\
This button will expand the chat window so that you can better see the chat and there is more space for the text.
3. **Hiding the chat window**\
This button will hide the window so that it does not interfere with your editing workspace and the toolset. You can reopen the window at any time, and all the chat history will be saved.
#### Applying the Edits
Click on the thumbnails to see what the AI Assistant offers you. After clicking on the preview, you'll see "Applying Preset" and a spinning wheel indicator.
{% hint style="warning" %}
Using edits from an AI assistant is similar to applying a preset, as it replaces all previous modifications made to the photo. Each Edit is a separate Preset.
{% endhint %}
After applying the changes, you can click the "x" to hide the chat and switch to the Edits panel to view the applied tools. You can revisit each of the tools and adjust the sliders as needed.
{% hint style="info" %}
The AI Assistant cannot be accessed if Luminar for Desktop is open in plugin mode.
{% endhint %}
# Layers
Understand how to work with layers in Luminar Neo, including adding, arranging, and masking them for pro-level compositions.
{% hint style="warning" %}
**Note:** Some interface details and visuals in this article may differ from the latest version of Luminar for Desktop. To see the current interface, visit the [Luminar for Desktop walkthrough](/how-to-use-luminar-for-desktop/luminar-for-desktop-walkthrough).
{% endhint %}
Layers provide maximum flexibility in the creative image editing process to separate different elements of an image. A layer can be compared to transparency in which images are applied and placed over or under an image. Luminar Neo offers the ability to use numerous raw files as image layers and can apply any tool to any layer. Tools can be added in any order, multiple times, and with unique masks. Layers are non-destructive, allowing previous steps to be modified to correct mistakes and can be saved with a preset for later use. Layers can be an integral part of your creative process.
{% content-ref url="/pages/lorL9dBI7pXiFbOofzn7" %}
[Layer Properties](/editing-tools/layers/layer-properties)
{% endcontent-ref %}
{% content-ref url="/pages/VDu3yxpd5JedbWZ2pC7y" %}
[Adding and Removing a Layer](/editing-tools/layers/adding-and-removing-a-layer)
{% endcontent-ref %}
{% content-ref url="/pages/vNW6L3o7wnzXmPDH7eGZ" %}
[Merge Layers](/editing-tools/layers/merge-layers)
{% endcontent-ref %}
{% content-ref url="/pages/SLZenR05u3RppetHZZNL" %}
[Reordering Layers](/editing-tools/layers/reordering-layers)
{% endcontent-ref %}
{% content-ref url="/pages/89BsO7HXtIR8CmyT6BKi" %}
[Transforming a Layer](/editing-tools/layers/transforming-a-layer)
{% endcontent-ref %}
{% content-ref url="/pages/ha2DMUzvsQK9UBYDsmKs" %}
[Background Removal AI](/editing-tools/layers/background-removal-ai)
{% endcontent-ref %}
Discover more efficient workflow tips:
{% embed url="" %}
# Layer Properties
Learn to adjust opacity, blend modes, and more with Luminar Neo’s Layer Properties panel for non-destructive editing.
{% hint style="warning" %}
**Note:** Some interface details and visuals in this article may differ from the latest version of Luminar for Desktop. To see the current interface, visit the [Luminar for Desktop walkthrough](/how-to-use-luminar-for-desktop/luminar-for-desktop-walkthrough).
{% endhint %}
{% @arcade/embed url="" flowId="LPCgv6R1ZBGMEK2TuiJB" %}
**Layer properties** can be found on the **Tools** panel, which consists of two tabs: **Properties** and **Masking.**
#### Properties
* **Opacity**. The Opacity slider enables you to lower or fade the amount or strength of the Layer as a whole. Lowering the opacity of a layer can help refine the blending of the image on the layers and any tools applied without altering the settings of individual tools separately.
* **Blend Modes**. A blend mode compares the content of two layers and enacts changes based on the content of both layers.
* **Horizontal Flip**. A transformation feature allows you to mirror a layer horizontally (from left to right).
* **Vertical Flip**. Enables you to create a mirror layer vertically. It flips the content from top to bottom.
* **Image Mapping**. Automated linking of different sections of an image
#### Masking
* **Brush Mask**. Using a Brush Mask is one of the easiest ways to mask an image. You can use brush strokes to add to or subtract from the mask.
* **Linear Gradient Mask**. The Linear Gradient Mask is useful for creating a gradual blend.
* **Radial Gradient Mask**. A Radial Gradient Mask offers a quick and easy way to mask an elliptical area of your photo.
* **Mask AI**. MaskAI detects up to nine separate elements in a photo: people, skies, buildings, vehicles, water, plants, mountains, and both natural and artificial ground for the perfect mask.
#### Mask actions
* **Fill**. This option covers your entire image with a mask. After using Fill, you can select Paint and use the Erase mode to subtract from the mask.
* **Clear**. This option removes your mask entirely. After clicking Clear, you can use the Paint Mask, Gradient Mask, or Radial Mask tools to add details to the image.
* **Invert**. This option inverts any mask you’ve created to reverse its opacity and transparency values.
* **Copy**. This option copies the current mask to the clipboard. To use this copied mask, create a new mask using any tool and paste it into the new tool mask.
* **Paste**. This option pastes the current mask stored on the clipboard for use on another tool mask.
* **Show**. This option controls the visibility of the mask. Clicking Show displays the mask as a red overlay. You may continue drawing your mask for greater precision while this overlay is shown. Click Show again to remove the red overlay.
# Adding and Removing a Layer
{% hint style="warning" %}
**Note:** Some interface details and visuals in this article may differ from the latest version of Luminar for Desktop. To see the current interface, visit the [Luminar for Desktop walkthrough](/how-to-use-luminar-for-desktop/luminar-for-desktop-walkthrough).
{% endhint %}
Follow these steps to add, remove, or hide a layer.
{% @arcade/embed url="" flowId="98JzqwcZPl6f6v4SzNy7" %}
#### Adding a Layer
To add a new layer in Luminar for Desktop, click the **+** icon in the Layers panel. This will open the **Add New Layer** panel with these options to add to the layer:
* My Images
* Flares
* Light Leaks
* Stardust Bokeh
* Sparklers
#### Removing a Layer
To remove a layer, press the keyboard shortcut **Delete** key or right-click on the layer and select **Remove Layer**. Another option is to hide the current by selecting **Hide Layer** instead of removing it. This is useful when you want to create different versions of an edit.
# Merge Layers
Find out how to combine multiple layers into one, simplifying your project and preserving your edits.
{% hint style="warning" %}
**Note:** Some interface details and visuals in this article may differ from the latest version of Luminar for Desktop. To see the current interface, visit the [Luminar for Desktop walkthrough](/how-to-use-luminar-for-desktop/luminar-for-desktop-walkthrough).
{% endhint %}
{% @arcade/embed url="" flowId="DEjpsdw0baalQLPzURFT" %}
The **Merge Layers** feature allows you to combine multiple layers into a new merged layer.
**How to Merge Layers**
* Select the layers you want to merge.
* Hold **Shift** on your keyboard.
* Right-click on the selected layers.
* Click the **Merge Layers** button.
This will create a new merged layer while keeping the original layers intact.
# Reordering Layers
Learn how to manage the stacking order of layers in your project to control the visibility and impact of edits.
{% hint style="warning" %}
**Note:** Some interface details and visuals in this article may differ from the latest version of Luminar for Desktop. To see the current interface, visit the [Luminar for Desktop walkthrough](/how-to-use-luminar-for-desktop/luminar-for-desktop-walkthrough).
{% endhint %}
Once created, layers can be reorganized in any order. The exception is the bottom first layer. This is the base layer, and it can not be moved.
#### Click and drag the Layer
To change a layer’s order, click and drag the layer to a new position. This is useful to see how a layer interacts with other layers.
# Transforming a Layer
Learn how to transform layers by scaling, rotating, or moving them to create unique compositions and effects with Luminar Neo’s layer-editing tools.
{% hint style="warning" %}
**Note:** Some interface details and visuals in this article may differ from the latest version of Luminar for Desktop. To see the current interface, visit the [Luminar for Desktop walkthrough](/how-to-use-luminar-for-desktop/luminar-for-desktop-walkthrough).
{% endhint %}
{% @arcade/embed url="" flowId="FrTZFp4M1Rc53lYj0q5P" %}
Once you’ve added a new layer, it’s easy to transform it into a new size.
#### Automatically transform a Layer.
* **Horizontal Flip**. Choose between automatically aligning the horizon (Auto Horizon Alignment) and straightening the verticals (Auto Verticals Straighten).
* **Vertical Flip**. Choose between automatically aligning the horizon (Auto Horizon Alignment) and straightening the verticals (Auto Verticals Straighten).
#### Manually transform a Layer.
Use these controls to transform an image on a layer manually.
* Drag any corners or resize handles to enlarge the image proportionately.
* Drag between any corners to enlarge and free-transform the image.
* To rotate an image, click and drag just outside a corner to rotate.
# Background Removal AI
Learn how to effortlessly remove backgrounds from your images using Luminar Neo's AI-powered tool.
{% hint style="warning" %}
**Note:** Some interface details and visuals in this article may differ from the latest version of Luminar for Desktop. To see the current interface, visit the [Luminar for Desktop walkthrough](/how-to-use-luminar-for-desktop/luminar-for-desktop-walkthrough).
{% endhint %}
{% @arcade/embed url="" flowId="CkY0Ze9Thd9cqcWGthAG" %}
*\*If the tool is not available, you may need to use the **Upgrade** option*
Automatically remove the background behind one or multiple subjects in your photo. The neural network in Background RemovalAI can detect the main subject and up to nine types of other elements in your photo, and you can select which ones to keep. Plus, use a refinement brush to fix any imperfections. Here’s a step-by-step guide on using Background RemovalAI in Luminar Neo:
1. **Select an image:** click the Edit tab
2. **Layer Properties:** select the Masking tab and choose Background RemovalAI
3. **Selection:** Select the chosen main object or choose from additional elements found in the image.
4. **Remove the background:** Click “Remove” to initiate the Background Removal process. Luminar Neo will remove the image’s background, revealing a transparent checkbox background.
5. **Click Refinement Brush for additional finetuning:** A Transition Mask will appear, highlighting Transition in a white checkerboard pattern, Object in orange, and Background in blue. Select a brush and apply it to refine each section.
The final image will appear with a transparent background. Use Layers to add a new background and move the layer to the bottom of the Layers palette. This will reveal the image on a new background.
***
Location in Neo: Edit view -> Layer Properties -> Masking
Discover more efficient workflow tips:
{% embed url="" %}
# Crop AI Tool
Learn how to automatically enhance photo composition with Luminar for Desktop's intelligent Crop AI tool for quick and smart framing.
{% hint style="warning" %}
**Note:** Some interface details and visuals in this article may differ from the latest version of Luminar for Desktop. To see the current interface, visit the [Luminar for Desktop walkthrough](/how-to-use-luminar-for-desktop/luminar-for-desktop-walkthrough).
{% endhint %}
{% @arcade/embed url="" flowId="piNK4nq7fZZSmKDkkKe0" %}
The **CropAI** tool automatically adjusts the photo’s composition, crop, and perspective. If needed, you can manually fine-tune any aspect of the resulting composition. The crop tool is non-destructive and can be applied, edited, or reset anytime without affecting the image. The crop tool settings are not saved with presets.
#### Automatically Cropping with CropAI
Use these controls to crop an image or fix perspective problems automatically.
* **Composition AI**. Automatically crop your photo based on an analysis of its contents.
* **Perspective**.
* **Horizon Alignment**. Automatically levels the image horizontally. Suitable for images that aren’t level with the horizon but have a natural horizon or straight horizontal lines.
* **Optics Auto Corrections.** This option is located under the [**Develop**](/editing-tools/essential-tools/develop-raw-develop) tool. Its sliders are designed to remove flaws in the image caused by the lens or camera handling.
#### Manually Cropping with CropAI
Depending on the intended use of the final image (print, web, social media), you may require a very specific aspect ratio for your final image. Straight out of a camera, your photos won’t be in that aspect ratio. To solve this problem, use manual tools to take complete, precise control over how an image is cropped.
Use these controls to crop an image or fix perspective problems manually:
1. **Drag any corners or resize handles** to modify the cropping rectangle.
2. To move the image inside the crop, just click inside the image crop area and drag to re-position the image behind the cropping rectangle.
3. To rotate an image, click and drag just outside a corner to rotate. A grid overlay appears to help you with accurate cropping.
4. When happy with the cropping, **switch to another tool to apply the crop.**
5. If you want to cancel the crop, click the **Reset tool** reverse arrow icon.
There is also an additional helpful functionality for cropping:
* **Rotate & Flip**. Uses one-click tools to adjust the crop of the image quickly.
* **Rotate Left (CCW)**. Rotates the image 90˚ counter-clockwise.
* **Flip Horizontal**. Reverse the left and right sides of the image, creating a mirror image.
* **Flip Vertical**. Reverse the top and bottom sides of the photo.
#### **Ratio**
You can choose Aspect Ratio from the Ratio drop-down menu. The image is displayed with a grid that represents the ratio chosen in the Aspect drop-down menu. Here's the list of commonly used ratios:
* **Free**. Create a custom shape by dragging it to taste.
* **Original**. Preserves the original shape of the photo but allows you to crop more tightly to remove details from the edges
* **Transposed**. The original dimensions are reversed for the crop.
* **1: 1 (Square)**. A square-shaped image is created.
* **4: 5**. A near-square image that’s common for many photo sizes
* **8.5: 11**. A common size for documents.
* **5: 7**. A rectangular image that’s common for many photo sizes
* **2: 3**. A rectangular image that’s common for many photo sizes
* **4 : 3**. A rectangular image that’s common for many photo sizes
* **21: 9**. A ratio that presents an ultra-wide view.
* **16: 9**. A ratio used by televisions, many electronic devices, and presentations
* **16: 10**. A ratio that matches many computer displays.
* **Facebook Cover**. A useful size for a page banner on Facebook.
* **Facebook Feed**. A common size for an image posted to Facebook.
* **Enter Custom**. Offers the ability to choose a specific aspect ratio.
{% hint style="info" %}
**Tip: Use the Rule of Thirds**.\
This is a standard overlay used to help with cropping. The four intersecting points are considered the best place to put a subject to focus the viewer’s eye on it.
{% endhint %}
# Image Quality tools
Improve sharpness, reduce noise, and enhance clarity using Luminar for Desktop’s image quality tools in this detailed support article.
{% hint style="warning" %}
**Note:** Some interface details and visuals in this article may differ from the latest version of Luminar for Desktop. To see the current interface, visit the [Luminar for Desktop walkthrough](/how-to-use-luminar-for-desktop/luminar-for-desktop-walkthrough).
{% endhint %}
Luminar for Desktop has tools that will help you improve your image quality. In the Edit view, on the right-side tools panel, you'll find the Image Quality section, which consists of two tools: Noiseless AI and Supersharp AI.
{% content-ref url="/pages/l2UnvGaaPr32cB7h38qP" %}
[Noiseless AI](/editing-tools/image-quality-tools/noiseless-ai)
{% endcontent-ref %}
{% content-ref url="/pages/0mCqNZxF2orzUxXwW6XV" %}
[Supersharp AI](/editing-tools/image-quality-tools/supersharp-ai)
{% endcontent-ref %}
# Noiseless AI
Learn how to reduce image noise intelligently with Noiseless AI, preserving details while cleaning up your photos.
{% hint style="warning" %}
**Note:** Some interface details and visuals in this article may differ from the latest version of Luminar for Desktop. To see the current interface, visit the [Luminar for Desktop walkthrough](/how-to-use-luminar-for-desktop/luminar-for-desktop-walkthrough).
{% endhint %}
{% @arcade/embed url="" flowId="SDGE1WI0upr5ffRPtF9H" %}
NoiselessAI in Luminar for Desktop is a sophisticated, AI-powered noise reduction tool designed to eliminate luminance and chroma noise from your images, resulting in cleaner and visually appealing photos. This advanced tool works with various image formats, including raw and non-raw files, and offers optimal results when applied to raw photos.
Leveraging intelligent algorithms, **Noiseless AI** analyzes the image’s noise level and suggests one of three noise reduction presets – **low, middle, or high** – for a quick and effective noise reduction solution throughout the image. Additionally, it provides manual control through sliders for Luminosity Denoise, Color Denoise, Details, and Sharpness, allowing you to fine-tune the balance between noise reduction, detail preservation, and image sharpness.
NoiselessAI in Luminar for Desktop empowers photographers to confidently use **higher ISO settings** without compromising image quality and to achieve superior results while maintaining full creative control over their images.
Luminar for Desktop’s NoiselessAI tool, the Luminosity Denoise, Color Denoise, Details, and Sharpness sliders work together to help you achieve noise-free images while retaining detail and sharpness:
1. **Luminosity Denoise:** This slider targets luminance noise, which manifests as random variations in brightness or grayscale values, creating a grainy appearance in your image. Adjusting the Luminosity Denoise slider reduces this noise, resulting in a smoother image while preserving important details and textures. Finding the right balance is crucial to avoid over-smoothing and losing detail.
2. **Color Denoise:** This slider removes chroma noise, which appears as random color speckles or blotches in your image. By adjusting the Color Denoise slider, you can eliminate these color artifacts effectively, producing a cleaner and more visually appealing photo. Be careful to maintain a balance that preserves natural colors without introducing color casts.
3. **Details:** The Details slider enables fine-tuning the balance between noise reduction and detail preservation. Increasing the Details value helps retain finer details and textures in your image while reducing noise. Be cautious not to push it too far, as overemphasizing details can reintroduce noise or create artifacts.
4. **Sharpness:** The Sharpness slider enhances overall image sharpness by accentuating edges and details in the photo. Adjusting this slider counteracts potential sharpness loss from noise reduction, resulting in a more detailed and crisp image. Use this slider judiciously to avoid unnatural-looking edges or halo effects.
Using the NoiselessAI tool in Luminar for Desktop requires finding the right balance among these sliders to achieve optimal noise reduction while preserving essential details and textures in your images.
***
{% hint style="info" %}
*Location in Luminar for Desktop: Edit view > Image Quality section*
{% endhint %}
# Supersharp AI
Learn how to sharpen your images while preserving fine details with Supersharp AI, Luminar Neo’s intelligent tool designed to enhance clarity without introducing noise.
{% hint style="warning" %}
**Note:** Some interface details and visuals in this article may differ from the latest version of Luminar for Desktop. To see the current interface, visit the [Luminar for Desktop walkthrough](/how-to-use-luminar-for-desktop/luminar-for-desktop-walkthrough).
{% endhint %}
{% @arcade/embed url="" flowId="4qN2vTcAhOiT4C2RUfCb" %}
SupersharpAI refines the blur on an object’s outlines caused by movement, missed focus, or a shaky camera and logically stabilizes the photo. The neural network, at its core, analyses depth, perspective, and the environment of the photo and works out with a compression algorithm. The result is a crisp and naturally sharp photo, just as it was meant to be.
**Universal correction:** a general sharpening technique applied to an entire image to improve its clarity and sharpness. It aims to restore lost detail and remove any softness in the image caused by camera shake or other factors.
**Motion Blur correction:** a specialized technique used to sharpen blurred images by camera movement during exposure. It uses advanced algorithms to analyze the blur’s direction and intensity and then applies a correction to restore the image’s original sharpness. This technique can be particularly useful for photos taken while moving, such as while walking or driving, or for photos of fast-moving subjects, like athletes or wildlife.
**Low, Middle, and High:** determines the sharpening strength applied to the image.
**Face EnhancerAI:** enhance faces and make them appear clearer and sharper in blurry photos.
***
{% hint style="info" %}
*Location in Luminar: Edit view > Image Quality section*
{% endhint %}
# Essential Tools
Discover Luminar for Desktop's core editing tools to handle basic yet powerful adjustments with ease and efficiency.
{% hint style="warning" %}
**Note:** Some interface details and visuals in this article may differ from the latest version of Luminar for Desktop. To see the current interface, visit the [Luminar for Desktop walkthrough](/how-to-use-luminar-for-desktop/luminar-for-desktop-walkthrough).
{% endhint %}
The **Essential Tools** are some of the most frequently used tools in Luminar for Desktop. These tools perform core adjustments that are useful for most images.
1. Select an image in your Catalog or open a single image.
2. Click the **Edit** Tab.
3. Choose the desired tool from the **Essentials Tools** section in the list.
# Develop RAW/Develop
{% hint style="warning" %}
**Note:** Some interface details and visuals in this article may differ from the latest version of Luminar for Desktop. To see the current interface, visit the [Luminar for Desktop walkthrough](/how-to-use-luminar-for-desktop/luminar-for-desktop-walkthrough).
{% endhint %}
{% @arcade/embed url="" flowId="1z00O95Fb7XhmkbpJ6bI" %}
**The Develop/DevelopRAW tool** contains the most essential controls for adjusting the color and tone of an image. Adjustments made with this tool will set the stage for all further adjustments. The RAW indicator will only show next to Develop when an unedited raw file is opened for editing. All RAW images will automatically apply the DevelopRAW tool as the first tool in the Edits panel. If a different tool is applied first to a RAW image, the DevelopRAW tool will automatically be applied as the first tool without any settings. Settings can be adjusted at any time.
{% hint style="warning" %}
**Note**: The **RAW** indicator will only show next to **Develop** when an *unedited* raw file is opened for editing.
{% endhint %}
### **Auto Adjust**
{% @arcade/embed url="" flowId="q2SIw0V6nT6zrQTmVjNk" %}
The Auto Adjust tool is designed to automatically optimize your image by adjusting key settings related to exposure and light balance. It simplifies the editing process by analyzing the image and applying smart adjustments to achieve a well-balanced result, quickly and efficiently.
You can access Auto Adjust within the Develop RAW or Develop toolset in Luminar for Desktop.
Auto Adjust automatically adjusts a set of core sliders to improve the overall exposure and dynamic range of your image. It targets:
* Exposure
* Shadows
* Highlights
* Whites
* Blacks
* Saturation
* Curves
These settings are recalculated and updated to enhance the light and tone in your photo, providing a solid starting point for further editing.
{% hint style="warning" %}
**Important Notes**
* If your image was **already edited using any of these sliders**, Auto Adjust will overwrite those adjustments with new values.
* If you **used other sliders** (such as Temperature, Structure, etc), Auto Adjust will not affect them. However, it will analyze the image as it existed before those adjustments were applied when determining how to optimize the photo.
{% endhint %}
This makes Auto Adjust an excellent first step in your editing workflow, helping you quickly establish a balanced base before moving on to creative or fine-tuned edits.
{% hint style="warning" %}
This feature is available exclusively for subscribers or lifetime owners with an Upgrade Pass.\
Learn how to check if you have access to upgraded features [here](/something-useful/difference-between-luminar-for-desktop-subscription-prime-and-x-membership/how-do-i-know-if-i-need-to-upgrade-my-license).
{% endhint %}
#### Camera Profile
For maximum control over your raw files, be sure to give **DNG camera profiles** a try. Luminar recognizes the industry standard DCP files you may already have on your computer (or have bought from third parties). These offer a high degree of control over how a raw file’s color and tone are handled.
{% hint style="info" %}
**Tip**: Need a bunch of free DCP profiles? [Install the free DNG Converter from Adobe](https://helpx.adobe.com/photoshop/digital-negative.html).
{% endhint %}
### Light
* **Exposure.** This slider adjusts the global luminance of the image. Moving it to the left results in a darker image (reduced exposure value). Moving it to the right results in a brighter image (increased exposure value).
* **Smart Contrast.** This slider adjusts the contrast of the image. Contrast refers to differences in luminance or color that allow you to distinguish objects in an image from one another. Practically speaking, contrast is determined by the difference in the color and brightness of an object relative to other objects within the same field of view. This slider’s innovative capabilities limit color shift and prevent details from becoming blocked up.
* **Highlights.** This slider adjusts the brightness of the brightest areas of the image. Moving it to the right causes bright areas to become brighter, while moving it to the left makes them darker.
* **Shadows.** This slider adjusts the brightness of the darkest areas of the image. Moving it to the right causes the darkest areas to become brighter, revealing additional details. Moving it to the left makes such areas darker.
### Blacks & Whites
* **Whites.** This slider adjusts the white point of the histogram and white tones in the image. When you move it to the right, the brightest tones become brighter while the histogram compresses to the right. Moving it to the left causes the white tones in the image to become darker as the histogram compresses to the left.
* **Blacks.** This slider sets the histogram’s black point and adjusts the image’s black tones. Moving it to the right makes the black tones brighter as the histogram compresses to the right. Moving it to the left makes the black tones darker as the histogram compresses to the left.
### Curves
This is one of the most powerful tools for adjusting your image’s tone. It allows you to brighten, darken, add contrast, and shift colors. Curves can be applied to all color channels together or to each color channel individually and can help you manually fine-tune the brightness and contrast of an image.
* **Color selectors**. You can use the white, red, green, and blue color selectors to make curve adjustments to all channels equally or to an individual channel (such as blue to emphasize the sky).
* **Control points**. You can add up to 10 control points. Drag up to add contrast to an area and drag down to lighten the area. Multiple control points can be employed for contrast adjustments based on tonal range.
{% hint style="info" %}
**Note**: Most users will either use Curves a lot or won’t use this tool at all. The Curves interface is a bit complex and allows up to 10 control points. This opens up many options when adjusting color and exposure. The primary advantage of the Curves tool is that it gives you precise control over which points get mapped for tonal adjustments.
{% endhint %}
### Color
* **White Balance.** To calculate a custom white balance, choose the Eyedropper tool (to the right of the White Balance drop-down menu) and click on an area in your image that should be a white or neutral gray. If you are working with a raw file, you can use the White Balance drop-down menu to choose from various presets similar to those found in a camera’s white balance menu.
* **Temperature.** This slider warms or cools an image by adding Cyan or Yellow to change its color temperature.
* **Tint.** This slider adjusts the amount of green or magenta and is useful for removing color casts from an image.
* **Saturation.** This slider adjusts the intensity of all colors in your photo.
* **Vibrance.** This slider adjusts only the intensity of muted colors, ignoring well-saturated colors. It’s helpful in achieving fine control when adjusting color.
### Sharpness
* **Sharpen.** The Sharpen tool helps focus soft edges in a photo to increase the clarity of focus. Use this tool to improve image quality significantly. Keep in mind that too much sharpening can give your photo a grainy look.
* **Radius.** This slider allows you to adjust the distance from contrast edges at which the sharpening effect is applied.
* **Masking.** This slider controls the zone in which details are amplified. Moving it to the left increases the size of the zone and makes the image more detailed. Moving it to the right reduces the size of the zone of sharpened zones.
{% hint style="warning" %}
**Note: Zoom in**\
On most screens, sharpening results can be seen at a 100% or higher Zoom level.
{% endhint %}
{% hint style="info" %}
**Tip: Better masks**\
Optimal masking comes from a setting in the range of 30 to 70.
{% endhint %}
### Noise Reduction
Upon close inspection, you may notice unwanted and distracting noise or grain in your image. This is typically caused by shooting photos with a high ISO setting on a digital camera, but it can also be caused by underexposure or a long shutter speed. An entry-level consumer camera is more likely to exhibit noise problems than a professional camera. Fortunately, Luminar for Desktop offers an easy tool to reduce or remove unwanted noise.
* **Luminosity Denoise.** This slider removes grayscale noise from an image.
* **Color Denoise.** This slider removes color noise from an image.
* **Boost.** This slider increases the aggressiveness of the Denoise tool.
### Optics Auto Corrections
This tool is helpful in enhancing your image and removing lens imperfections. Its sliders are designed to remove flaws in the image caused by the lens or camera handling. The exact controls you’ll see vary between standard and raw files.
* **Auto Distortion Corrections (raw only).** Click this option to automatically correct lens distortion. This tool analyzes your image and its metadata to calculate an automatic fix. Get rid of wide-angle distortion and get truer perspective lines and more attractive portraits.
* **Auto Fix Chromatic Aberrations (raw only).** Chromatic aberration is a type of color fringing. It often happens with telephoto lenses and in areas of high contrast. Chromatic aberrations tend to show up as magenta or green edges around objects.
* **Auto Defringe.** This adjustment can remove halos and edge noise (particularly in high-contrast areas).
### Optics Manual Corrections
* **Lens Distortion.** Drag this slider to the left to widen the barrel shape of the lens. Drag it to the right to pinch the barrel shape and compensate for lenses with wider angles.
* **Devignette.** This slider removes any darkening at the edges of an image caused by the lens itself. This is a corrective tool, not a stylizing tool. If you want an artistic vignette, be sure to explore the Vignette tool.
* **Devignette Midpoint.** This slider refines which areas are brightened or darkened by the Devignette slider.
### Transform
If your image needs to be scaled or transformed, use these sliders to adjust perspective distortion manually.
* **Vertical**. Tilts the image vertically to correct for vertical distortion, which, for instance, can occur when a tall building is photographed at street level.
* **Horizontal**. Tilts the image horizontally to create straight lines and correct for horizontal distortion, which, for instance, can occur when an object is photographed off to the side.
* **Aspect**. Moving the Aspect slider to the right corrects for horizontal aspect distortion. Moving it to the left corrects for vertical aspect distortion. The Aspect slider can work in tandem with the Vertical and Horizontal sliders. For example, making a correction with the Horizontal slider may distort the aspect of a subject. To correct this, you can move the Aspect slider until the subject looks natural.
# Enhance AI
Learn how to use Enhance AI to automatically adjust light, color, and detail, making your photo editing fast and effective.
{% hint style="warning" %}
**Note:** Some interface details and visuals in this article may differ from the latest version of Luminar for Desktop. To see the current interface, visit the [Luminar for Desktop walkthrough](/how-to-use-luminar-for-desktop/luminar-for-desktop-walkthrough).
{% endhint %}
{% @arcade/embed url="" flowId="2QdUOYd0WAxkc5J8wJTX" %}
**The EnhanceAI tool** contains two helpful adjustments that harness the power of Artificial Intelligence to enhance your photos. This tool automatically analyzes your image and instantly corrects it while still offering control over the final amount of correction.
* **AccentAI**. Under the hood, AccentAI uses more than a dozen controls. This tool tends to yield naturally beautiful results with one simple slider. The AccentAI tool can substitute for many traditional controls, including shadows, highlights, contrast, tone, saturation, exposure, and details.
* **Sky EnhancerAI**. Luminar for Desktop detects and analyzes the sky in an image to improve the sky’s texture, tone, and colors. The Sky EnhancerAI tool can recognize the sky in most photos as well as distinguish between water and other elements. It also detects objects in the foreground (and their edges) for perfect masking. Sky EnhancerAI performs the necessary improvements to recover details and improve the texture of the sky and clouds, selectively adjusting brightness, contrast, saturation, and vividness. It is designed to work with most photographs of the skies and works from the blue hour in the morning to the blue hour in the evening. However, it is not designed to work with night skies.
{% hint style="warning" %}
**Note: No sky slider?**
If the controls are **grayed out** for the Sky EnhancerAI tool, the Artificial Intelligence algorithm could not recognize the sky in your photo. Skies that are very out of focus or blurred may not be detected. If the piece of visible sky in your photo is too small, it may also be undetected.
{% endhint %}
{% hint style="info" %}
**Tip: Skip as needed**
If you apply a preset that uses the Sky EnhancerAI tool to an image in which no sky is detected, Luminar for Desktop will skip the adjustment. This allows you to create your own custom Luminar for Desktop presets containing the Sky EnhancerAI tool and apply them to any images, whether or not they include any sky.
{% endhint %}
# Erase
Learn how to effortlessly remove unwanted objects from your images using Luminar for Desktop’s advanced Erase tool.
{% hint style="warning" %}
**Note:** Some interface details and visuals in this article may differ from the latest version of Luminar for Desktop. To see the current interface, visit the [Luminar for Desktop walkthrough](/how-to-use-luminar-for-desktop/luminar-for-desktop-walkthrough).
{% endhint %}
{% @arcade/embed url="" flowId="CMea6aACUpvAaZkUcC6Z" %}
**The Erase tool** helps you remove unwanted objects with a few clicks. As soon as the Erase tool is selected, the cursor becomes a brush. When brushing over areas to erase, a red overlay appears showing the selection.
* **Select and Deselect**. By default, the **Select** button is chosen. When brushing over an image with Select chosen, you select areas to erase (indicated with a red overlay). By clicking the **Deselect** button, you can deselect areas to erase (removing the red overlay).
* **Size**. This slider increases or decreases the brush size. You can also use the left and right bracket keys (**\[**** and ****]**) to decrease and increase the brush size. It’s a good idea to keep the brush slightly larger than the size of the object or blemish you’re erasing.
* **Erase**. Click this button to erase areas of your selected image (indicated with the red overlay).
* **Clear Selection**. Click this button to clear your current selections so you can start over.
* **Restore**. Click this button to restore the current selection.
The **Erase** tool serves a similar purpose to the **Clone** tool, allowing you to remove unwanted objects or details. But its approach is different from Clone. Rather than setting a source point for pixels, with Erase, you simply click and brush over unwanted areas. Luminar for Desktop then examines the surrounding pixels and generates a new texture based on its awareness of what’s nearby in the photo. It then matches the original pixels’ texture, lighting, and shading. This approach is often reasonably practical, as this tool is fast and easy to use.
{% hint style="info" %}
**Tip: Selectively undo brush strokes**
If you are using the Erase tool and accidentally select an area you no longer want, you do not need to use the **Clear Selection** button to start over. Instead, you can select the Deselect button and brush over the area you want to remove from the selection. This replaces the **Edit > Undo** or pressing **Cmd****+****Z** (macOS) or **Ctrl****+****Z** (Windows) to undo the last brush stroke.
{% endhint %}
### Objects Removal
**Remove Powerlines**
{% @arcade/embed url="" flowId="4jVyc7lYak5jg1GaXQtM" %}
**The Remove Powerlines tool** is helpful for automatically removing unwanted objects like power and phone lines from the sky of a landscape photo. Getting a clear image in just a few seconds is now easy. This tool saves time when editing photos of weddings, landscapes, and popular sightseeing spots, getting rid of power lines, phone lines, and other annoying little details in the sky.
### **Remove Dust Spots**
**The Remove Dust Spots tool** helps remove dust spots and particles caused by dirt on their lenses or sensors. Since this is a common problem, removing the undesired effects of such foreign objects on photos with the help of AI (rather than erasing or cloning) can help photographers create better photos faster and more efficiently. Remove Dust Spots in Luminar for Desktop automatically removes the effects of dust and debris on the camera sensor and lens. This feature is helpful not only for lenses that quickly get dirty but also for fixing photos taken in such situations as when dirt and dust quickly get into lenses or sensors and ruin photos that a photographer has traveled many miles to capture.
{% hint style="info" %}
**Tip: Fine-tuning the Remove Powerline and Dust Spots tools**
After using the Remove Powerline or Dust Spots tools, continue to use the Erase and Restore features to fine-tune the image if needed.
{% endhint %}
# Structure AI
Learn how to enhance the fine details and textures of your photos with Structure AI, adding depth and clarity while avoiding over-sharpening or unnatural effects.
{% hint style="warning" %}
**Note:** Some interface details and visuals in this article may differ from the latest version of Luminar for Desktop. To see the current interface, visit the [Luminar for Desktop walkthrough](/how-to-use-luminar-for-desktop/luminar-for-desktop-walkthrough).
{% endhint %}
{% @arcade/embed url="" flowId="YOiibfIFFLgDZwIC6lQW" %}
**The Structure AI** tool allows you to adjust the detail and clarity of an image. You can use this tool to reveal a great deal of detail or get a smoother image with less detail. StructureAI is the primary tool for increasing the contrast of an image and visualizing more details. Thanks to Artificial Intelligence, StructureAI is content-aware and can adjust areas variably based on the subject. It is also human-aware, so it doesn’t overprocess people in your images. As a result, faces and skin look natural while the objects around them look detailed.
* **Amount**. This slider selects the strength of the StructureAI effect. Moving it to the right increases the amount of visible detail in the image. Moving it to the left removes detail and flattens the image. This tool is soft and produces natural results.
* **Boost**. This slider adjusts the overall display of details. Moving it to the right accentuates details. Compared to Amount, Boost emphasizes small details and is more aggressive. It offers an HDR-like look.
{% hint style="info" %}
**Tip: Need a Blur?**
You can use a negative amount of **StructureAI** to create a blur effect. For precise control, consider using the **Basic** local masking adjustment to mask with brush strokes easily. For a heavier blur effect, use multiple instances for a heavier blur effect. Just pull the slider to the left for a negative effect that creates a blur.
{% endhint %}
# Color
{% hint style="warning" %}
**Note:** Some interface details and visuals in this article may differ from the latest version of Luminar for Desktop. To see the current interface, visit the [Luminar for Desktop walkthrough](/how-to-use-luminar-for-desktop/luminar-for-desktop-walkthrough).
{% endhint %}
{% @arcade/embed url="" flowId="knhdwPfHhfuRGBQjyI6W" %}
**The Color tool** is a valuable way to control the intensity of colors in a photo. It’s often used in conjunction with the **Develop** tool.
#### Standard Settings
* **Saturation**. This slider adjusts the intensity of all colors in your photo.
* **Vibrance**. This slider adjusts only the intensity of muted colors, ignoring well-saturated colors. It’s helpful in achieving fine control when adjusting color.
* **Remove Color Cast**. This slider automatically removes undesirable color casts in your images by detecting and adjusting the hue.
#### HSL
* **Hue/Saturation/Luminance**. In this drop-down menu, you can toggle between adjusting the Hue, Saturation, and Luminance when adjusting the sliders below.
* **Hue.** Adjusts the hue or basic color shades of your image for the selected target. Moving the Hue slider to the right results in a shift towards the next color in the list (for example, from Orange to Yellow). Sliding to the left shifts the hue toward the previous color in the list (for example, from Orange to Red).
* **Saturation**. Adjust the color saturation for the selected target. Moving this slider to the right results in a more intense color. Moving it to the left removes color.
* **Luminance**. Adjust the brightness of the selected target color. Sliding this control further to the right results in a brighter color within the image. The further to the left, the darker the color.
* **Hue Shift**. This slider lets you roll the hue in a photo for subtle or dramatic changes. A little hue shift is perfect for eliminating unwanted color tints, while a significant shift is perfect for a dramatic style.
# Black & White
{% hint style="warning" %}
**Note:** Some interface details and visuals in this article may differ from the latest version of Luminar for Desktop. To see the current interface, visit the [Luminar for Desktop walkthrough](/how-to-use-luminar-for-desktop/luminar-for-desktop-walkthrough).
{% endhint %}
{% @arcade/embed url="" flowId="aOr9k8IaTyANSSDSyOpG" %}
**The Black & White** tool converts a color photo to black and white. It also contains several controls to manipulate the monochrome look.
* **Convert to B\&W**. Click this button to convert between color and black & white.
* **Luminance**. When the Luminance button is selected, the Red, Yellow, Green, Cyan, Blue, and Magenta color sliders control the brightness of each respective color as it’s converted to black and white.
* **Saturation**. When the Saturation button is selected, each color slider introduces the respective color into the black and white image where it was present in the original color image.
{% hint style="info" %}
**Tip: Spot color**
If you want to create a spot color effect, explore the Edit Mask for the Black & White tool.
{% endhint %}
# Details
Learn how to sharpen your images and bring out fine textures using the powerful Details enhancement tool in Luminar for Desktop.
{% hint style="warning" %}
**Note:** Some interface details and visuals in this article may differ from the latest version of Luminar for Desktop. To see the current interface, visit the [Luminar for Desktop walkthrough](/how-to-use-luminar-for-desktop/luminar-for-desktop-walkthrough).
{% endhint %}
{% @arcade/embed url="" flowId="YB7gpcsOzMlMH4iKkqoh" %}
**The Details** tool helps you create dramatic photos and brings crystal-clear sharpness to your images. With the proper detail enhancement, you can make your photos look sharp, with no halos or artifacts.
#### Standard Settings
* **Small Details**. This slider sets the sharpness of fine details. At 0, the tool is not applied. Moving the slider to the right increases the clarity of small details, while moving it to the left washes out fine details.
* **Medium Details**. This slider sets the sharpness of medium-sized details. At 0, the tool is not applied. Moving the slider to the right increases the clarity of medium-sized details, while moving it to the left decreases their sharpness.
* **Large Details**. Use this slider to set the sharpness of the global contours of objects in the image. At 0, the tool is not applied. Moving the slider to the right increases the sharpness of global contours, while moving it to the left decreases its sharpness.
* **Sharpen**. The Sharpen tool helps focus soft edges in a photo to increase the clarity of focus. Use this tool to improve image quality significantly. Keep in mind that too much sharpening can give your photo a grainy look.
{% hint style="info" %}
**Note: Zoom in**
On most screens, sharpening results can be seen at a 100% or higher Zoom level.
{% endhint %}
#### Details Masking
* **Details Protection**. To ensure that areas of the image aren’t over-processed, use the Details Protection slider.
* **Details Masking**. This dynamic masking tool allows you to reveal details only in appropriate areas and help you define your image’s sharpness.
#### Sharpening Masking
* **Sharpening Radius**. This slider allows you to adjust the distance from contrast edges at which the sharpening effect is applied.
* **Sharpening Masking**. This slider controls the zone in which details are amplified. Moving it to the left increases the size of the zone and makes the image more detailed. Moving it to the right reduces the size of the zone of sharpened zones.
{% hint style="info" %}
**Tip: Better masks**
Optimal masking comes from a setting in the range of 30 to 70.
{% endhint %}
{% hint style="info" %}
**Tip: Need a Blur?**
You can use a negative amount of **Details** to create a blur effect. For precise control, just pull the slider to the left for a negative effect that creates a blur.
{% endhint %}
# Denoise
Learn how to remove unwanted noise from your photos and recover detail with Luminar for Desktop’s advanced Denoise tool.
{% hint style="warning" %}
**Note:** Some interface details and visuals in this article may differ from the latest version of Luminar for Desktop. To see the current interface, visit the [Luminar for Desktop walkthrough](/how-to-use-luminar-for-desktop/luminar-for-desktop-walkthrough).
{% endhint %}
{% @arcade/embed url="" flowId="dXJI9zQtaCHYPM3s5eaO" %}
**The Denoise Tool**. Upon close inspection, you may notice unwanted and distracting noise or grain in your image. This is typically caused by shooting photos with a high ISO setting on a digital camera, but it can also be caused by underexposure or a long shutter speed. An entry-level consumer camera is more likely to exhibit noise problems than a professional camera. Fortunately, Luminar for Desktop offers an easy tool to reduce or remove unwanted noise.
#### Standard Settings
* **Luminosity Denoise**. This slider removes grayscale noise from an image.
* **Color Denoise**. This slider removes color noise from an image.
#### Advanced Settings
* **Boost**. This slider increases the aggressiveness of the Denoise tool
# Vignette
Learn how to add a vignette effect to your photos to darken the edges and draw attention to the center, creating a focused and dramatic look in your images.
{% hint style="warning" %}
**Note:** Some interface details and visuals in this article may differ from the latest version of Luminar for Desktop. To see the current interface, visit the [Luminar for Desktop walkthrough](/how-to-use-luminar-for-desktop/luminar-for-desktop-walkthrough).
{% endhint %}
{% @arcade/embed url="" flowId="cB4zo2056l8RfR9OB6Oi" %}
The **Vignette** tool darkens or lightens the edges of your image. This is quite an old technique to emphasize the subject in photos. The effect typically leaves the center of the image unaffected while shading or lightening the edges. Luminar for Desktop goes further by letting you place the center point of the vignette anywhere in the image.
#### Standard Settings
* **Choose Subject**. Click this button to enable a crosshair. You can then click within the photo to center the vignette. This allows you to adjust the focus of the vignette by offsetting it and guiding the viewer’s eyes to your subject.
* **Amount**. This slider adjusts the darkening around the edges of the photo. Move it to the left to give more shading or to the right to brighten the edges.
* **Size**. This slider sets the size of the obscured area. Moving it to the left increases the darkened area. Moving it to the right decreases the darkened area.
#### Advanced Settings
* **Mode:** Post-crop / pre-crop. Choose pre-crop or post-crop options to apply a vignette automatically before or after cropping on all new edits.
* **Roundness**. This slider changes the shape of the shaded area.
* **Feather**. This slider sets the smoothness of the transition between the area of shading and the rest of the image.
* **Inner Light**. This slider increases the brightness in the image’s central region, which is not affected by shading. It allows you to create a contrast effect.
{% hint style="info" %}
**Note: Better vignettes**
The Vignette tool allows you to highlight key points in a photo, making it more interesting. A slight shading of the edges provokes the viewer to consider the lighter central part of the photo. For a realistic picture, don’t lower the Amount below -50. As a rule, the Amount slid.
{% endhint %}
# Landscape Tools
Enhance your landscape photos using tools like Golden Hour, Dehaze with Luminar for Desktop’s dedicated landscape tools.
{% hint style="warning" %}
**Note:** Some interface details and visuals in this article may differ from the latest version of Luminar for Desktop. To see the current interface, visit the [Luminar for Desktop walkthrough](/how-to-use-luminar-for-desktop/luminar-for-desktop-walkthrough).
{% endhint %}
The Landscape Tools are specifically designed to enhance and optimize landscape photography. These tools offer specialized adjustments tailored to the unique requirements of landscape images, allowing users to achieve stunning results.
# Sky AI
Learn how to automatically enhance the sky in your landscape photos with Sky AI, which adjusts colors, lighting, and textures for a natural look.
{% hint style="warning" %}
**Note:** Some interface details and visuals in this article may differ from the latest version of Luminar for Desktop. To see the current interface, visit the [Luminar for Desktop walkthrough](/how-to-use-luminar-for-desktop/luminar-for-desktop-walkthrough).
{% endhint %}
{% @arcade/embed url="" flowId="eYm3lUg8z8lLpTKR3Bvu" %}
If the sky in your photo isn’t compelling, you can easily replace it with the **SkyAI** tool. This tool is designed to work with flat or blown-out skies but can be refined to work with most skies using sliders. Using the power of artificial intelligence, SkyAI automatically analyzes an image identifies where the sky begins and ends, recognizes if water is featured in the image, and then seamlessly replaces the sky and adds reflections to any body of water to create a realistic look.
#### Sky Selection
**Sky Selection**. Visually select the sky you want from the dropdown list and instantly have an idea of what your final result will look like. You can add your own skies individually or in bulk.
To add a single sky, click the **+** icon at the end of the sky list and browse your computer for a sky to add.
Select **Show Custom Skies…** from the **Sky Selection** dropdown list to add a group of skies. Then drag and drop your custom skies to the folder that opens. We recommend keeping fewer than 50 skies loaded at a time for better performance.
{% hint style="info" %}
**Note: How to create your own skies**
To learn how to capture your own skies, review the [**Sky Replacement Guidelines**](#h_01h6x6ak2p3etsk9mk4kghm0g2).
{% endhint %}
#### Sky Orientation
* **Horizon Position**. Grab the center-line of the pin to move the new sky vertically to freely place it exactly where you want it in the scene.
* **Vertical Position**. You can freely offset your new sky vertically and place it exactly where you want it in the scene. **SkyAI** will perfectly scale it to fit while keeping it aligned with the horizon. The **Vertical Position** slider controls the Textures in the sky and water areas but moves them in opposite directions in relation to the Horizon Position line until you get the ideal match between your new sky and its reflection.
* **Horizontal Position**. With this slider, you can freely position the sky horizontally and place it exactly where you want it in the scene. **SkyAI** will perfectly scale it to fit while keeping it aligned with the horizon.
* **Flip**. Flips the new sky to change its direction in the frame. Beneficial when a photo has shadows that you’re trying to match.
#### **Horizon Position**
* **Shift**. Set the desired position of your horizon line
* **Rotation**. You can rotate the new sky on the Z-axis for perfect placement.
#### **Mask Refinement**
* **Global**. This slider affects how the texture is mixed into the scene. A higher value will increase the amount of new sky that is added.
* **Close Gaps**. This slider fixes small details and holes not initially filled by the replaced sky. You may need to adjust it if the image has refined details such as trees or wires.
* **Fix Details**. This slider fixes small imperfections around the edges of your new sky.
#### **Scene Relighting**
* **Relight Strength**. This slider adjusts the exposure of the scene to match the new sky.
* **Relight Saturation**. This slider adjusts the saturation of the relighting effect to realistically add the color from the new sky to the scene.
* **Relight Human**. This slider controls relighting for any people in the scene, matching people to the new sky for a more realistic effect. Use it on environmental portraits and lifestyle photos to see the drastic difference!
#### **Reflection**
* **Reflection Amount**. Allows you to adjust the intensity of the reflection to your liking.
* **Water Blur**. Allows you to blur the reflected sky to better match an uneven water surface due to waves or ripples.
#### **Sky Adjustments**
* **Defocus**. This slider defocuses the sky and is useful when a shallow focus is used with a foreground object.
* **Grain**. Use this slider to match new skies to the grain in the original photo for a seamless, realistic effect.
* **Atmospheric Haze**. Use this slider to add a soft haze to the sky. Haze is helpful in matching a replacement sky to the original image, especially if there’s moisture in the sky or environmental pollutants.
* **Warmth**. Use this slider to adjust the color temperature of the image.
* **Brightness**. This slider darkens or lightens the new sky. It’s useful for matching the original scene.
#### Adding Your Own Skies
{% @arcade/embed url="" flowId="wFtlCklDFWTc597rL2Pk" %}
You can load your own skies into Luminar for Desktop from the **Sky Selection** drop-down menu by choosing **Show Custom Skies** … and copying your own JPEG files into the folder that opens. We recommend keeping fewer than 50 skies loaded at a time for better performance. You will see the skies from your Custom folder in the main list of skies available for SkyAI. To remove skies from this list, remove them from the Custom folder.
{% hint style="info" %}
**Tip: Keep improving**
Once the sky is replaced, you can take advantage of useful options like [EnhanceAI](/editing-tools/essential-tools/enhance-ai) to improve the overall scene.
{% endhint %}
{% hint style="danger" %}
**FAQ: Why can’t I use Sky Replacement?**
I’m trying to use SkyAI, and the sliders are greyed out. How come? If the Sky Selection menu is disabled, the sky is likely not visible enough in the image.
{% endhint %}
#### Sky Replacement Guidelines
Follow these guidelines to achieve the best results with the SkyAI tool in Luminar for Desktop. Doing so will give Luminar for Desktop the most information possible and ensure the best results. While the SkyAI tool includes sample skies for you, many photographers will want to use sky photos of their own creations.
#### Image Requirements
In order to use a sky photo with the SkyAI tool, it must meet these requirements:
* Minimum of 1,200 pixels on the short edge (higher resolutions preferred)
* JPEG format. You can export an image as a JPEG file in Luminar for Desktop by clicking the Export tab, the Save Photo to Disk button, and the JPEG format. You can use a quality setting of 60–85 to keep file sizes smaller.
* Keep the image size below 10 megabytes for the optimal performance of the tool.
{% hint style="info" %}
**Note**: Keep the image size of replacement skies below 10 MB for optimal performance.
{% endhint %}
#### How to Capture Skies
The sky replacement technology in Luminar for Desktop requires skies to be photographed in a specific way to achieve realistic results. You can also pre-process existing sky images to meet these guidelines and export new JPEG files for use by the SkyAI tool.
# Sunrays
Learn how to add sunrays to your photos with Luminar’s tool, simulating realistic light effects for a warm and natural ambiance in your images.
{% hint style="warning" %}
**Note:** Some interface details and visuals in this article may differ from the latest version of Luminar for Desktop. To see the current interface, visit the [Luminar for Desktop walkthrough](/how-to-use-luminar-for-desktop/luminar-for-desktop-walkthrough).
{% endhint %}
{% @arcade/embed url="" flowId="nLMBe6CR2wil97TryHT2" %}
Add a whole new light source to your photo — the sun! You can control its position, warmth, and the amount of glow for a subtle or even dramatic change in lighting. Combine the **Sunrays tool** with blending modes for even more control of your lighting.
#### **Standard Settings**
* **Place Sun Center**. Click this button to position the sun. You can also drag the position off of the photo canvas.
* **Amount**. This slider controls the overall intensity of the sun’s rays.
* **Overall Look**. This slider changes the overall brightness of the scene.
* **Sunrays Length**. This slider controls the distance the sun rays travel.
* **Penetration**. This slider impacts how much the sun passes through an area. It can be helpful when trying to composite the sunrays into a photo naturally.
#### **Sun Settings**
* **Sun Radius**. This slider affects the size of the sun (the origin point of the sun’s rays).
* **Sun Glow Radius**. This slider changes the size of the glow around the sun.
* **Sun Glow Amount**. This slider changes the intensity of the sun’s glow.
#### **Rays Settings**
* **Number of Sunrays**. Use this slider to select the number of sun rays.
* **Randomize**. This slider will generate an entirely new variation based on your current settings.
#### **Warmth**
* **Sun Warmth**. This slider can change the sun from a bright white to a warm glow.
* **Sunrays Warmth**. Use this slider to adjust the color temperature of the rays.
# Twilight Enhancer AI
Learn how to use Twilight Enhancer AI to improve low-light or twilight photos by adjusting lighting, colors, and detail for more vibrant and balanced nighttime images.
{% hint style="warning" %}
**Note:** Some interface details and visuals in this article may differ from the latest version of Luminar for Desktop. To see the current interface, visit the [Luminar for Desktop walkthrough](/how-to-use-luminar-for-desktop/luminar-for-desktop-walkthrough).
{% endhint %}
{% @arcade/embed url="" flowId="e827bnuBmmaqAg9sO5Ma" %}
**Twilight Enhancer AI** feature within Luminar for Desktop replicates the enchanting ambiance experienced during the Blue and Golden Hours in photography. This feature enhances landscape and outdoor photographs by infusing them with the naturalistic lighting and color effects characteristic of these magical times of the day. By intuitively adjusting colors and swiftly fine-tuning settings, users can attain impressive outcomes, whether they begin with a preset or tailor each detail to their liking.
#### **Presets for Quick Application**
Pre-defined presets such as "Blush," "Golden," "Blue," "Emerald", and "Mauve" offer instant, one-click applications of Twilight Enhancer AI effects, streamlining the editing process and facilitating further customization. Users can adjust the settings to suit their preferences.
* **Amount**. Controls the overall strength of the preset, adjusting each setting proportionally.
* **Exposure**. Adjusts the overall brightness of the photograph, making it darker or lighter;
#### **Sky Adjustments**
Users can fine-tune the appearance of the sky using sliders for temperature, tint, exposure, and horizon blend. This allows for the creation of the Blue Hour effect while retaining the original sky elements.
* **Temperature**. Adjust the warmth or coolness of the sky, with higher values adding warmth and lower values adding coolness.
* **Tint**. Fine-tunes the green or magenta tint of the sky, with higher values adding magenta and lower values adding green.
#### **Dawn Adjustments**
This section simulates the subtle, warm gradient of light seen during dawn. Users have control over the scale, intensity, and hue of this gradient, enabling precise adjustments as the image transitions from night to day.
* **Amount**: Controls the overall quantity of the dawn effect applied to the image. Adjusting the amount affects how dominant or subtle the dawn light is across the image, enabling users to simulate everything from the faintest hint of dawn to a full, bright morning light.
* **Size**: Similar to scale, the size feature lets users determine the spatial extent of the dawn light effect within the image. It can be adjusted to affect a small area, giving the impression of a distant or just-beginning dawn, or expanded to cover the entire image, simulating a wide, open sky at dawn.
* **Temperature**: Adjusts the color temperature of the dawn light, shifting it from cooler to warmer tones. Higher temperature settings will produce a warmer, more orange or pink light, typical of sunrise. In contrast, lower temperatures result in cooler, bluish tones, which can be used to depict the very early moments of dawn or dawn under specific weather conditions.
* **Tint**: Allow for the fine-tuning of the dawn light's color bias, adding green or magenta hues to the gradient. This can be used to simulate the effects of atmospheric conditions on dawn light, such as the presence of particles or moisture in the air, which can influence the perceived color of the light.
* **Exposure**: Controls the brightness level of the dawn light, independent of its color or temperature. Adjusting the exposure amount can simulate the light's intensity at various points during the dawn, from the dim early light barely illuminating the landscape to the full brightness of a sun nearing the horizon.
#### **Scene Enhancements**
With this feature, users can adjust the overall ambiance of the scene to evoke the desired time period. By making nuanced changes to lighting and color, the entire image is transformed, resulting in a more immersive visual experience.
* **Shade**. Manipulates the shadows within an image to control the level of darkness or lightness, enhancing the overall contrast and depth.
* **Saturation**. Intensify or reduce the vibrancy of colors within an image, allowing for adjustments that impact the overall richness and vividness of the scene.
* **Relight human** - recognizes the person in the image and adjusts the lighting on the person, making them brighter or darker. This helps improve the visual quality of the image by correcting lighting issues focused on the person.
* **Feathering**. Soften the edges of a selection or mask, seamlessly blending it with the surrounding area to create a more natural and visually appealing transition.
#### **Water Reflection**
This feature is designed to refine the reflection of the sky on water surfaces in images. It enhances the visual interaction between the sky and water, making the reflection appear more vivid and accurate. This is useful for improving the aesthetic appeal and realism of photos involving water bodies.
* **Amount**. Controls the overall presence or intensity of the water effect in the image. By adjusting the amount, users can either increase or decrease how pronounced the water appears. This adjustment can significantly impact the mood and realism of scenes involving water, allowing for a customized portrayal of water in various environments and lighting conditions.
* **Blur**. The blur feature adjusts the clarity and sharpness of the water elements, simulating the effect of motion or stillness in the water. Increasing the blur can give the impression of moving water, such as flowing rivers or waves, creating a sense of motion and dynamism. Decreasing the blur results in clearer, more tranquil water, ideal for depicting still ponds, lakes, or clear water where details beneath the surface might be visible. This control is crucial for conveying the texture and movement of water, adding depth and realism to the water elements in an image.
#### **Mask Refinement**
Precision masking tools enable users to selectively apply Twilight Enhancer AI effect to specific areas of the image, such as the sky or landscape, ensuring optimal customization and control over the final outcome.
* **Sky Horizon**. Adjusts the separation line between the sky and the horizon in an image, allowing users to precisely control the boundary between these two areas for enhanced editing and composition.
* **Sky Global**. Modifies the overall mask of the sky in an image, offering users the ability to make broad adjustments to elements such as color, brightness, or contrast across the entire sky area with a single control.
* **Fix Gaps**. Fixes small details and holes not initially filled by the replaced sky. You may need to adjust it if the image has refined details, such as trees or wires.
* **Blur**. Used to soften or blur the edges of a mask or selection, creating a smoother transition between the masked and unmasked areas. The value determines the extent of the blur applied, with higher values resulting in a greater degree of blurring. Adjusting the blur allows users to control the amount of feathering or blending between the masked and unmasked regions.
# Atmosphere AI
Explore how Atmosphere AI adds realistic environmental effects to your photos with ease.
{% hint style="warning" %}
**Note:** Some interface details and visuals in this article may differ from the latest version of Luminar for Desktop. To see the current interface, visit the [Luminar for Desktop walkthrough](/how-to-use-luminar-for-desktop/luminar-for-desktop-walkthrough).
{% endhint %}
{% @arcade/embed url="" flowId="aeP8O0HUB11NxKgM8qlB" %}
**AtmosphereAI** uses content-aware and depth masking to place a fog, mist, or haze in an image’s background and/or foreground. This smart tool prevents the subject of your photograph (such as a person or tree) from being covered by the atmospheric effect and positions the effect in a way that maintains a realistic look.
* **Mode**. This drop-down lets you choose between four atmospheric effects: Fog, Layered Fog, Mist, and Haze. Fog and Mist can fill most of the frame (depending on the Depth slider), whereas Layered Fog and Haze are mainly applied in the lower third.
* **Amount**. This slider sets the intensity of the atmospheric effect and is set to 0 by default. Increase the value to apply AtmosphereAI adjustments to your image.
* **Depth**. This slider adjusts the depth of the atmospheric effect. Increasing the Depth value brings the effect closer to the front of the frame.
* **Lightness**. This slider is set to the maximum value of 100 by default. To make your atmospheric effect darker or more subdued, decrease the Lightness value.
# Landscape
{% hint style="warning" %}
**Note:** Some interface details and visuals in this article may differ from the latest version of Luminar for Desktop. To see the current interface, visit the [Luminar for Desktop walkthrough](/how-to-use-luminar-for-desktop/luminar-for-desktop-walkthrough).
{% endhint %}
{% @arcade/embed url="" flowId="UZlK0rJeq4ehVkiMjo7c" %}
The sliders in the **Landscape tool** are explicitly designed to enhance landscape photographs. However, they can also help with real estate, travel, and nature photographs.
#### **Standard Settings**
* **Dehaze**. This slider applies the perfect blend of contrast, clarity, and color adjustments to eliminate the effects of fog and haze often found in cityscapes, landscapes, and aerial photos. It’s especially helpful when editing photos shot through glass or with a lot of mist or fog in the scene.
* **Golden Hour**. Use this slider to bring warmth, softness, and a golden glow to all of your photos. Simply dial in the amount of warm toning to introduce more overall color vibrancy. Quickly emulate the magic that happens just after sunrise and just before sunset.
* **Foliage Enhancer**. This slider automatically enhances the colors of foliage and greenery, making them more vivid and natural. It’s a good choice for nature and lush landscape images.
#### **Advanced Settings**
**Foliage Hue**. This slider modifies the hue of the foliage affected by Foliage Enhancer. It’s helpful in achieving the right amount of green.
# Water Enhancer AI
{% hint style="warning" %}
**Note:** Some interface details and visuals in this article may differ from the latest version of Luminar for Desktop. To see the current interface, visit the [Luminar for Desktop walkthrough](/how-to-use-luminar-for-desktop/luminar-for-desktop-walkthrough).
{% endhint %}
{% @arcade/embed url="" flowId="BWgocPWSRetlFIts3XrV" %}
The **Water Enhancer AI** Tool leverages artificial intelligence to enhance the natural beauty of water in photographs, allowing for customized adjustments in brightness, contrast, and color to increase clarity, vibrancy, and precision. It provides advanced composition controls, such as drawing, erasing, and restoring water areas, ensuring a seamless integration between the enhancements and the original scene. This tool is aimed at transforming aquatic photography, enabling the capture of water in its most captivating form with exceptional detail and realism.
**Main tools and sliders:**
* **Amount** Adjust this slider to control the intensity of the enhancement applied to the water. Increasing it amplifies the effect, making water features more vivid and pronounced, while decreasing it maintains a closer resemblance to the original scene.
* **Blue**. With this slider, you can adjust the blue tones in the water, enhancing the vibrancy and depth of oceans, seas, and pools. If you slide it toward the higher end, the water appears more profound and refreshing, while if you slide it towards the lower end, the blue tones appear more subtle and warmer.
* **Green**. Slide towards the upper end to enhance green tones, which make rivers and lakes look lush, vibrant, and lush, while slide towards the lower end to reduce green tones for a more neutral or clear appearance.
* **Original Color.** With this slider, you can adjust the contrast between the enhanced colors and the original hues of the water.
* **Brightness**. You can adjust the brightness of the water to match the overall lighting of your scene. Increasing the brightness can make the water sparkle and appear more inviting, while decreasing it can give the scene a moodier, more subdued feel.
* **Contrast**. Using this slider, you can adjust the contrast within the water elements. A higher contrast will deepen shadows and highlight details, giving the water texture and depth, whereas a lower contrast can create a softer, more uniform surface.
* **Refine area.** Adjusts the selected area of an image precisely, providing more detailed and targeted editing capabilities.
* **Size.** Adjusts the size of the tool's brush or eraser, allowing for larger or smaller adjustments to the refinement area, which is useful for covering different areas efficiently.
* **Softness**. Controls the edge softness of the brush, with higher values creating more blends at the edges for a smoother transition and lower values creating a sharper, more defined edge.
* **Strength.** Determines the intensity of the adjustments made with the tool, with higher values applying a more substantial change and lower values applying a subtler effect.
* **Mask Feather.** Adjusts the feathering of the selected mask, which softens the mask's edges, creating a more gradual transition between the masked and unmasked areas.
* **Depth.** Modifies the perceived depth or z-axis manipulation of the selected area, which can give a sense of layering or focus to specific elements of the image.
**Additional tools:**
* **Draw**. Draw lets you specify precisely what regions will receive adjustments by adding manually to the area you wish to refine or affect.
* **Erase**. With the Erase option, you can remove portions of the area you've previously selected with the Draw function, allowing you to refine only the desired areas.
* **Restore**. With Restore, you can reverse any changes made with Draw or Erase, returning the selected area to its original state.
# Creative Tools
Explore Luminar for Desktop's creative tools to add artistic effects and transform your photos uniquely.
{% hint style="warning" %}
**Note:** Some interface details and visuals in this article may differ from the latest version of Luminar for Desktop. To see the current interface, visit the [Luminar for Desktop walkthrough](/how-to-use-luminar-for-desktop/luminar-for-desktop-walkthrough).
{% endhint %}
**Creative Tools** help you express yourself with your photos. Explore options for color and style that can affect the mood of an image.
1. Select an image in your library or open a single image.
2. Scroll to the **Creative** section in the **Edit** sidebar
3. Choose the desired tool from the list.
# Light Depth
{% hint style="warning" %}
**Note:** Some interface details and visuals in this article may differ from the latest version of Luminar for Desktop. To see the current interface, visit the [Luminar for Desktop walkthrough](/how-to-use-luminar-for-desktop/luminar-for-desktop-walkthrough).
{% endhint %}
{% @arcade/embed url="" flowId="WLITqJ0Ui7H9wXIJJple" %}
**Light Depth** adds natural depth and dimensional lighting to your photos — transforming flat, evenly lit images into scenes that feel alive.
It automatically mimics the classic *Dodge and Burn* technique, letting you sculpt light and shadow with just a few intuitive sliders. The result is effortless, realistic volume that enhances portraits, landscapes, and product shots alike.
The tool understands distance and structure within your image using **AI-powered depth mapping**. It adds light where it naturally belongs, deepens shadows, lifts highlights, and restores a sense of space and atmosphere — as if you were painting with light, but without the manual work.
You can use it to:
* Give portraits more contour and warmth
* Add distance and dimension to landscapes
* Define shape and direction in product photography
Light Depth helps your images breathe and tell a more vivid story.
#### Main Controls
As soon as you move the **Amount** slider above zero, the effect activates and updates in real time. Use the on-screen handles to fine-tune the light’s position, size, and wrap — just like placing a soft spotlight exactly where you want it.
| **Amount** | Adjusts the overall strength of the depth effect. |
| ------------------- | --------------------------------------------------------------------------------- |
| **Depth Mask** | Defines where the main light center falls using AI depth mapping. |
| **Softness** | Controls how smoothly light fades into shadow. |
| **Warmth** | Shifts the tone of the light from cool to warm. |
| **Brightness Near** | Fine-tunes brightness in the foreground. |
| **Warmth Near** | Adjusts the color temperature in the *foreground* areas (closer to the viewer) |
| **Brightness Far** | Fine-tunes brightness in the background. |
| **Warmth Far** | Adjusts the color temperature in the *background* areas (further from the viewer) |
{% hint style="warning" %}
Please note that the **Light Depth** tool has replaced the **Relight AI** tool, offering more adjustable light editing to enhance your edits even further.
The Relight AI tool adjustments you have applied to your images **are saved and can still be adjusted in the Edits section** of the image. The Relight AI edits are also saved in your custom Presets if you have created one.
The Relight Edit can be found here in the **Edit tab > Edits.**
{% endhint %}
# Color Transfer
Learn how to match color tones between images effortlessly with the Color Transfer tool in Luminar for Desktop.
{% hint style="warning" %}
**Note:** Some interface details and visuals in this article may differ from the latest version of Luminar for Desktop. To see the current interface, visit the [Luminar for Desktop walkthrough](/how-to-use-luminar-for-desktop/luminar-for-desktop-walkthrough).
{% endhint %}
{% @arcade/embed url="" flowId="pBAFTk1WaxmJsXfmODzC" %}
**Color Transfer** is a creative tool that enables users to apply the color palette from a reference image to their own photos. By selecting a reference image, users can transfer its colors, such as the hues of the sky, foliage, or buildings, to their target image. The tool provides adjustable sliders for fine-tuning the color application, offering users control over the intensity and blending of the transferred colors. Additionally, an AI-powered Match Similar Objects' Color automatically matches colors between similar elements (e.g., sky to sky, vehicle to vehicle), ensuring precision and consistency. This feature enhances creative flexibility, allowing users to achieve specific color aesthetics or unify the tone across multiple images.
* **Reference Selection**: This option allows you to choose a reference image and transfer its color palette (such as the colors of the sky, foliage, or buildings) to your target image.
* **Amount**: Controls the overall strength of the color transfer. Increasing it applies more of the reference image’s colors to your photo; decreasing it makes the effect subtler.
* **Color Intensity**: Adjusts the saturation of the transferred colors. Higher values make the colors more vibrant, while lower values create a more muted effect.
* **Luminosity Intensity**: Fine-tune the transferred colors' brightness to match the lighting of the reference image, ensuring the brightness of colors looks natural.
* **Transition Smoothing**: Softens the transitions between different color zones. Higher values blend the transferred colors more smoothly, while lower values keep the boundaries between color zones more distinct.
* **Color Smoothing**: Balances the variation of transferred colors across the image, avoiding harsh shifts and creating a more even look.
* **Match Similar Objects’ Color**: Uses AI to automatically match the colors of similar elements between the reference and target images, ensuring precise and consistent color matching for elements like skies or vehicles.
{% hint style="danger" %}
**Note**: The Color Transfer tool does not work with the black-and-white photos.
{% endhint %}
# Magic Light AI
Add glowing light accents to your photos with Magic Light AI in Luminar for Desktop. This guide explains how to make your images shine.
{% hint style="warning" %}
**Note:** Some interface details and visuals in this article may differ from the latest version of Luminar for Desktop. To see the current interface, visit the [Luminar for Desktop walkthrough](/how-to-use-luminar-for-desktop/luminar-for-desktop-walkthrough).
{% endhint %}
{% @arcade/embed url="" flowId="6TlNfptuT7eBknRVbJhx" %}
*\*If the tool is not available, you may need to use the **Upgrade** option*
This tool allows you to manipulate multiple light sources in your photo. It works best with artificial light sources, such as light bulbs, street lights, decoration lights (like on Christmas trees), and so on. You can control these light sources to add a little magic touch to your pictures — shining, glowing light beams. The neural network in the core of the Magic LightAI tool analyzes the photo and looks for any points emitting light and gives you the power to make this light more intense, add beams, and glow. You could also use masking tools to work with specific lights.
* Intensity — how intensive the whole effect is
* Size — length of the beam
* Beam width – width of the beam
* Glow — applied to glow behind the beams
* Clearness — how clear the edges of the beams are
* Number of beams — number of beams
Holiday and festive photos — small decorative lights (like the ones on Christmas trees) are perfect for this tool. When applied correctly, it adds magical glowing, making the whole picture more enchanting.
Street photography (after hours) — you can create visual accents with street lamps in the night city.
Indoor photos — works with light bulbs (Edison type is the best).
Cars, bikes, and other transport — you can add rays to the car’s headlights, making the photo more dramatic.
### Tutorial for Magic Light AI in case there is no natural light source in the photo
{% @arcade/embed url="" flowId="weHbC0WoEctDOmA5vG1g" %}
If you find yourself in a situation without a direct light source but still want to utilize Magic Light, there's a helpful workaround you can follow. Let's go through it step by step, taking the example of adding a light source to road lamps.
{% stepper %}
{% step %}
Begin by opening the Developer Tools, proceed to Masking, and select the Brush.
{% endstep %}
{% step %}
After you've marked all the desired light sources, return to Adjustments. Here, you can use Exposure to highlight the areas you want to illuminate. If necessary, you can also use Highlights and Smart Contrast.
{% endstep %}
{% step %}
Once you've completed these steps, it's time to return to Magic Light. The tool will now detect the marked light sources, allowing you to make any necessary adjustments.
{% endstep %}
{% endstepper %}
This method should help you achieve the desired lighting effect even when there isn't a direct light source available.
# Dramatic
Learn how to instantly add cinematic mood and intensity to your images with the Dramatic creative tool in Luminar for Desktop.
{% hint style="warning" %}
**Note:** Some interface details and visuals in this article may differ from the latest version of Luminar for Desktop. To see the current interface, visit the [Luminar for Desktop walkthrough](/how-to-use-luminar-for-desktop/luminar-for-desktop-walkthrough).
{% endhint %}
{% @arcade/embed url="" flowId="NiC0EGU7m0AUM7sxrl12" %}
The **Dramatic tool** allows for creativity. It lowers the saturation and the contrast, helping you achieve a gritty cinematic look in your photos. Its effect is similar to that achieved by the bleach bypass darkroom technique. The Dramatic tool is often used in stylized fashion shoots, urban images, and grungy athletic portraits.
#### Standard Settings
* **Amount**. The Amount slider controls the overall intensity of the adjustment.
* **Local Contrast**. This slider adds a targeted contrast adjustment to the image’s finer details.
#### Brightness & Saturation
* **Brightness**. This slider darkens or lightens the details in the image. It’s useful for bringing out details in areas like the skies.
* **Saturation**. This slider controls whether colors become washed out or are more saturated.
# Mood (LUT)
Apply Look-Up Tables (LUTs) to your photos to achieve specific color grading and moods with ease.
{% hint style="warning" %}
**Note:** Some interface details and visuals in this article may differ from the latest version of Luminar for Desktop. To see the current interface, visit the [Luminar for Desktop walkthrough](/how-to-use-luminar-for-desktop/luminar-for-desktop-walkthrough).
{% endhint %}
{% @arcade/embed url="" flowId="T3KO0DdqYOGGyH2dt9m0" %}
The **Mood tool** uses professional lookup tables (LUTs) to change your photo’s appearance quickly. Choose from film stocks and black and white looks — or create color grades to unlock a new style in seconds. You’ll find several built-in LUTs in the Choose LUT drop-down menu. You can also load your own lookup tables in the .cube format.
* **Choose LUT**. In this drop-down menu, you can choose a built-in LUT or a recently used LUT, or you can load your own.
* **Amount**. This slider lets you reduce the intensity of the LUT.
* **Contrast**. This slider impacts the overall contrast of the image and can be used to refine the LUT’s appearance.
* **Saturation**. This slider impacts the overall saturation of the image and can also be used to refine a LUT’s appearance.
{% hint style="info" %}
**Note**: If you choose a custom LUT, it will automatically be stored with your saved Luminar file and embedded into any custom Luminar template you create.
{% endhint %}
# Toning
Learn how to apply various toning effects to your images with Luminar for Desktop’s Toning tool, adding mood and atmosphere to your photos by enhancing color and lighting.
{% hint style="warning" %}
**Note:** Some interface details and visuals in this article may differ from the latest version of Luminar for Desktop. To see the current interface, visit the [Luminar for Desktop walkthrough](/how-to-use-luminar-for-desktop/luminar-for-desktop-walkthrough).
{% endhint %}
{% @arcade/embed url="" flowId="2uTW6sSXQmmBntUcb25l" %}
The **Toning tool** corrects overall brightness and contrast for a balanced image. This is one of the most important tools to get the right tonal harmony for your photo.
* **Amount**. This slider sets the overall strength of color toning applied to the image.
* **Highlights:**
* Saturation. This slider increases the intensity of the color in the bright areas of the image.
* Hue. Slide through a spectrum of colors to choose the toning of the bright values in the scene. Becomes available once you apply Saturation.
* **Shadows:**
* Saturation. This slider increases the color intensity in the darker areas of the image.
* Hue. Scroll through a spectrum of colors to choose the toning of the darker values. Becomes available once you apply Saturation.
* **Balance**. This slider shifts the balance between the Highlights adjustments and Shadows adjustments for split toning. Slide it to the left and Shadows adjustments will take precedence; slide it to the right and adjustments to the Highlights will take precedence.
# Matte
Learn to apply a matte effect to your images, giving them a soft, vintage look with customizable settings.
{% hint style="warning" %}
**Note:** Some interface details and visuals in this article may differ from the latest version of Luminar for Desktop. To see the current interface, visit the [Luminar for Desktop walkthrough](/how-to-use-luminar-for-desktop/luminar-for-desktop-walkthrough).
{% endhint %}
{% @arcade/embed url="" flowId="CfsYol1OXrs1hCADXPpl" %}
The **Matte tool** can give your photos an aged look with flat colors and high contrast. It works well for landscapes and portraits to change the emotion of your image.
#### Standard Settings
* **Amount**. This slider adjusts the overall strength of the matte effect.
* **Fade**. This slider controls the loss of detail in the darker areas of the image.
* **Contrast**. This slider adjusts the relationship between the brighter and darker area of the image.
* **Vividness** This slider can be used to affect the saturation of the matte effect.
#### Color Toning
* **Range**. This slider affects the portion of the image in which the color is shifted.
* **Hue**. This slider selects the color that the image takes on.
* **Saturation**. This slider can be used to affect the saturation of the color toning effect.
---
[Next Page](/llms-full.txt/1)
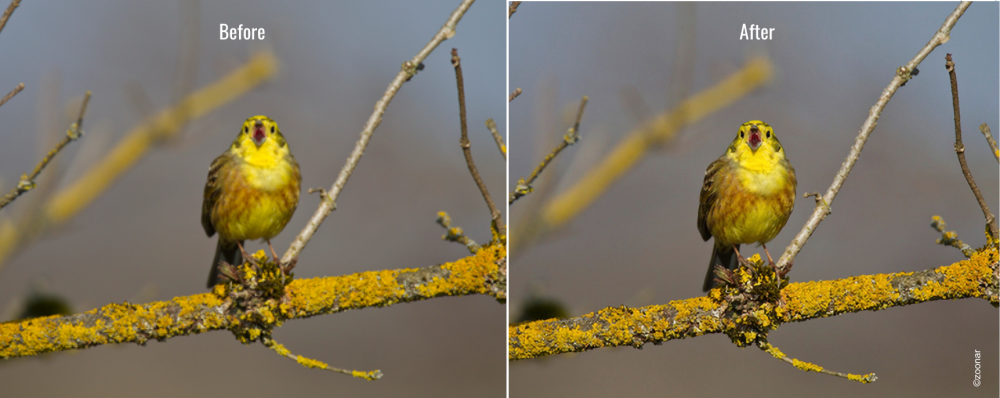 # Presets
Explore a variety of presets to quickly apply different styles and looks to your photos in Luminar for Desktop.
{% hint style="warning" %}
**Note:** Some interface details and visuals in this article may differ from the latest version of Luminar for Desktop. To see the current interface, visit the [Luminar for Desktop walkthrough](/how-to-use-luminar-for-desktop/luminar-for-desktop-walkthrough).
{% endhint %}
Presets in Luminar for Desktop are a powerful way to enhance your photos with just one click. They offer a quick and easy starting point for editing, applying a range of styles and adjustments that can transform your images instantly. Whether you're looking for a subtle enhancement or a bold, creative look, Presets help streamline your workflow and spark inspiration. In this section, we’ll explore how to apply, customize, and create your own Presets to make the most of your photo editing experience.
# Presets
Explore a variety of presets to quickly apply different styles and looks to your photos in Luminar for Desktop.
{% hint style="warning" %}
**Note:** Some interface details and visuals in this article may differ from the latest version of Luminar for Desktop. To see the current interface, visit the [Luminar for Desktop walkthrough](/how-to-use-luminar-for-desktop/luminar-for-desktop-walkthrough).
{% endhint %}
Presets in Luminar for Desktop are a powerful way to enhance your photos with just one click. They offer a quick and easy starting point for editing, applying a range of styles and adjustments that can transform your images instantly. Whether you're looking for a subtle enhancement or a bold, creative look, Presets help streamline your workflow and spark inspiration. In this section, we’ll explore how to apply, customize, and create your own Presets to make the most of your photo editing experience.